Wallpaper for Textured Walls: What Actually Sticks (and What Doesn’t)
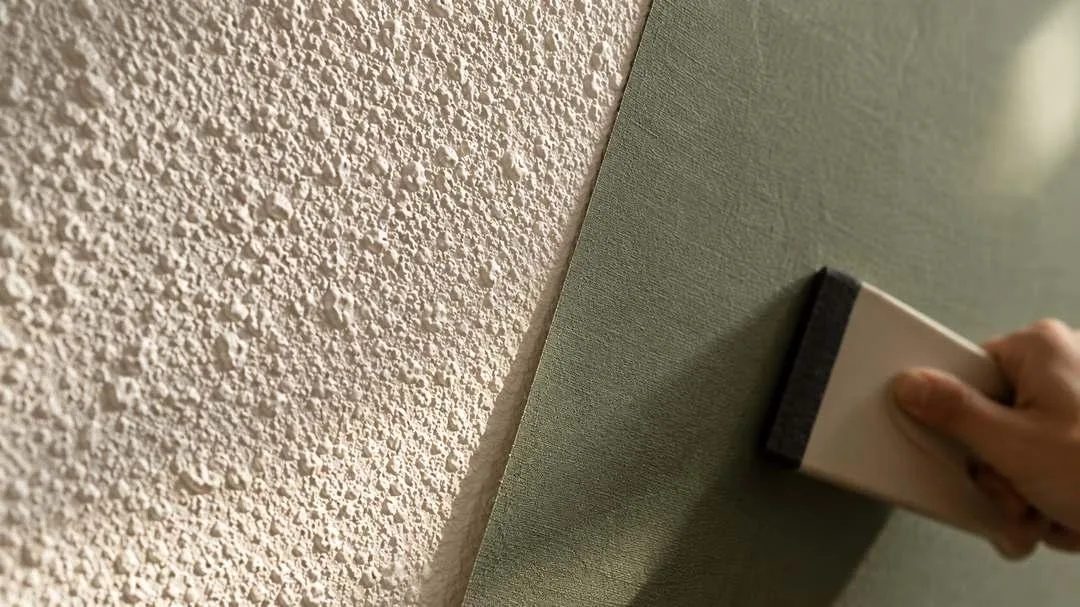
Almost every guide to wallpaper for textured walls gives you the same non-answer: “it depends on how textured your walls are.” Nobody tells you how textured is too textured, and that is the only thing you actually need to know before you spend two hundred dollars on rolls you may not be able to use.
Here is the number. Press a fingernail into your wall. If the groove you can feel is deeper than about an eighth of an inch — roughly two stacked credit cards — adhesive alone will fail, every time, no matter which brand you buy. Under a sixteenth of an inch, most peel and stick holds fine with primer. In between, you need a liner.
This guide sorts it out by texture type, with a photograph of each one so you can identify yours, an honest verdict for each, and the prep that actually changes the outcome.
Yes, you can wallpaper textured walls — but the texture depth decides the method. Under 1/16 inch (light orange peel), peel and stick works with a primer. Between 1/16 and 1/8 inch, use heavy vinyl wallpaper over a wallpaper liner. Over 1/8 inch (knockdown, skip trowel, popcorn), adhesive alone always fails and you need a liner or a skim coat first.
The Thumbnail Test: how textured is too textured?
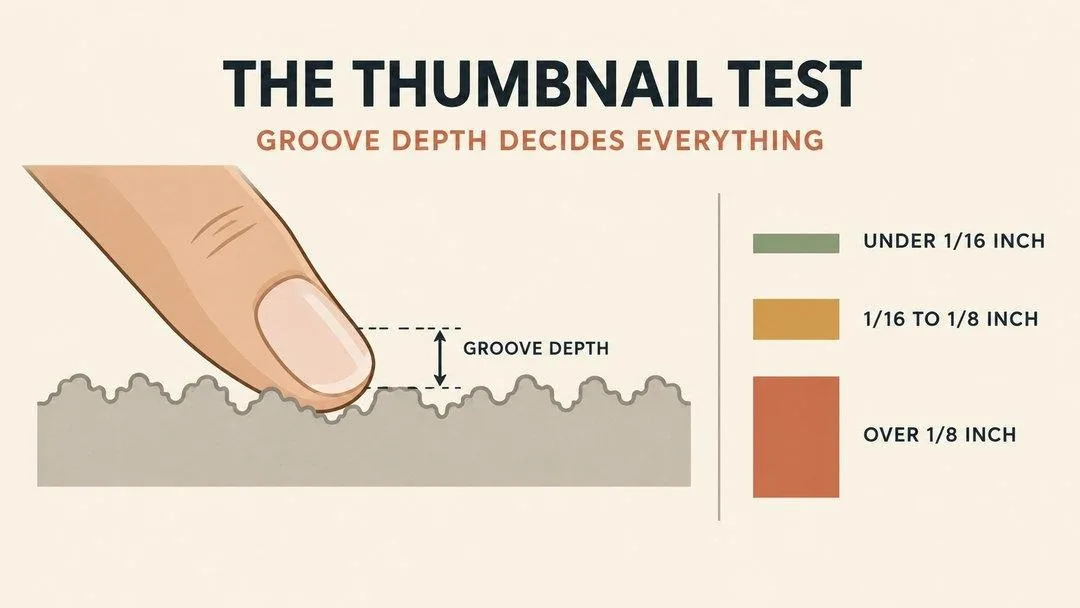
Put your fingernail flat against the wall and drag it slowly across the surface. What you are measuring is the depth of the valleys between the high points — not how rough it looks, but how deep it actually is. That single measurement determines everything that follows.
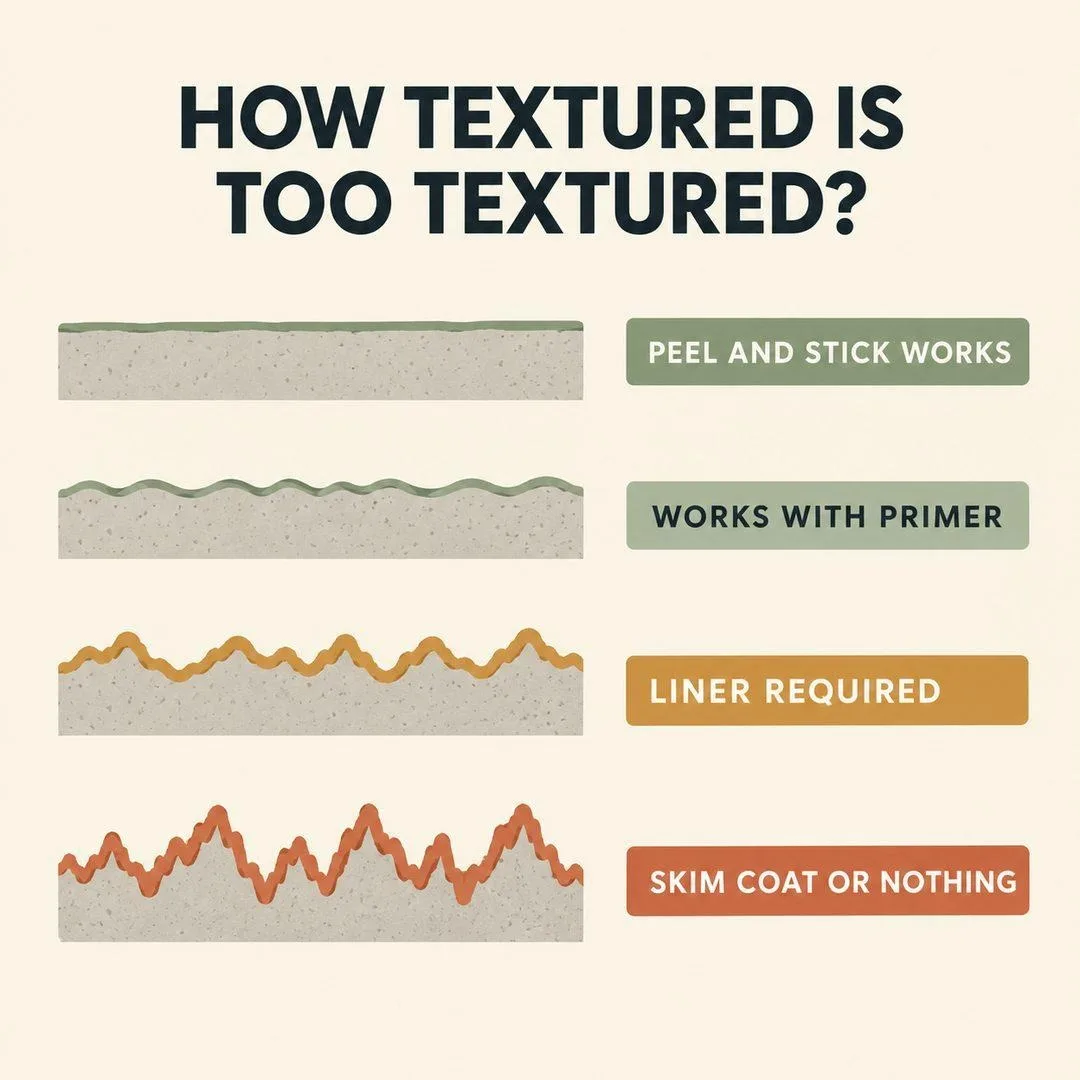
- Under 1/16 inch. Your nail glides with a faint buzz. Peel and stick will hold with a coat of primer. This is most lightly sprayed modern drywall.
- 1/16 to 1/8 inch. Your nail catches slightly and you can feel individual bumps. Standard peel and stick will lift at the edges within weeks. Use a heavy vinyl paper, or add a liner.
- Over 1/8 inch. Your nail drops into grooves. No adhesive bridges a gap that size. You need a wallpaper liner or a skim coat — there is no product that solves this.
The cheap way to test before you commit: buy one roll, apply a two-foot square in a corner, and leave it a full week. Check the edges. If they have lifted at all in seven days, they will lift everywhere in a month, and you have spent twenty dollars instead of two hundred.
Before you sand anything, read this. Textured wall and ceiling coatings applied before the early 1980s can contain asbestos, and sanding one releases fibres into the air. If your home predates 1985 and you are considering sanding the texture down, have it tested first — the EPA’s guidance on asbestos in the home explains how. Liner paper and skim coating are both safe alternatives because neither disturbs the existing surface.
Identify your texture (and what works on each)
These eight cover almost every American wall. Compare yours against the photographs — raking light from a phone torch held flat against the wall will show you the profile clearly.
Orange peel
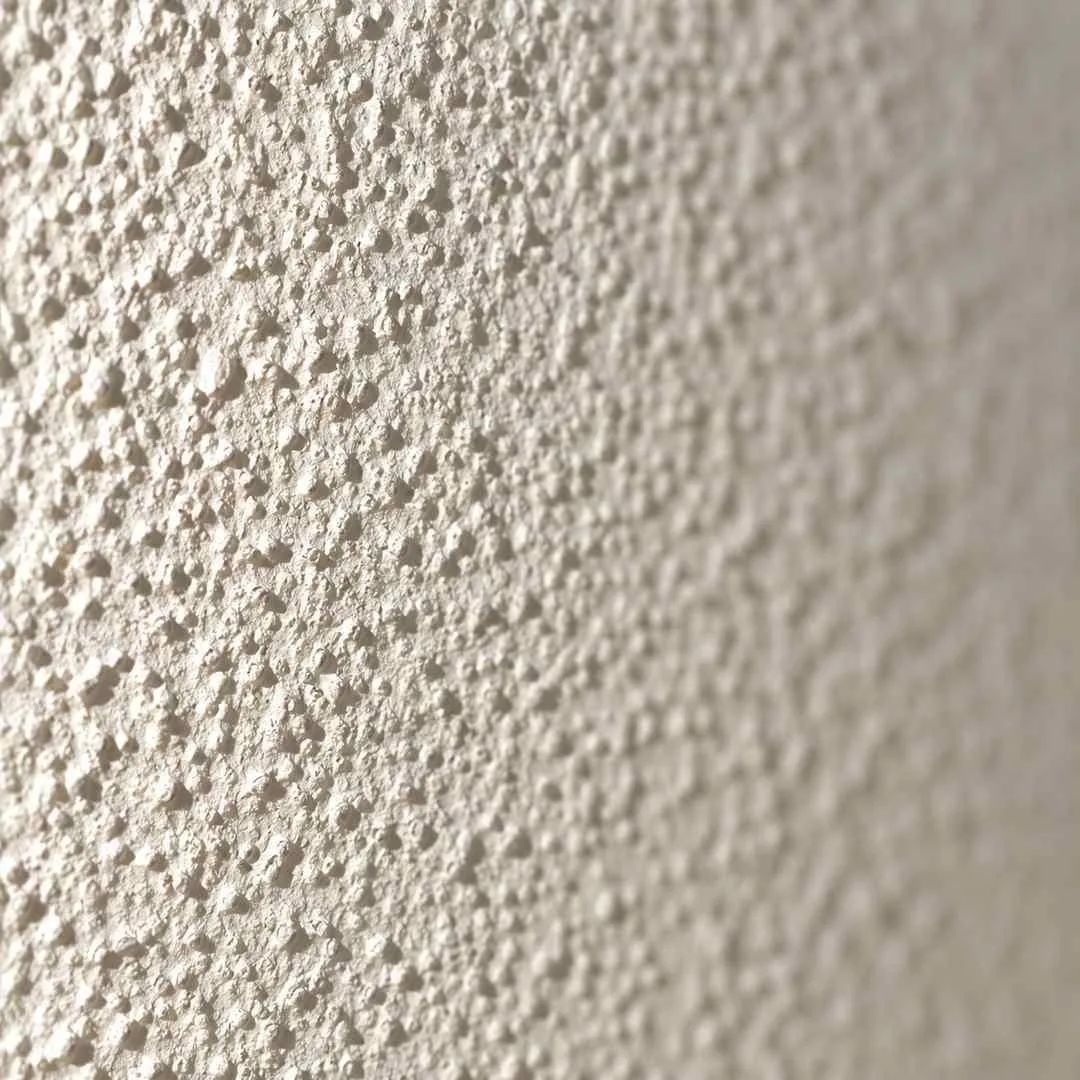
Typical depth: 1/32 to 1/16 inch · Peel and stick works
The most common sprayed finish in American homes, and the easiest case by a wide margin. Small rounded bumps with shallow valleys. Clean it, prime it with a bonding primer, and standard peel and stick will hold. This is the texture most manufacturers mean when they say their product works on ‘lightly textured’ walls.
Knockdown
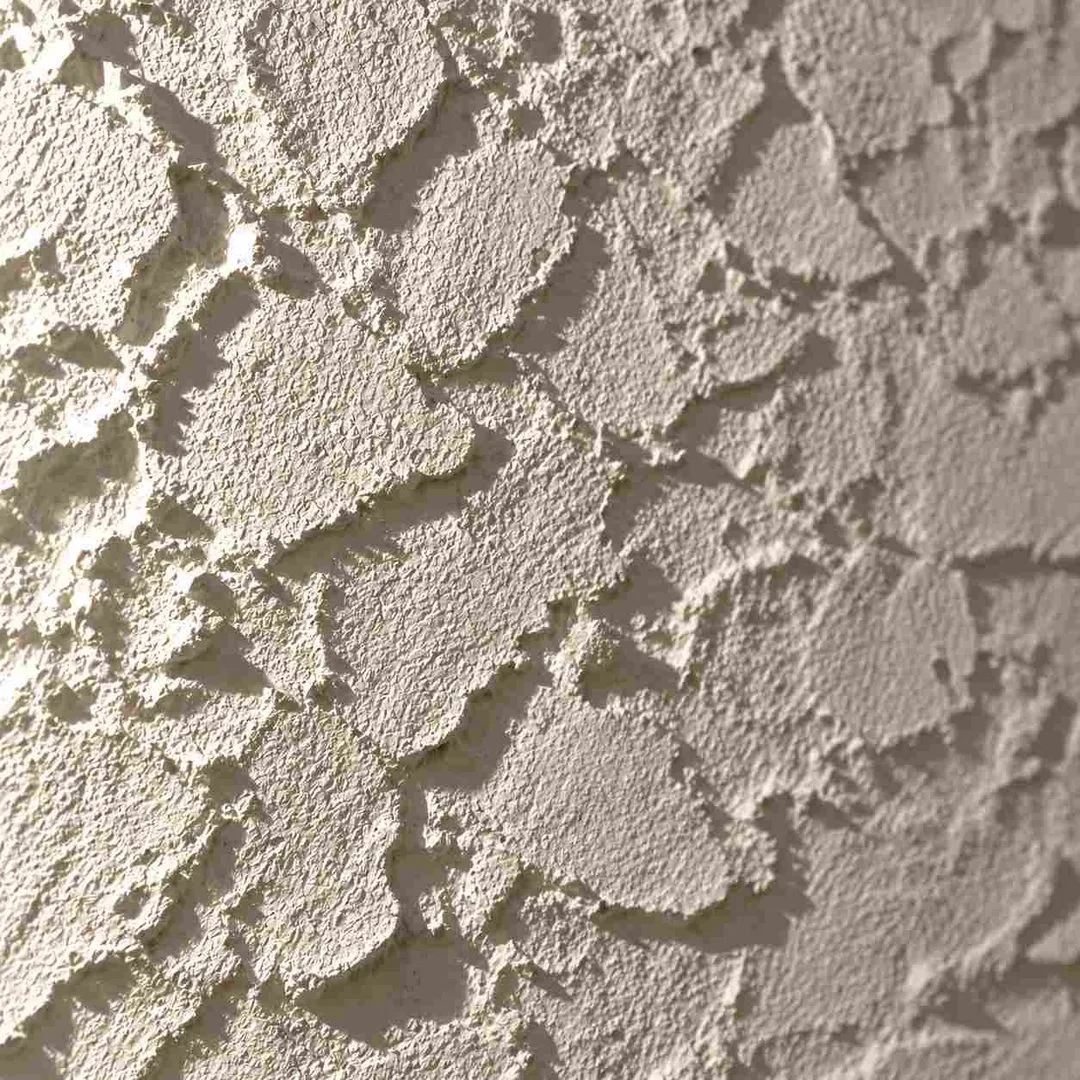
Typical depth: 1/8 to 3/16 inch · Liner required
Sprayed then flattened with a blade, leaving wide plateaus with real valleys between them. This is the texture that generates most of the complaints online. Standard peel and stick bridges the plateaus and lifts within weeks. Heavy vinyl over a liner works; adhesive alone does not.
Skip trowel
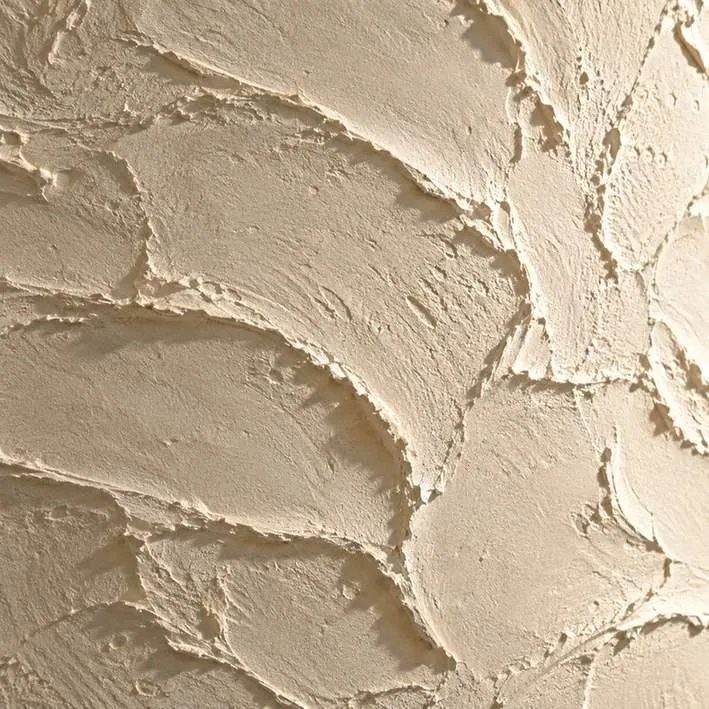
Typical depth: 1/8 to 1/4 inch · Liner or skim coat
Hand-applied with a trowel, leaving irregular raised sweeps and smooth patches. The irregularity is the problem — one area holds beautifully and the next fails, so the wall ends up patchy. Skim coat if you want a good result.
Popcorn or acoustic spray
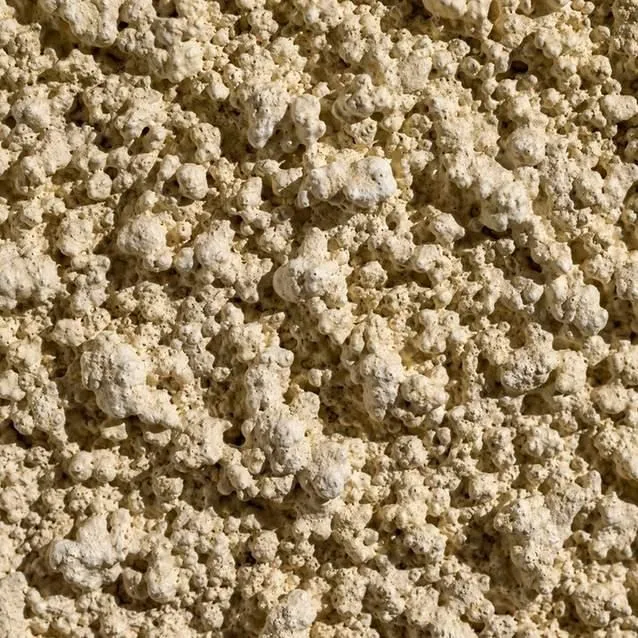
Typical depth: 1/4 inch or more · Do not wallpaper
Dense clustered lumps with deep shadowed gaps. Nothing sticks to this and nothing ever will — the surface is friable, meaning it crumbles under pressure, so even the adhesive that does grip pulls the texture off the wall with it. Popcorn must be removed or covered with board before any wallpaper goes near it, and pre-1980s popcorn is the highest-risk texture for asbestos.
Sand swirl
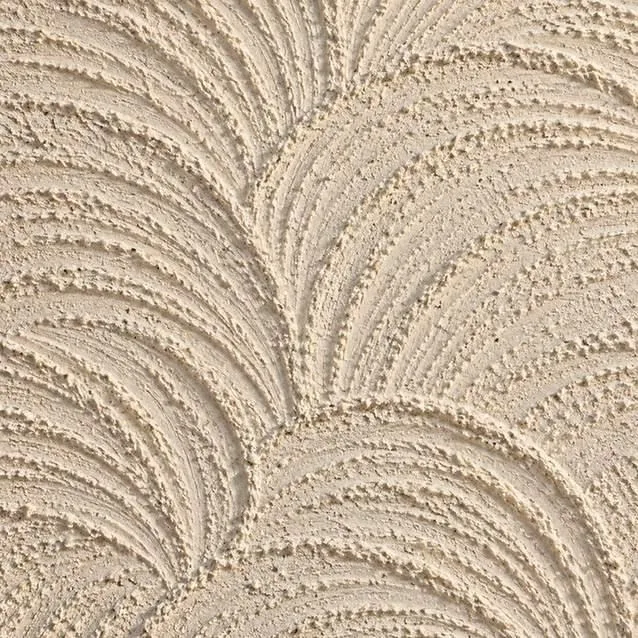
Typical depth: 1/16 to 1/8 inch · Works with a liner
Repeating fan and arc patterns brushed into the surface with fine aggregate mixed in. The depth is manageable but the aggregate is abrasive and the regular pattern telegraphs through pale wallpaper very visibly. Liner solves both problems at once.
Slap brush or stomp
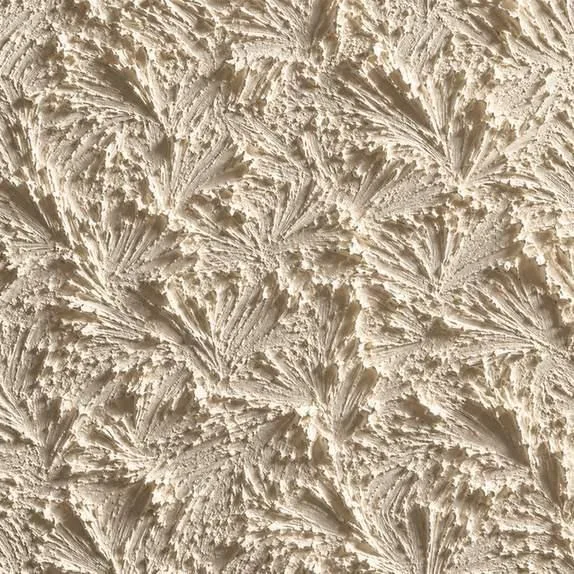
Typical depth: 3/16 to 1/4 inch · Skim coat or nothing
Chaotic raised bristle marks radiating in all directions with sharp peaks. Second only to popcorn for difficulty. The peaks puncture thinner papers during smoothing and the valleys are far too deep for any adhesive to reach.
Venetian plaster or limewash
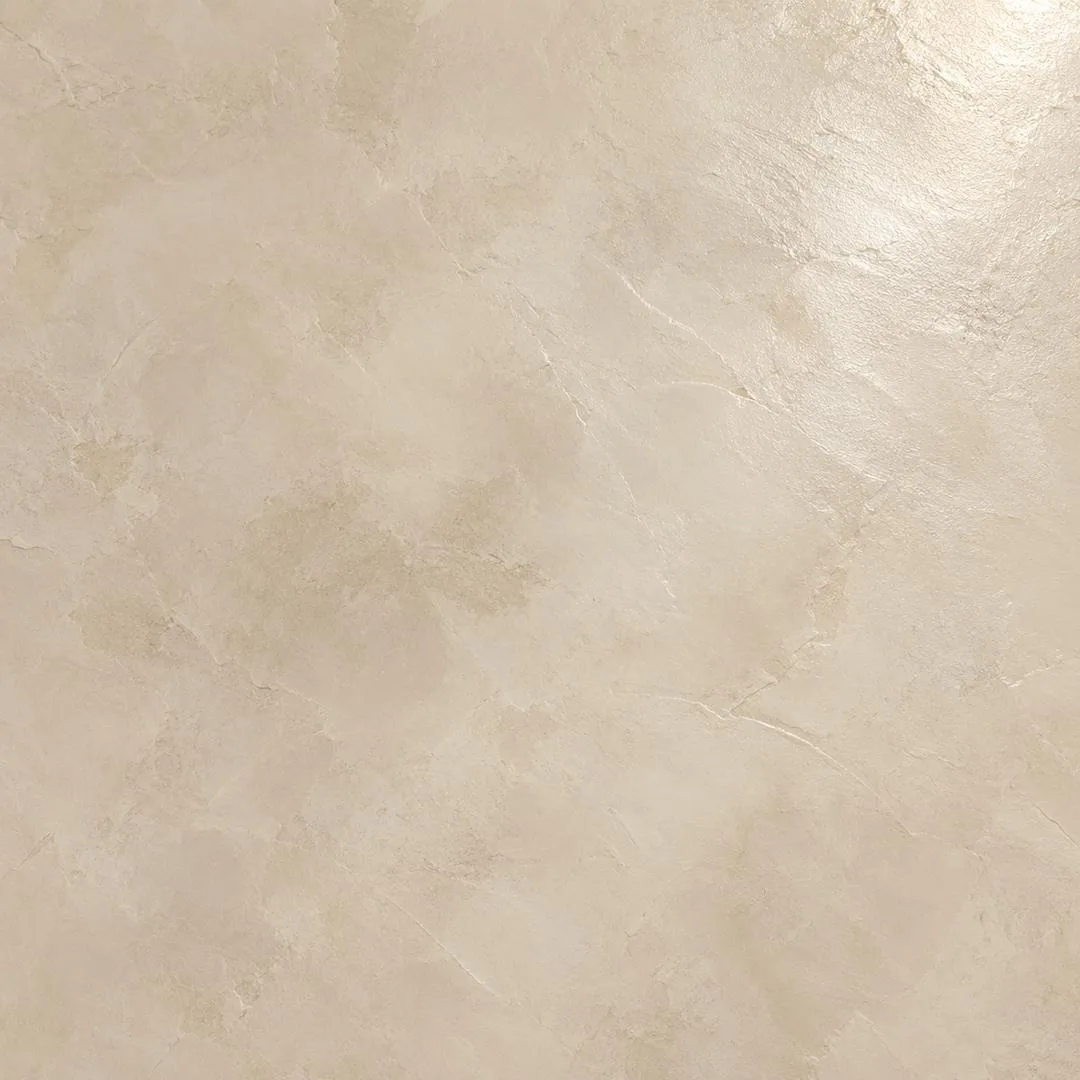
Typical depth: Under 1/32 inch · Prime first, then fine
Almost smooth with gentle tonal undulation. The depth is not the issue here — the sheen is. Polished plaster and limewash are often sealed or waxed, and adhesive will not grip a sealed surface. Scuff-sand lightly, wipe down, and use a bonding primer.
Beadboard and panelling
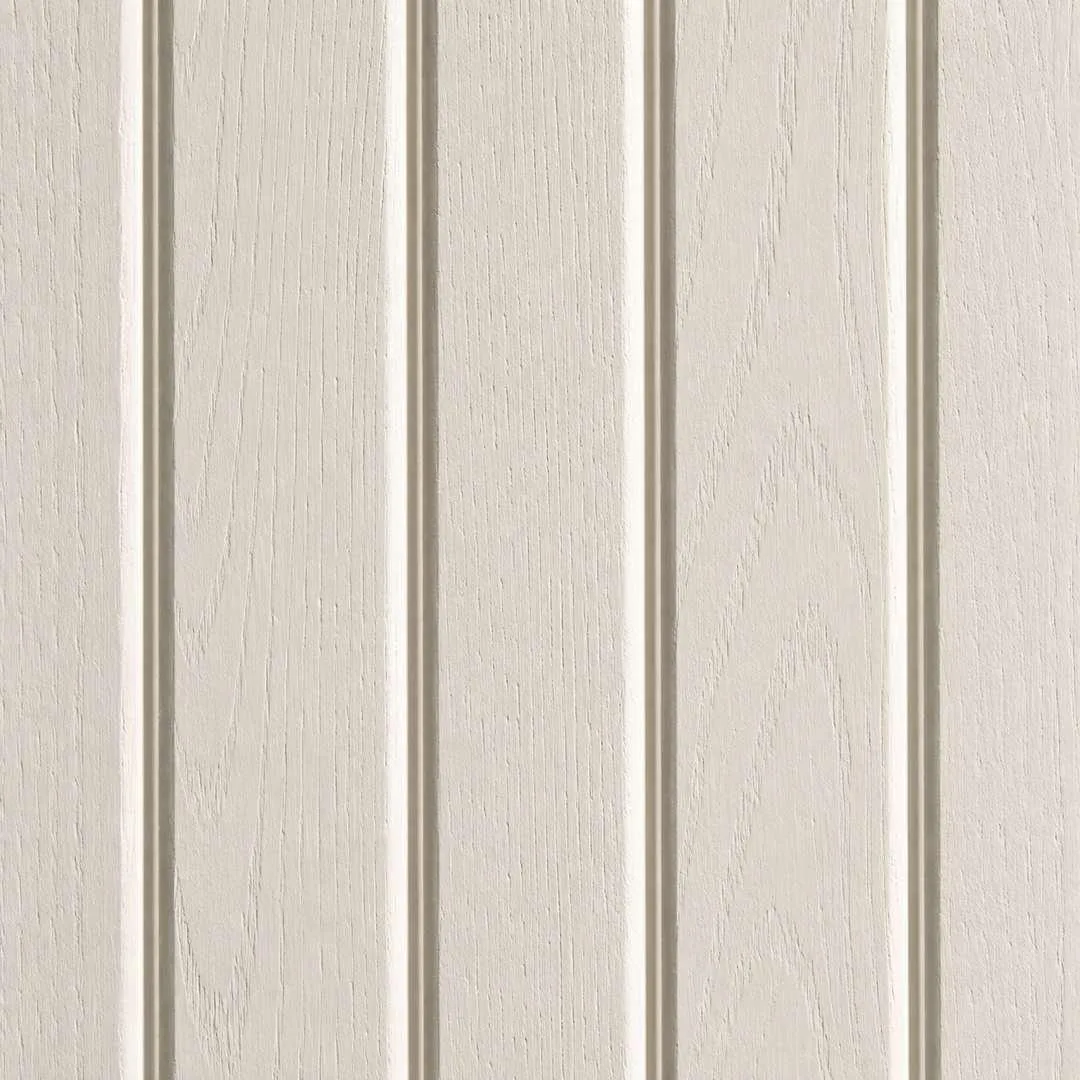
Typical depth: Grooves 1/8 to 1/4 inch · Fill the grooves first
A different problem entirely: the surface between grooves is perfectly flat, but the grooves themselves are deep, regular and will show as hard shadow lines through any paper. Fill them with joint compound, sand flush, prime, and the wall becomes an easy case.
Why peel and stick wallpaper lifts on textured walls
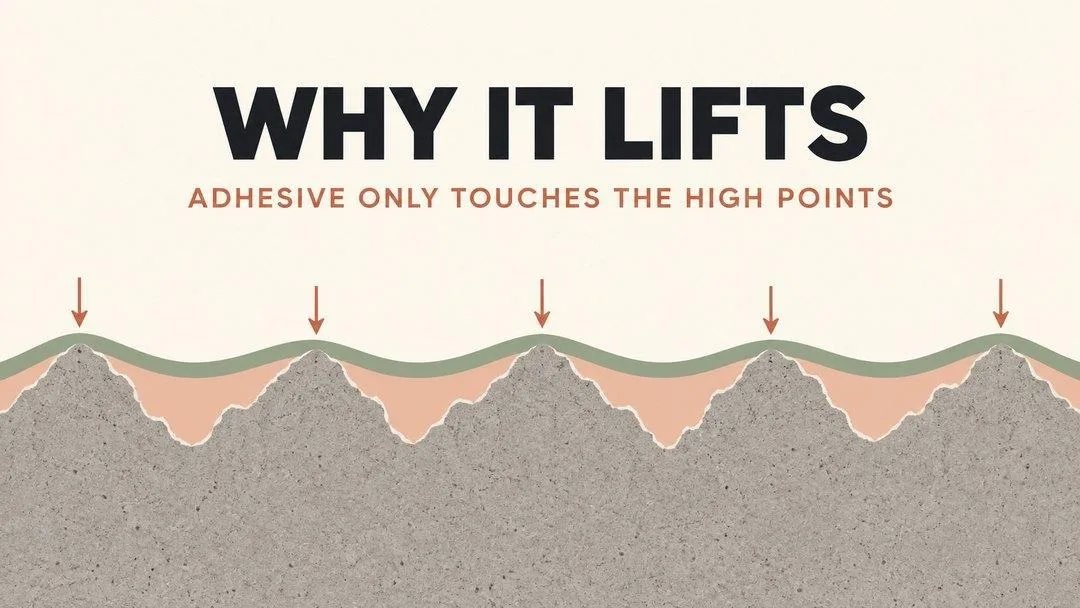
It is worth understanding the mechanism, because it explains why buying a more expensive brand does not help. Peel and stick adhesive is pressure-sensitive: it bonds where it makes contact and nowhere else. On a textured wall, it touches only the tips of the high points. Every valley is an air pocket with no bond at all.
On a lightly textured wall that is still 70 or 80 percent contact, which is plenty. On knockdown it might be 30 percent, concentrated on small plateaus. Gravity, temperature change and the natural curl memory of the roll all pull downward on that limited bond, and it releases — always at an edge or a seam first, because that is where the leverage is greatest.
Which is why the three things that genuinely change the outcome are all about increasing contact area: a liner, a skim coat, or a heavier paper that conforms into the valleys rather than bridging them.
The prep that actually makes the difference
Wallpaper liner: the best answer for most walls
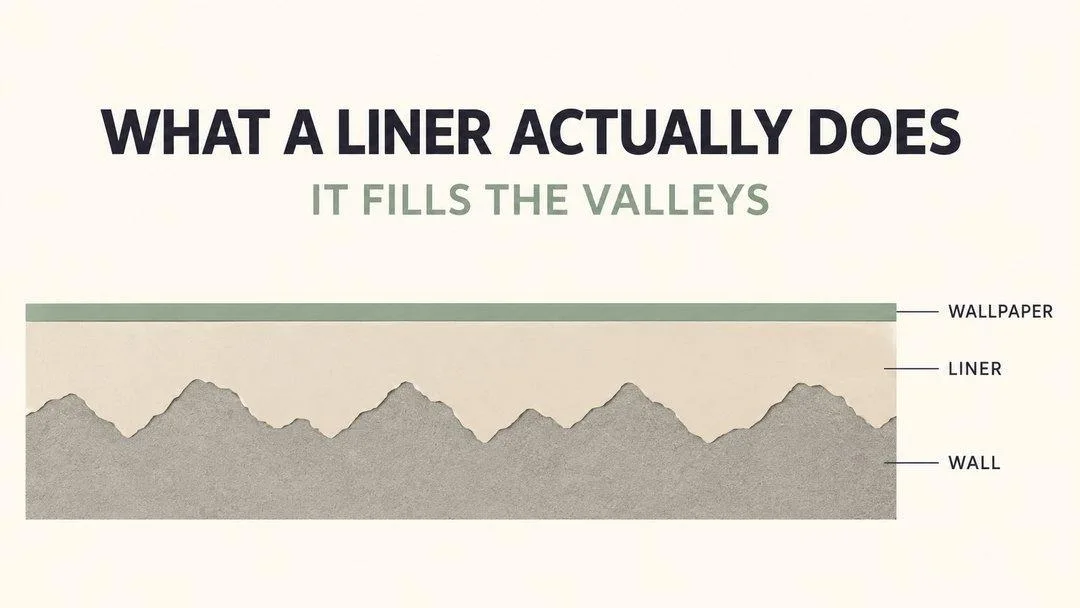
Also sold as lining paper or bridging paper. It is a thick blank paper hung horizontally, straight onto the textured wall with traditional paste, which fills the valleys and dries to a flat surface. Your wallpaper then goes on top of a perfectly smooth substrate.
It adds a day and roughly $30 to $60 a room, and it is the single highest-return step in this entire guide. Use a heavier grade — sold by weight, typically 1000 to 2000 — for deeper textures. Hang it horizontally so its seams never line up with your wallpaper’s vertical seams.
Skim coating: the permanent fix
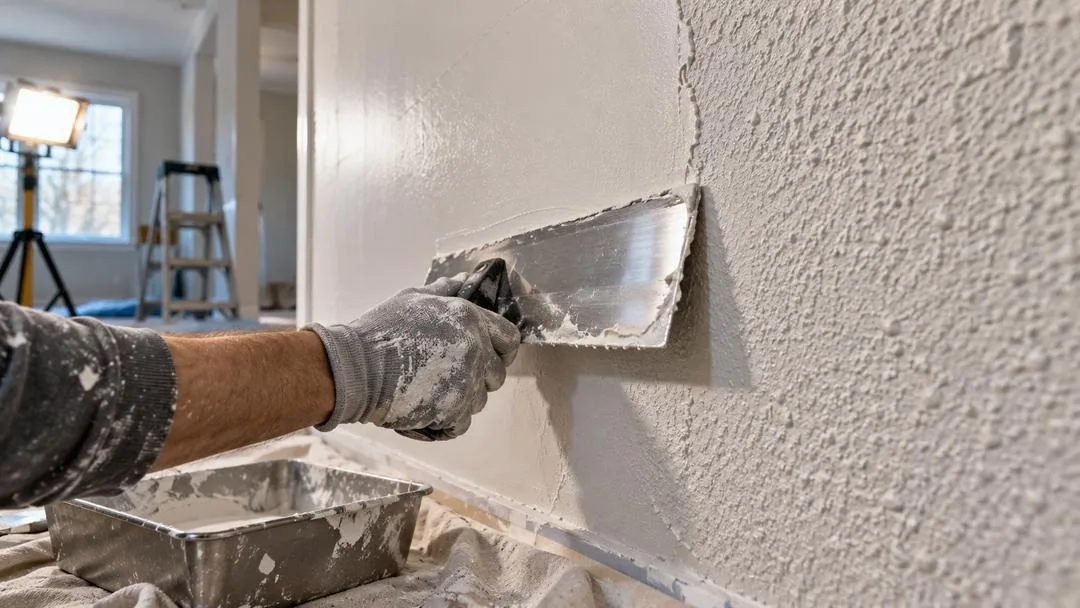
Joint compound spread thin across the whole wall with a wide taping knife, left to dry, sanded smooth, then primed. Two coats for anything over an eighth of an inch. It is messy and it takes a weekend, but it permanently solves the problem and it is the only option for slap brush or heavy skip trowel.
Not suitable for renters, and not suitable on any pre-1980s texture without testing first.
Primer: necessary, but not sufficient
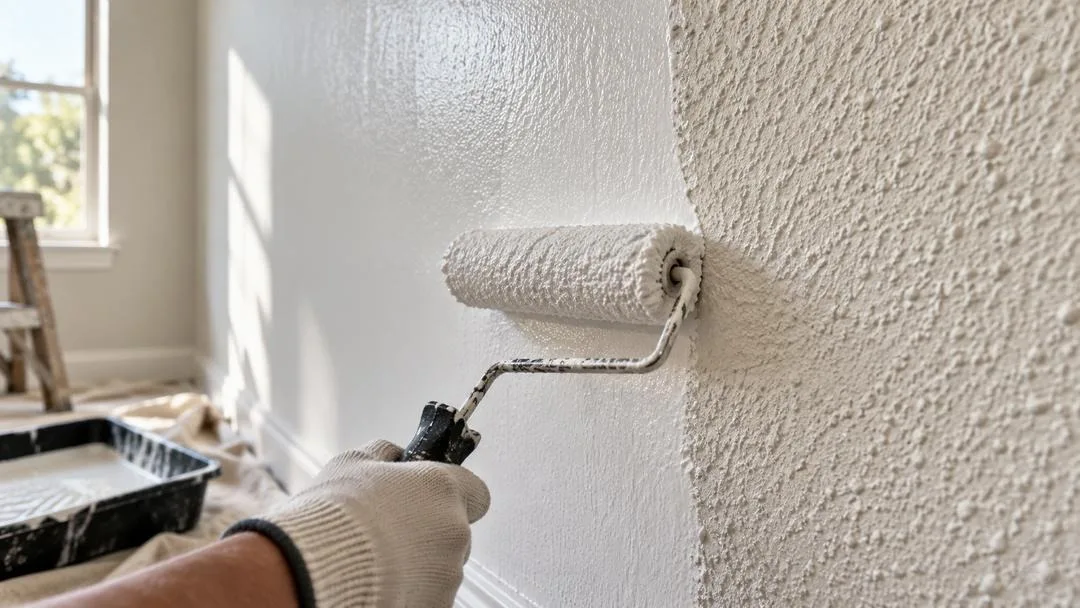
A bonding or wallpaper primer gives adhesive something consistent to grip. It matters enormously on flat or lightly textured walls, and on sealed surfaces like satin paint, limewash or polished plaster it is the difference between holding and not holding.
What primer will not do is fill a valley. If your texture is over an eighth of an inch, primer alone changes nothing — which is the mistake most people make, because it is the cheapest step and it feels like it should be enough.
How to wallpaper textured walls, step by step
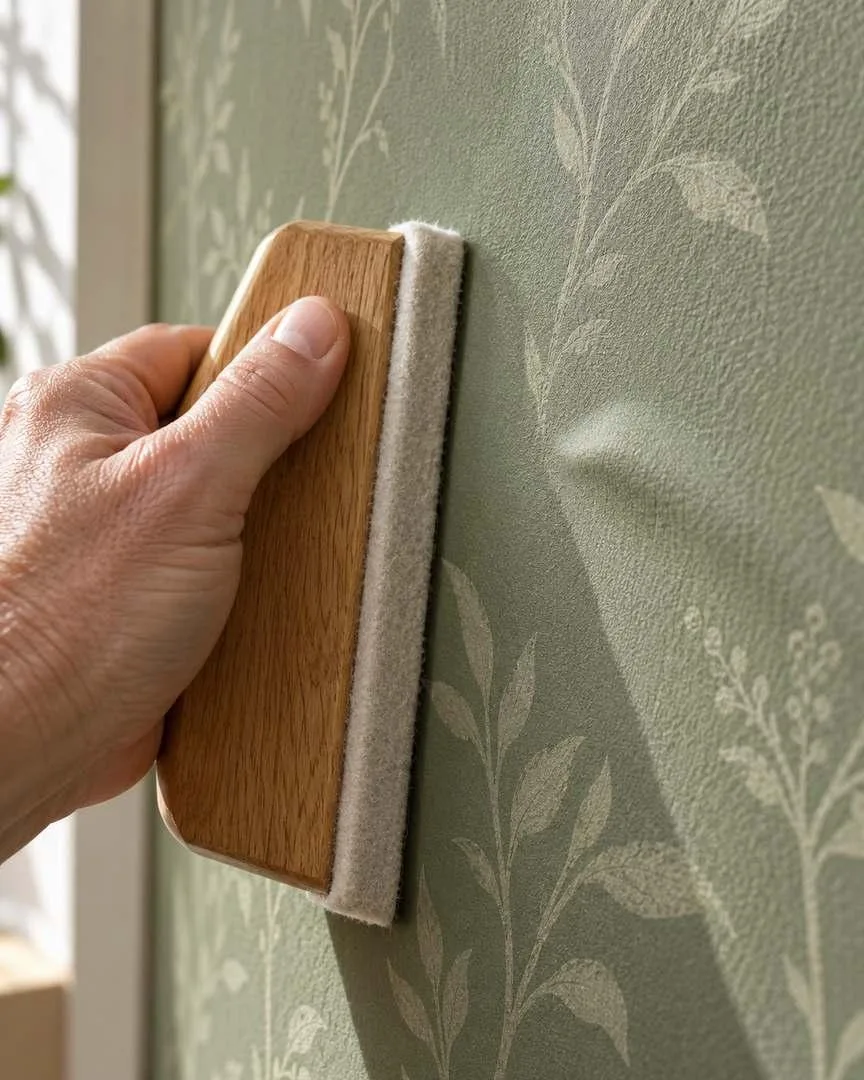
Assuming you have identified your texture and done the right prep, the application itself is where the remaining failures happen.
- Clean properly first. Textured walls hold dust in every valley. Wipe down with a damp microfibre cloth, then let it dry fully. Adhesive bonds to dust, not to wall.
- Warm the room to at least 65°F. Peel and stick adhesive is noticeably less tacky when cold, and a cold wall is the most common cause of a failed install in winter.
- Work in small sections. Peel six to eight inches of backing at a time, not the whole sheet. On texture you need to press progressively rather than lay a full length and hope.
- Press hard, and press twice. Use a felt-edged smoother from the centre outward, then go back over the whole sheet a second time pressing firmly with the heel of your hand. The second pass is what pushes the paper down into the valleys.
- Roll every seam and edge. A small seam roller along all four edges is worth more than anything else you do. Edges fail first, always.
- Wait a week before you judge it. Some initial settling is normal. If it still looks good at day seven, it will hold.
What it honestly looks like afterwards
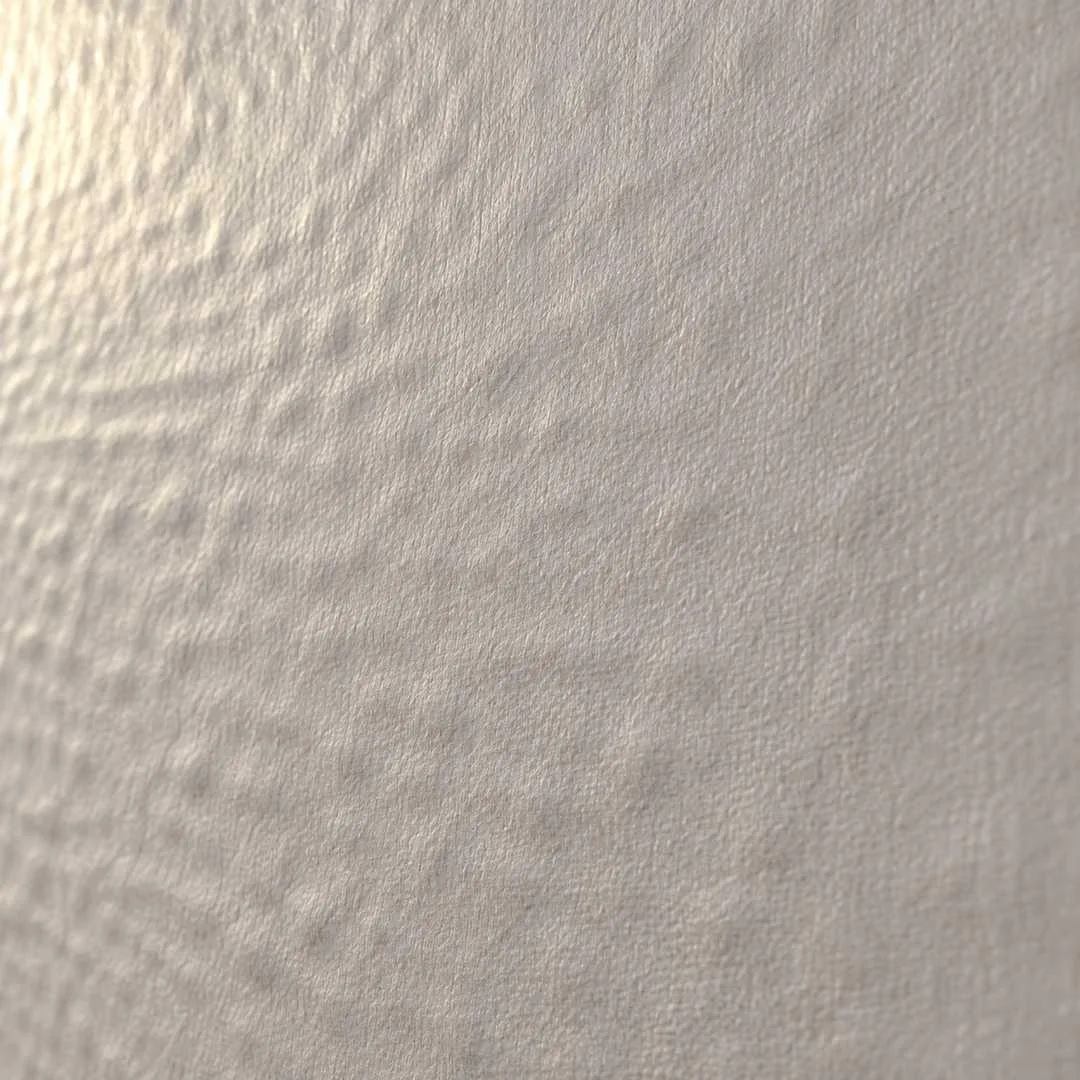
Nobody else will tell you this, so here it is: even a successful install over texture will telegraph. The bumps beneath show through as a faint rippled shadow across the surface, most visibly in raking light near a window or a lamp.
That is not failure. The paper is fully adhered, it is simply not flat. Three things reduce it: a busier pattern hides more than a plain colour, a matte finish hides more than anything with sheen, and a darker paper hides more than a pale one. A plain white wallpaper over orange peel will show every bump; a dark botanical print over the same wall will show almost none.
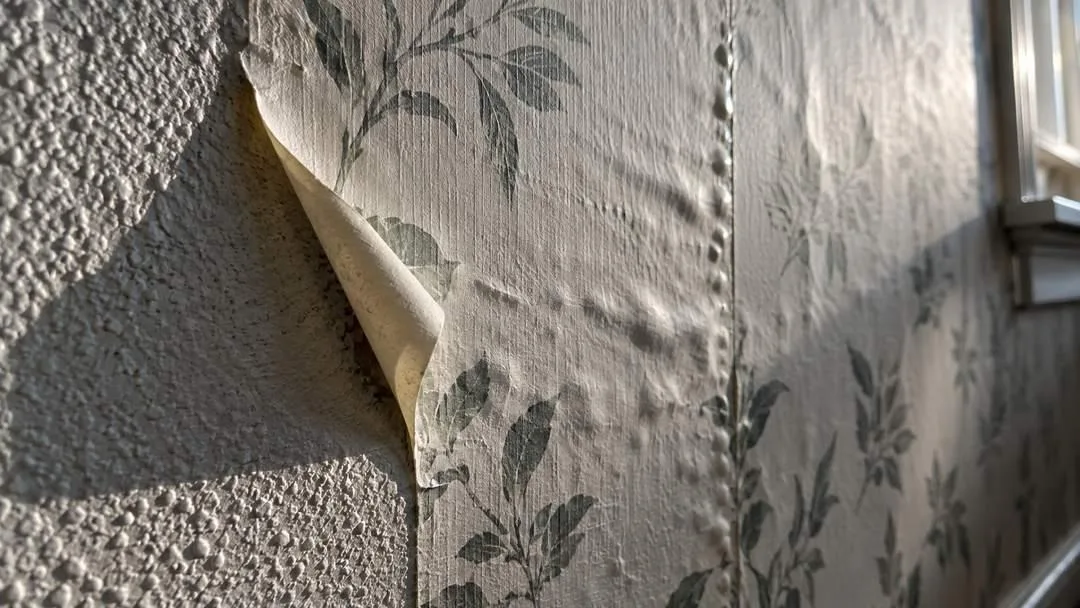
And this is what actual failure looks like — corners curling away, bubbles running along a seam, edges releasing. If you see this within the first week, stop. Pull the sheet down while it comes away cleanly, add a liner, and start again. Pressing it back down never works twice.
The result when it goes right
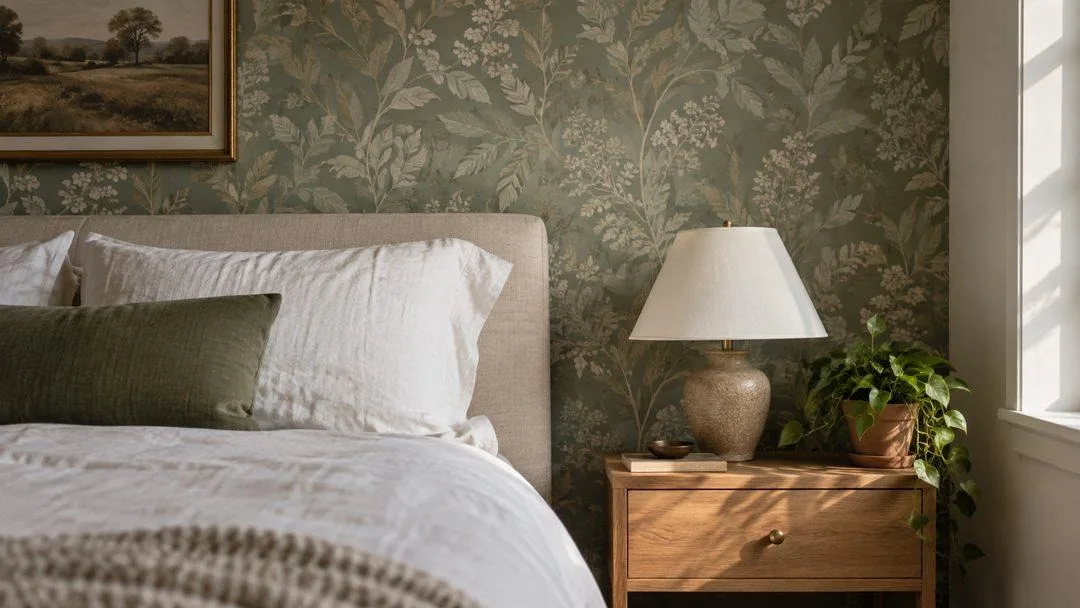
Done properly on a wall within range, a textured substrate becomes invisible from more than a few feet away. The wall above was orange peel, primed, papered with a mid-tone botanical print. You can still find the texture if you go looking for it in the right light — and nobody who walks into the room ever does.
Renters: protecting your deposit
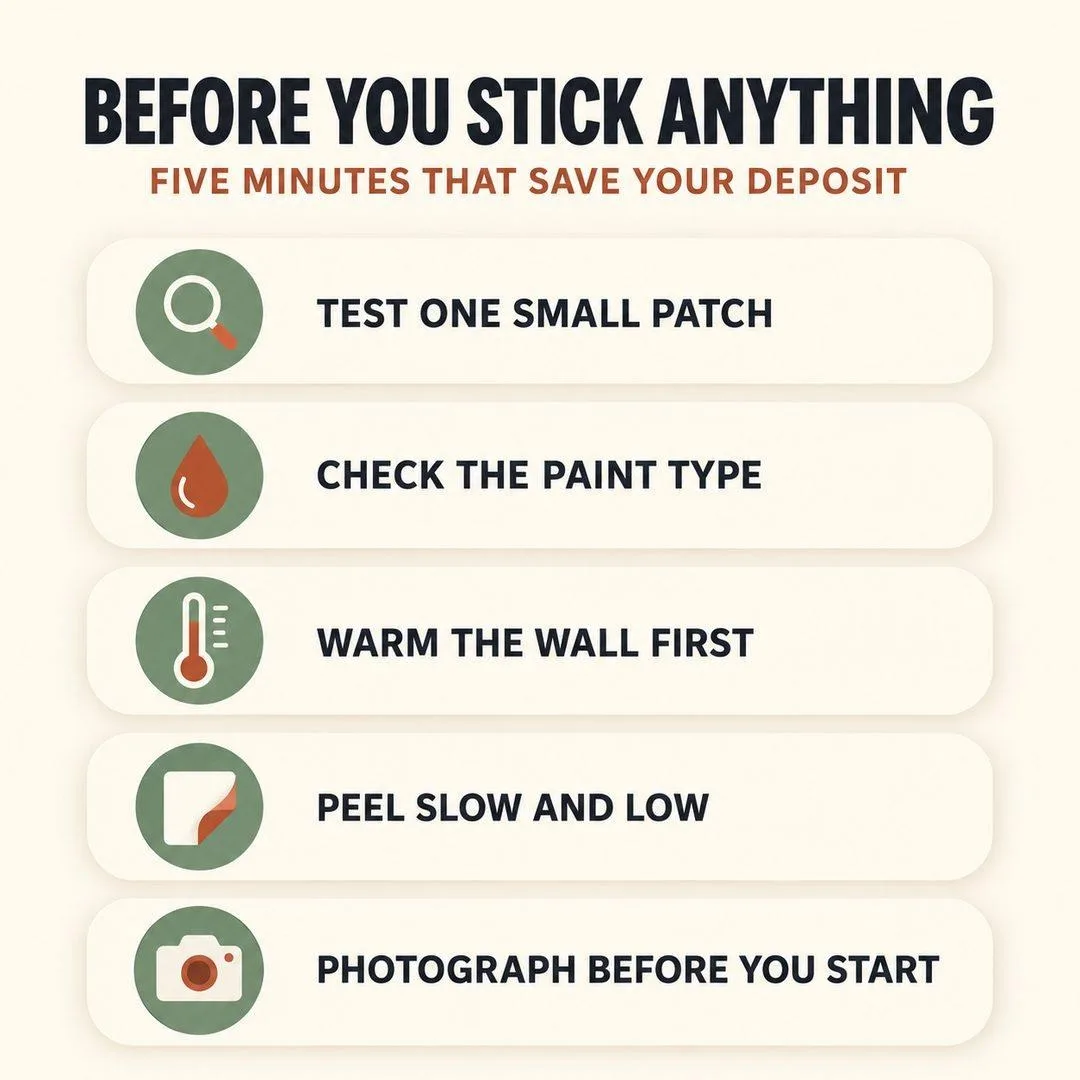
Peel and stick is marketed as removable, and on smooth walls in good paint it usually is. On textured walls the risk is different: the adhesive grips the raised peaks hardest, and those peaks are the most fragile part of the surface. Pulling too fast takes texture off the wall with the paper.
- Test one small patch first in a cupboard or behind a door, and leave it a week before removing. That tells you how your specific paint will behave.
- Check the paint type. Flat and matte paints are the risky ones — they are porous and the adhesive can bond into them. Satin and eggshell release far more cleanly.
- Warm the wall before removal. A hairdryer on low, held six inches away and moved constantly, softens the adhesive and dramatically reduces tearing.
- Peel slow and low. Pull downward at a shallow angle, close to the wall, not outward at 90 degrees. Outward is what tears paint.
- Photograph the wall before you start. Timestamped photos of pre-existing marks are the cheapest deposit insurance there is.
Quick reference: texture type to method
| Texture | Depth | Method | Verdict |
|---|---|---|---|
| Orange peel | 1/32-1/16 in. | Clean, prime, apply | Works |
| Venetian / limewash | Under 1/32 in. | Scuff-sand, bonding primer | Works |
| Sand swirl | 1/16-1/8 in. | Liner, then paper | Works with liner |
| Knockdown | 1/8-3/16 in. | Liner or heavy vinyl | Liner required |
| Beadboard / panelling | Grooves 1/8-1/4 in. | Fill grooves, sand, prime | Works after filling |
| Skip trowel | 1/8-1/4 in. | Skim coat | Skim coat |
| Slap brush / stomp | 3/16-1/4 in. | Skim coat | Skim coat |
| Popcorn / acoustic | 1/4 in.+ | Remove or board over | Do not wallpaper |
Depths are typical ranges; measure your own wall with the thumbnail test rather than assuming.
Wallpaper for textured walls: FAQ
What wallpaper works best on textured walls?
Heavy, thick vinyl wallpaper with a matte finish and a busy pattern. Weight lets the paper conform into the valleys instead of bridging them, matte hides the ripple that sheen exaggerates, and pattern disguises whatever texture still telegraphs through. Thin paper-backed and pale plain papers are the worst performers on texture.
What is the best peel and stick wallpaper for textured walls?
Look for thick vinyl rather than a specific brand. The two specifications that matter are weight and finish — a heavier gauge conforms better, and matte hides telegraphing. That said, no peel and stick product will hold on texture deeper than about an eighth of an inch, so check your wall with the thumbnail test before choosing a product at all.
How textured is too textured for peel and stick wallpaper?
Deeper than about an eighth of an inch — roughly two stacked credit cards. Press a fingernail into the wall: if it drops into the grooves rather than gliding across, adhesive alone will fail regardless of brand. Under a sixteenth of an inch is fine with primer; in between needs a liner.
Can I apply wallpaper to textured walls, and if so, how?
Yes. Identify your texture depth first, then match the method: prime and apply directly on light orange peel; hang a wallpaper liner first on knockdown or sand swirl; skim coat for skip trowel or slap brush. Popcorn texture has to be removed or covered with board — nothing adheres to a friable surface.
Can you wallpaper over textured walls without sanding?
Yes, and in older homes you should avoid sanding entirely. A wallpaper liner hung straight onto the texture, or a skim coat of joint compound spread over it, both create a flat surface without disturbing the existing coating. Textured coatings from before the early 1980s can contain asbestos, which is why sanding is the option to avoid.
Does peel and stick wallpaper work on textured walls?
On lightly textured walls, yes — orange peel and similar shallow finishes hold well with a bonding primer. On knockdown, skip trowel, slap brush or popcorn, no. The adhesive only contacts the high points, leaving air pockets in every valley, and the bond releases at the edges within weeks.
What is wallpaper liner and do I need it?
Liner is a thick blank paper hung horizontally with traditional paste, straight onto the textured wall. It fills the valleys and dries flat, giving your wallpaper a smooth surface to bond to. It costs roughly $30 to $60 a room and adds a day, and for any texture between a sixteenth and an eighth of an inch it is the difference between a wall that holds and one that peels.
Will the texture show through the wallpaper?
Almost always, to some degree — it is called telegraphing, and it shows as a faint rippled shadow in raking light. It is not a sign of failure. Reduce it by choosing a busier pattern, a matte finish and a darker colour. A plain pale wallpaper over texture will show every bump.
Will peel and stick wallpaper damage my rental walls?
It can, particularly on flat or matte paint, because those finishes are porous and the adhesive bonds into them. On textured walls there is an added risk that removal pulls the raised texture off with the paper. Test a small patch for a week first, warm the wall with a hairdryer before removing, and peel slowly downward at a shallow angle.
Is it cheaper to skim coat or use liner?
Liner is cheaper and faster — around $30 to $60 and one day. Skim coating costs slightly more in materials but takes a weekend and produces a permanent smooth wall you can paint or paper for years afterwards. For renters, liner is the only sensible option; for owners with heavy texture, skim coating is worth the weekend.
Measure first, then buy
The order most people follow is backwards: choose a wallpaper, buy it, then discover the wall. Do it the other way. Run the thumbnail test, match your texture to the table above, and only then decide whether you are buying wallpaper, wallpaper plus liner, or a bag of joint compound and a free weekend.
Once the wall is ready, bedroom wall decor ideas, kitchen wall decor ideas and office wall decor cover what goes on it. For the skim coating and panelling work itself, DIY projects at home has the technique.