50 Bookmark Ideas for 2026: Cute, Easy DIY Bookmarks to Make at Home
There is a moment every reader knows: you put the book down, grab the nearest receipt to mark your page, and it falls out by the next morning. Making your own DIY bookmarks fixes that, and it is one of the easiest, most satisfying crafts to do when you are bored. You need a strip of paper, ten minutes and a little color.
Below are 50 bookmark ideas grouped by what you make them from: paper, origami corners, no-glue folds, tassels and beads, paper clips and magnets, pressed flowers, felt and crochet, plus ideas for kids and gifts. You will also find the standard bookmark size, step-by-step instructions for the most popular methods, and a free tool to design and print your own.
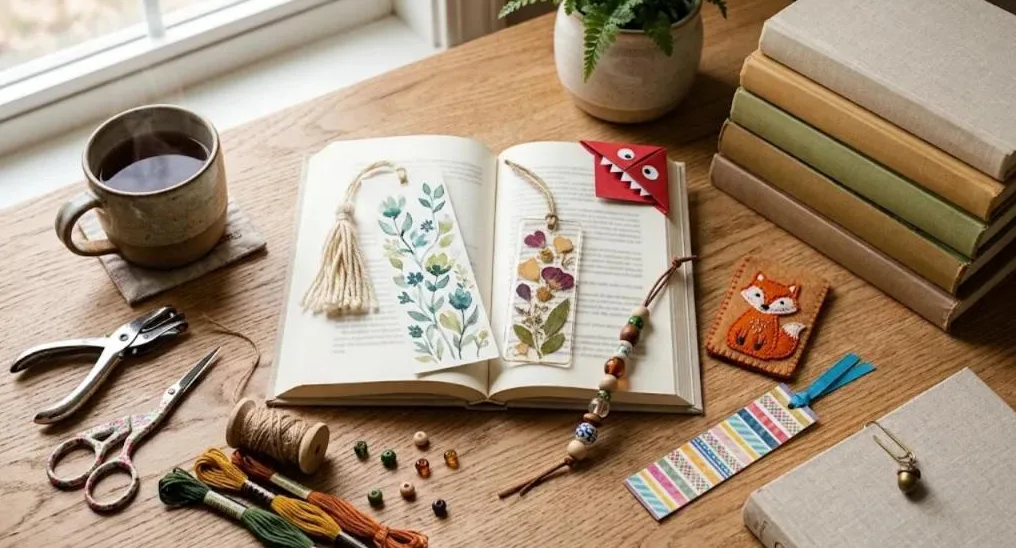
What are good bookmark ideas? The most popular bookmark ideas are watercolor and washi tape paper bookmarks, origami corner bookmarks shaped like monsters, hearts or animals, tassel and beaded bookmarks, paper clip bookmarks with charms, magnetic bookmarks, pressed flower bookmarks, felt and crochet bookmarks, and photo or handprint bookmarks for kids.
How do you make a bookmark? Cut a 2 x 6 inch strip of cardstock, decorate it with paint, pens, stickers or washi tape, seal it with clear contact paper or packing tape, punch a hole at the top and tie on a tassel or ribbon.
Bookmark design ideas: design and print one in a minute
No supplies yet? Try a few bookmark design ideas with this free bookmark maker: mix colors, patterns and a favorite quote. It prints three bookmarks at the standard 2 x 6 inch size on one page, ready to cut out.
🔖 Design and print your own bookmark
Pick colors, a pattern and a quote. Print it at the standard 2 x 6 inch size, or save it as an image.
Colors
Pattern
Quote
Name (optional)
Tip: print on cardstock, punch a hole at the top and add a tassel (steps below).
DIY bookmark ideas by type
Every DIY bookmark below uses supplies you probably already have. Pick a type that matches what is at home, then jump to the list.
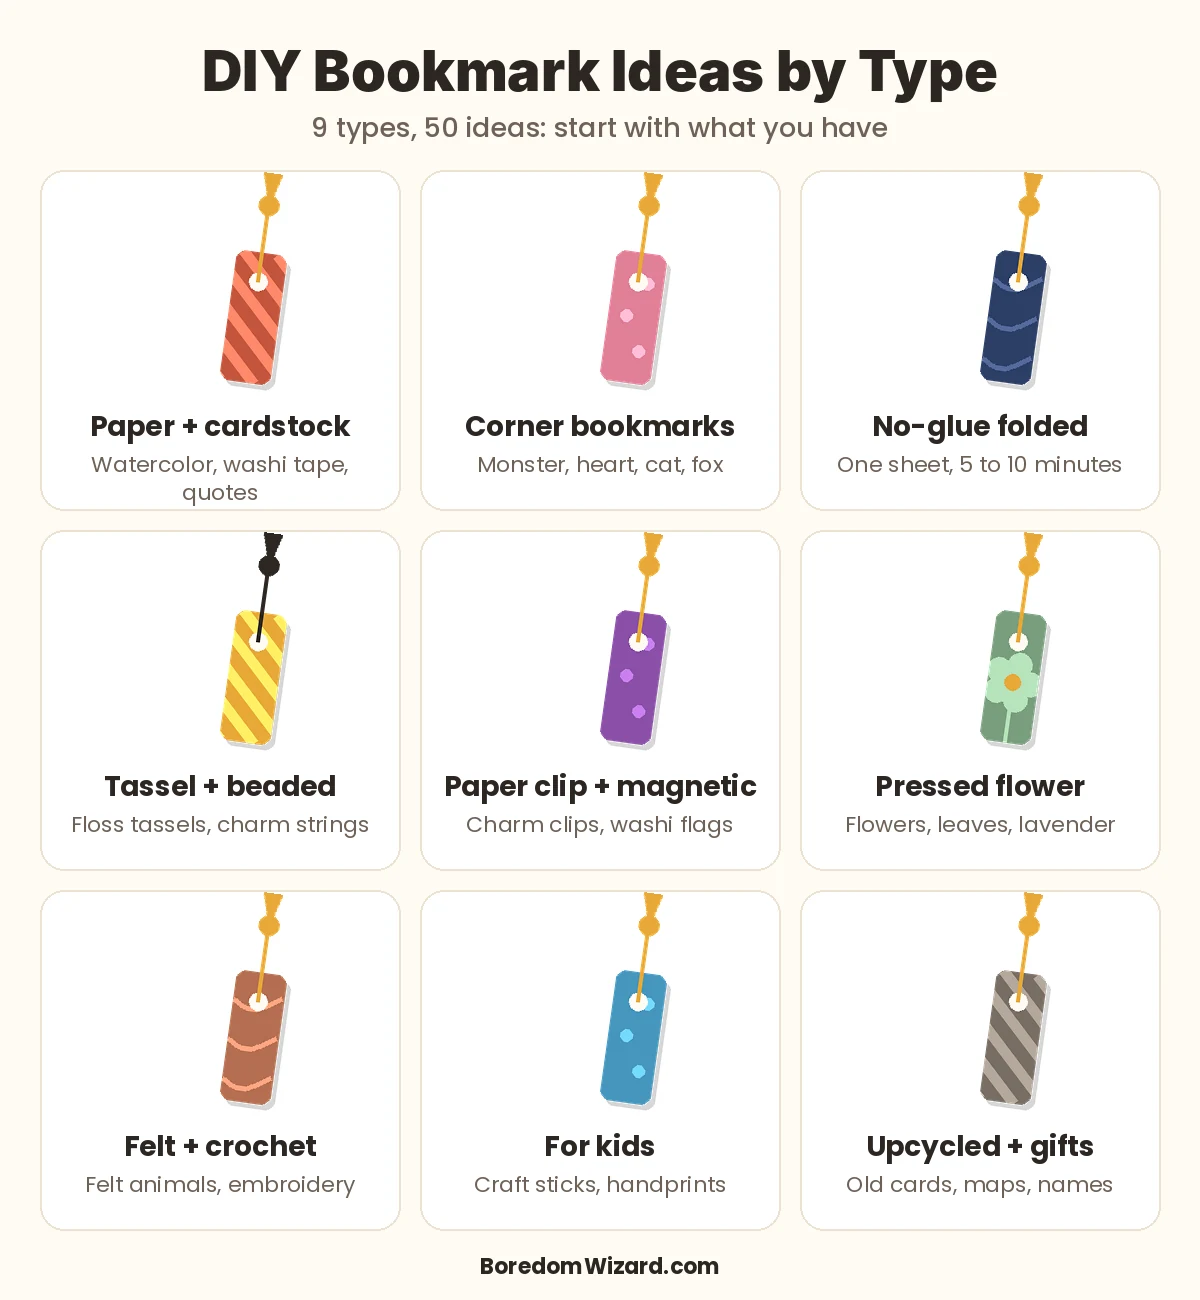
| Type | What you need | Best for | Jump to |
|---|---|---|---|
| Paper and cardstock | Cardstock, pens, paint, tape | Quick, cheap, any age | Ideas 1 to 8 |
| Corner bookmarks | One square of paper | Kids, cute gifts | Ideas 9 to 16 |
| No-glue folded | One sheet of paper | Bored with no supplies | Ideas 17 to 20 |
| Tassel and beaded | Floss, cord, beads | Thin books, gifts | Ideas 21 to 26 |
| Paper clip and magnetic | Clips, magnets, charms | Bags, classrooms | Ideas 27 to 31 |
| Pressed flower | Flowers, contact paper | Pretty gifts, adults | Ideas 32 to 36 |
| Felt and crochet | Felt, yarn, floss | Keepsakes | Ideas 37 to 41 |
| For kids | Craft sticks, paint, stickers | Ages 3 to 10 | Ideas 42 to 46 |
| Upcycled and gifts | Old cards, maps, photos | Zero waste, holidays | Ideas 47 to 50 |
Paper and cardstock bookmark ideas (1 to 8)
The classic. Cut a 2 x 6 inch strip of cardstock (65 to 110 lb is sturdy enough), decorate it, and you are done in minutes.
- Watercolor wash bookmark. Wet a 2 x 6 inch strip of watercolor paper, drop in two colors and let them bleed together. Once dry, add a silhouette of mountains or birds in black pen. (Watercolor paper, paints, about 20 min, easy)
- Washi tape stripes. Lay strips of washi tape diagonally across the cardstock, then trim the edges flush with scissors for a clean, store-bought look. (Cardstock, washi tape, about 10 min, easy)
- Doodle pattern bookmark. Split the strip into small sections with a pencil and fill each one with a different pattern: dots, waves, scales and tiny flowers. (Cardstock, fine pens, about 30 min, easy)
- Favorite quote bookmark. Write one short line from a book you love in brush lettering down the length of the strip, then add the book title in small print at the bottom. (Cardstock, brush pen, about 15 min, easy)
- Magazine collage bookmark. Glue overlapping scraps of color and words onto the strip, then seal it with clear packing tape on both sides so it does not peel. (Old magazines, glue stick, about 20 min, easy)
- Stamped bookmark. Carve a simple shape into half a potato, press it into acrylic paint and stamp a repeating pattern down the strip. (Cardstock, stamps or a cut potato, about 15 min, easy)
- Ombre paint chip bookmark. Paint chip cards from a hardware store are already the perfect bookmark shape. Punch a hole at the top and add a ribbon. (Free paint chip cards, about 5 min, easy)
- Galaxy bookmark. Sponge purple, blue and pink onto black cardstock, then flick white paint off a toothbrush to make stars. (Black cardstock, chalk or paint, about 20 min, medium)
Cute corner bookmark ideas (9 to 16)
Corner bookmarks slip over the corner of a page, so they never fall out. All of them start from the same simple fold, explained step by step below.
- Monster corner bookmark. Fold the basic corner pocket, then glue on paper teeth along the bottom edge and one or two googly eyes. (One square of colored paper, about 10 min, easy)
- Heart corner bookmark. Make the corner pocket, then glue two half-circles to the top edges so the whole thing forms a heart. (Red or pink paper, about 10 min, easy)
- Cat corner bookmark. Add two small triangle ears to the top of the corner pocket and draw a face with whiskers. (Paper, black pen, about 10 min, easy)
- Fox corner bookmark. Use orange paper, add white cheek triangles and pointed ears, and draw a black nose at the tip. (Orange and white paper, about 15 min, easy)
- Strawberry corner bookmark. Red corner pocket, a green leafy cap glued on top and small yellow dots for seeds. (Red and green paper, about 10 min, easy)
- Penguin corner bookmark. Black pocket, a white belly shape on the front, an orange beak and two tiny feet poking out the bottom. (Black, white and orange paper, about 15 min, easy)
- Pumpkin or elf corner bookmark. Swap colors for the season: an orange pumpkin with a stem for fall, or a green elf with a red hat for December. (Seasonal paper, about 10 min, easy)
- Shark corner bookmark. Gray pocket with a white jagged mouth along the bottom, so the shark looks like it is biting the page. (Gray and white paper, about 15 min, easy)
No-glue folded bookmark ideas (17 to 20)
No glue, no tape and no supplies beyond a sheet of paper. These are perfect when you are bored in class, on a train or at a cafe.
- Origami strip bookmark. Fold a long strip into thirds lengthwise, then fold the top into a point and tuck the flap in so it locks without glue. (One sheet of printer paper, about 10 min, easy)
- Origami heart bookmark. Fold a classic origami heart from a long rectangle and leave the bottom flap open so it slides over a page. (One square of paper, about 10 min, medium)
- Pleated fan bookmark. Accordion-fold the top third of a strip into a small fan and pinch it at the base. The fan sticks out of the book like a little flag. (One strip of paper, about 5 min, easy)
- Braided paper bookmark. Braid three thin strips of colored paper tightly, then fold the ends under to lock the braid. (Three thin paper strips, about 15 min, easy)
Tassel, ribbon and beaded bookmark ideas (21 to 26)
Soft bookmarks are thin enough to leave in any book without bending the pages, and they make lovely gifts.
- Tassel bookmark. Wrap floss around a 3 inch card 30 times, tie the top, cut the bottom loops and wrap the neck. Attach it to any paper bookmark. Full steps are below. (Embroidery floss or yarn, about 15 min, easy)
- Beaded string bookmark. Cut 14 inches of cord, string 5 to 8 beads on one end and a charm on the other, and knot both ends. The beads hang out of the top and bottom of the book. (Cord, beads, a charm, about 15 min, easy)
- Ribbon and button bookmark. Thread 12 inches of ribbon through a big button at the top and let the tail sit between the pages. (Ribbon, a large button, about 10 min, easy)
- Embroidery floss braid. Braid three colors of floss like a friendship bracelet, then add a bead at each end so it does not slip. (Three colors of floss, about 15 min, easy)
- Pom-pom bookmark. Wrap yarn around a fork 40 times, tie it in the middle, cut the loops and fluff. Tie it to a ribbon so the pom-pom sits on top of the book. (Yarn, a fork, about 15 min, easy)
- Elastic band bookmark. Sew a loop of 1 inch elastic that wraps around the whole book cover, and add a ribbon on the inside to mark your page. (Wide elastic, a sewing kit, about 20 min, medium)
Paper clip and magnetic bookmark ideas (27 to 31)
These grip the page, so they never fall out of a bag. They are also the fastest bookmarks to make in bulk for a class or a party.
- Paper clip charm bookmark. Slide a charm or a few beads onto a jump ring and hook it to the end of a large paper clip. (Large paper clips, charms, about 5 min, easy)
- Washi flag clip. Fold a short strip of washi tape over the top of a paper clip and cut the end into a flag or a V shape. (Paper clips, washi tape, about 5 min, easy)
- Felt topper clip. Cut two small felt shapes like a heart or a cactus, glue them together over the top of a paper clip. (Felt, paper clip, glue, about 15 min, easy)
- Magnetic bookmark. Cut a 2 x 4 inch strip, fold it in half, and stick a thin magnet inside each half so they snap together over the page. (Cardstock, thin adhesive magnets, about 15 min, easy)
- Ribbon bow clip. Tie a small bow from 6 inches of ribbon around the top of a paper clip and trim the tails at an angle. (Paper clip, ribbon, about 5 min, easy)
Pressed flower and nature bookmark ideas (32 to 36)
Nature bookmarks look expensive but cost almost nothing. Press flowers in a heavy book for 1 to 2 weeks first.
- Pressed flower bookmark. Arrange flat pressed flowers on a cardstock strip and cover both sides with clear contact paper or self-laminating sheets. See our pressed flower ideas for how to press them. (Pressed flowers, clear contact paper, about 20 min, easy)
- Fall leaf bookmark. Place pressed leaves between two sheets of wax paper and iron on low with a towel on top to seal them. (Leaves, wax paper, an iron, about 20 min, medium)
- Lavender sachet bookmark. Sew a tiny fabric pocket, fill it with a pinch of dried lavender and attach it to a ribbon so your book smells calm. (Fabric, dried lavender, about 25 min, medium)
- Botanical print bookmark. Brush paint onto the back of a leaf and press it onto the strip to print the veins. (Leaves, paint, about 15 min, easy)
- Birth flower bookmark. Draw or paint the reader’s birth flower for a personal gift. Our birth flowers by month guide lists every month. (Cardstock, pens or paint, about 25 min, easy)
Felt, fabric and crochet bookmark ideas (37 to 41)
These last for years and are lovely gifts for serious readers.
- Felt animal bookmark. Cut a felt strip and glue a simple animal face at the top: a fox, a bear or an owl. No sewing needed. (Felt sheets, glue, about 20 min, easy)
- Crochet bookmark. Crochet a narrow strip of single crochet about 7 inches long and add a small flower at the top. New to crochet? Start with our crochet for beginners guide. (Cotton yarn, hook, about 45 min, medium)
- Embroidered bookmark. Stitch a tiny flower or a word onto a strip of felt using simple backstitch. See our embroidery patterns for beginners. (Felt or linen, floss, about 60 min, medium)
- Fabric scrap bookmark. Iron interfacing onto a fabric scrap so it stiffens, cut it to 2 x 7 inches and trim the edges with pinking shears. (Fabric scraps, fusible interfacing, about 25 min, easy)
- Cross-stitch bookmark. Stitch a pixel pattern onto a strip of plastic canvas. Any pixel art design works. (Plastic canvas, yarn, about 45 min, medium)
Easy bookmark ideas for kids (42 to 46)
Simple, colorful and great for reading logs, classrooms and rainy days.
- Popsicle stick bookmark. Decorate a jumbo craft stick as a monster, a pencil or a superhero. Our popsicle stick crafts have more ideas. (Jumbo craft sticks, markers, about 10 min, easy)
- Handprint bookmark. Paint a child’s hand, press it at the top of a long strip and add the date. It makes a sweet gift for grandparents. (Cardstock, paint, about 15 min, easy)
- Photo bookmark. Glue a small printed photo to the top of a strip and laminate it with packing tape. (A printed photo, cardstock, about 15 min, easy)
- Reading reward bookmark. Draw ten boxes on the bookmark and add a sticker each time a chapter is finished. (Cardstock, stickers, about 10 min, easy)
- Finger puppet bookmark. Make a small felt finger puppet with a long tail. The head pokes out the top and the tail marks the page. (Felt, glue, about 20 min, easy)
Upcycled and gift bookmark ideas (47 to 50)
Reuse what you already have, or make something personal for a reader you love.
- Old greeting card bookmark. Cut the prettiest strip from an old card and round the corners with scissors. A great way to keep a card you love. (Used greeting cards, about 5 min, easy)
- Map bookmark. Cut a strip from a map of a place you visited and back it with cardstock. (Old maps, about 10 min, easy)
- Personalized name bookmark. Spell a name down the length of the strip with letter stickers and add a tassel in their favorite color. Find more gift ideas in our personalized craft projects. (Cardstock, letter stickers, about 15 min, easy)
- Holiday gift bookmark. Make a stack of snowflake, tree or gingerbread bookmarks to tuck into holiday cards. Pair them with our Christmas crafts for kids. (Cardstock, ribbon, about 15 min, easy)
What size is a bookmark?
The standard bookmark size is 2 x 6 inches (about 5 x 15 cm). It fits almost every paperback and hardcover without sticking out too far. Use 2 x 7 or 2 x 8 inches for larger hardcovers and textbooks, and a slim 1.5 x 6 inches for small paperbacks.
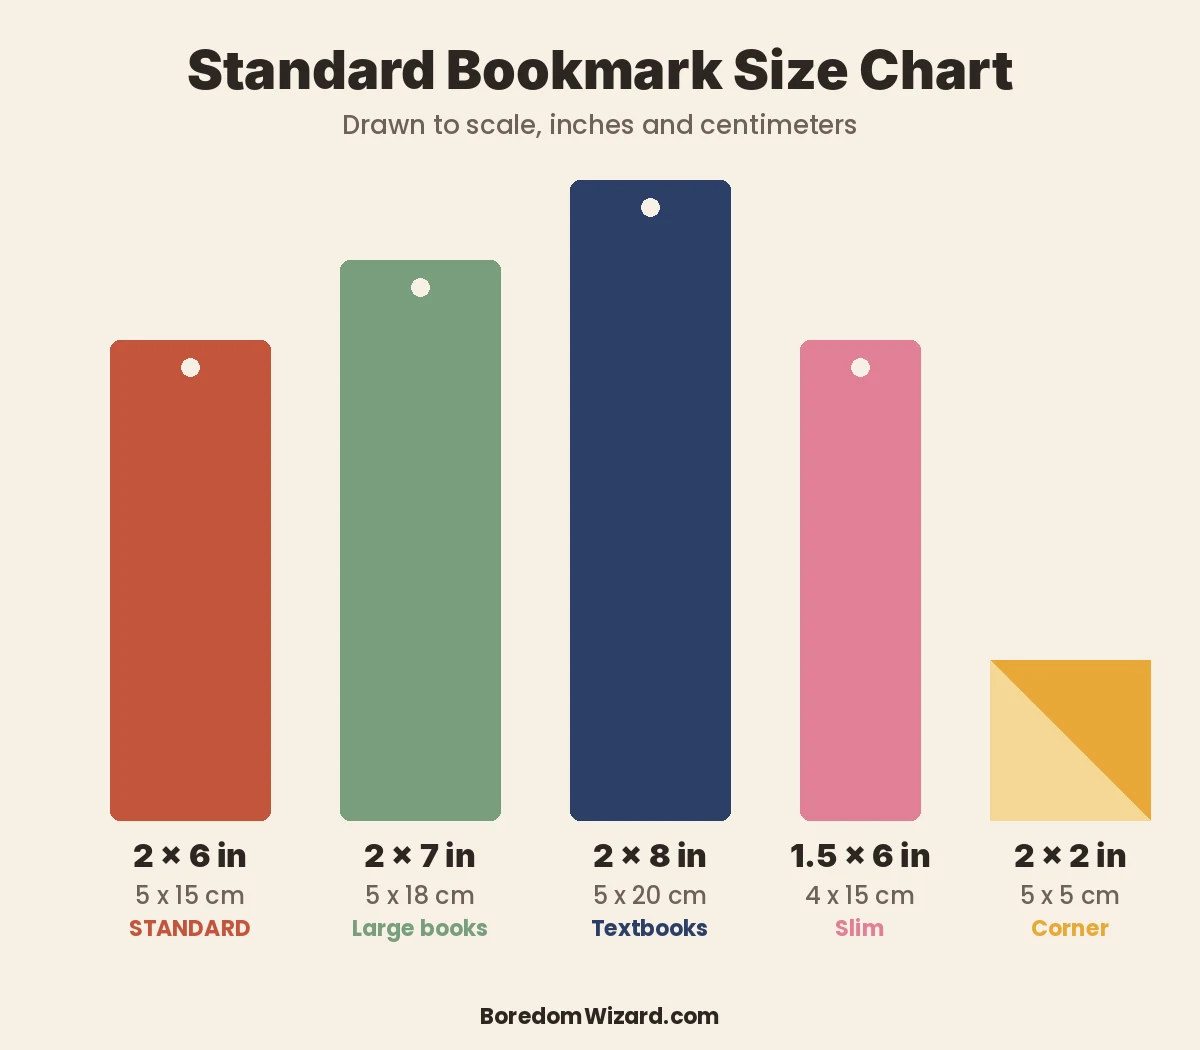
| Size | Metric | Best for |
|---|---|---|
| 2 x 6 in (standard) | 5 x 15 cm | Most paperbacks and hardcovers |
| 2 x 7 in | 5 x 18 cm | Large hardcovers |
| 2 x 8 in | 5 x 20 cm | Textbooks, cookbooks, journals |
| 1.5 x 6 in | 4 x 15 cm | Small paperbacks, slim gifts |
| 2 x 2 in corner | 5 x 5 cm | Origami corner bookmarks |
Best paper: use 65 to 110 lb cardstock, or 140 lb watercolor paper for painted bookmarks. Printer paper is too thin unless you laminate it or fold it into an origami bookmark.
How to make a bookmark: step by step
This is the classic paper bookmark method. Once you know it, every other idea on this page is just a variation.
Make a sturdy, decorated paper bookmark with a tassel in about 20 minutes, using cardstock, markers or paint, clear contact paper and embroidery floss.
Total time: 20 minutes
Cut the cardstock
Measure and cut a strip 2 inches wide and 6 inches long from 65 to 110 lb cardstock. Round the corners with scissors if you like.
Decorate both sides
Paint, draw, stamp or add washi tape, stickers or a short quote. Let paint dry completely.
Seal it
Cover both sides with clear contact paper, a self-laminating sheet or clear packing tape, then trim the edges.
Punch a hole
Punch a 1/4 inch hole in the center, about 1/2 inch from the top edge.
Add a tassel or ribbon
Loop a tassel or a 10 inch piece of ribbon through the hole and knot it.
How to make a corner bookmark
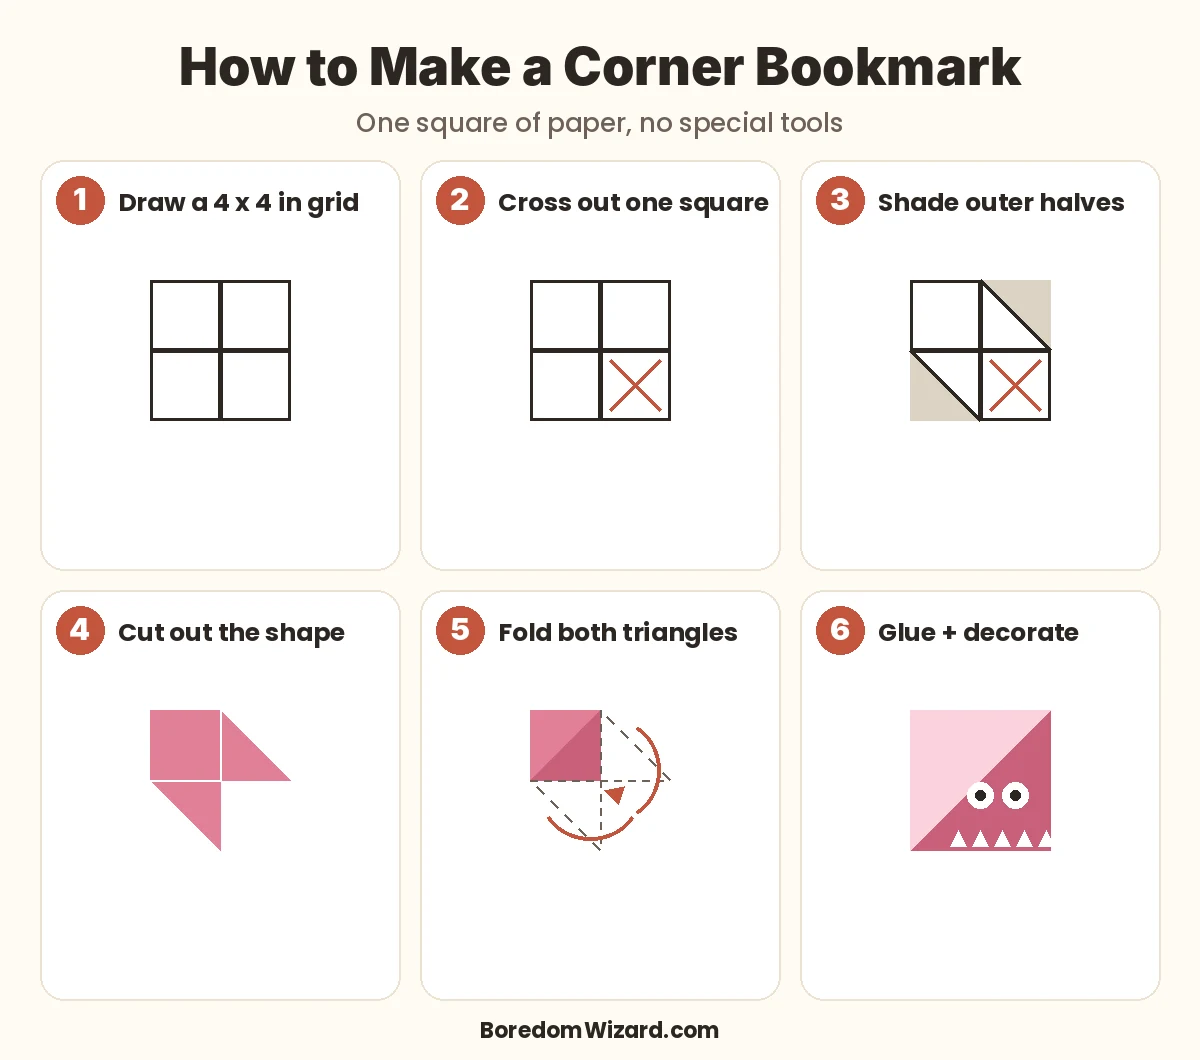
- Draw a 4 x 4 inch square on paper and divide it into four 2 inch squares.
- Cross out the bottom-right square. You will cut it away.
- In the top-right and bottom-left squares, draw a diagonal line and shade the outer half. Keep the triangle that touches the center of the big square.
- Cut out the shape: one full square with a triangle on its right and one below it.
- Fold the top-right triangle down over the square, then fold the bottom triangle up over it.
- Glue the two triangles to each other only, not to the square, so a pocket forms.
- Decorate it as a monster, heart, cat or any idea from the corner bookmark list above.
How to make a bookmark tassel
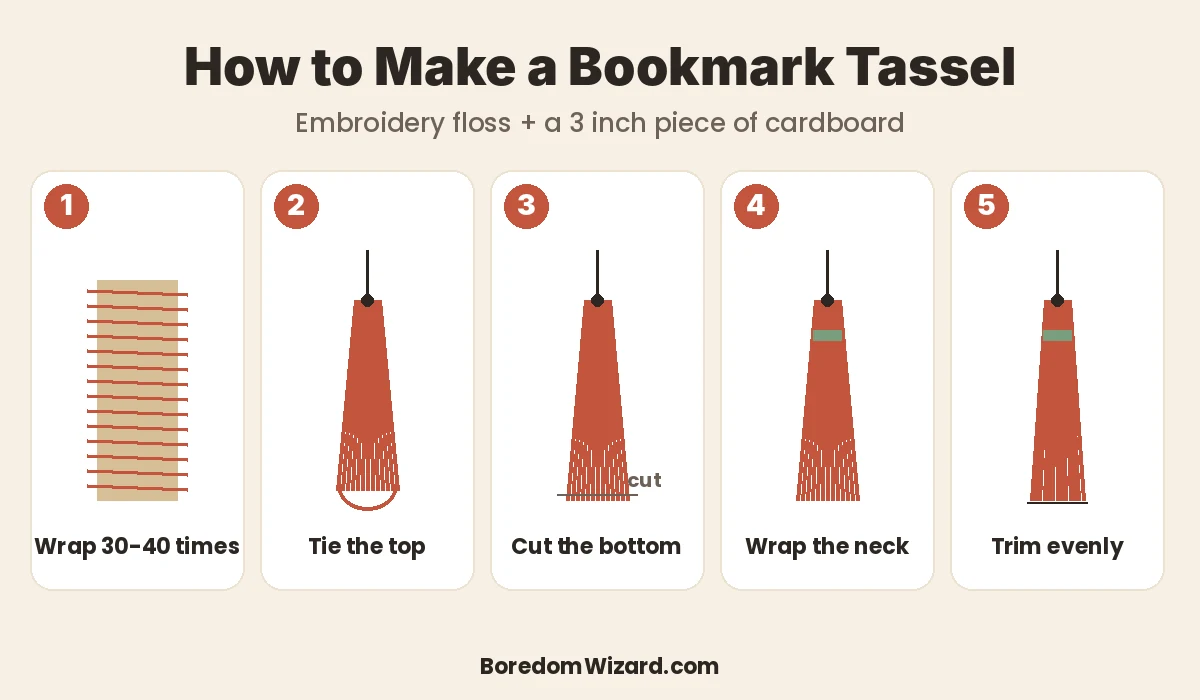
- Cut a piece of cardboard 3 inches tall and wrap embroidery floss or yarn around it 30 to 40 times.
- Slide a 6 inch piece of floss under the loops at the top and tie it tightly. This is the hanging tie.
- Cut through all the loops at the bottom and slide the bundle off the card.
- Wrap another piece of floss around the bundle about 1/2 inch below the top, knot it and hide the ends inside.
- Trim the bottom so all the strands are even, then tie the tassel to your bookmark.
How to make a magnetic bookmark
- Cut a strip of cardstock 2 x 4 inches and fold it in half so it is 2 x 2 inches.
- Decorate the outside of both halves.
- Stick a thin adhesive magnet on the inside of each half, directly opposite each other.
- Slide it over the top of a page so the two magnets snap together through the paper.
Tips for bookmarks that last
- Seal paper bookmarks: contact paper or packing tape stops corners from bending and makes them wipe-clean.
- Keep them thin: thick bookmarks with buttons or bulky charms can dent pages. Put bulky decorations on a tassel outside the book.
- Use acid-free paper for keepsakes: it does not yellow or stain old books over time.
- Avoid wet glue near pages: let glue and paint dry fully before you put a bookmark in a book.
- Make a set: cut six bookmarks from one sheet of 8.5 x 11 inch cardstock and decorate them together. It is faster and makes great party favors.
Why make your own bookmark in 2026?
Reading for fun is in trouble. A 2025 study from the University of Florida and University College London, using time-use data from more than 236,000 Americans, found that daily reading for pleasure fell by more than 40% over 20 years. A bookmark you made yourself is a small, real nudge to pick the book back up. Leave it sticking out of a book on your nightstand and it works like a reminder.
Crafting is also having a moment. Pinterest’s 2026 Hobbies Trend Report found searches for hand embroidery art up 1,351% and beaded bag charms up 965% in a year. Both translate straight into bookmarks: try an embroidered bookmark (#39) or a beaded string bookmark (#22).
- Charm bookmarks: beaded strings and paper clip charms are the bookmark version of the bag charm trend.
- Pressed flower and botanical bookmarks: the most saved style for gifts and book clubs.
- Personal and handmade gifts: a bookmark with a name or a birth flower is a small, thoughtful gift for any reader.
- Our prediction for 2027: more people will pair bookmarks with reading challenges, like the sticker reward bookmark (#45), to rebuild a daily reading habit.
Need something to read with your new bookmark? Try our books to read when bored. Want another paper craft? See our things to make with paper and origami flowers.
Bookmark ideas: FAQ
What are some cute bookmark ideas?
Cute bookmark ideas include origami corner bookmarks shaped like monsters, cats, foxes or strawberries, pom-pom and tassel bookmarks, felt animal bookmarks, pressed flower bookmarks and paper clip bookmarks with small charms.
How do you make a bookmark at home?
Cut a 2 x 6 inch strip of cardstock, decorate it with paint, markers, washi tape or stickers, seal it with clear contact paper or packing tape, punch a hole at the top and tie on a tassel or ribbon.
What is the standard size of a bookmark?
The standard bookmark size is 2 x 6 inches, or about 5 x 15 cm. Larger books suit 2 x 7 or 2 x 8 inch bookmarks, and small paperbacks suit 1.5 x 6 inches.
What paper is best for making bookmarks?
Use 65 to 110 lb cardstock for sturdy paper bookmarks, or 140 lb watercolor paper for painted ones. Thin printer paper works for origami and corner bookmarks.
How do you make a corner bookmark?
Draw a 4 x 4 inch square split into four 2 inch squares, cut away the bottom-right square and the outer halves of the top-right and bottom-left squares, then fold the two triangles over the remaining square and glue them only to each other to form a pocket.
How do you laminate a bookmark without a laminator?
Cover both sides with clear contact paper, self-laminating sheets or wide clear packing tape, smooth out the bubbles and trim the edges.
How do you make a tassel for a bookmark?
Wrap embroidery floss around a 3 inch card 30 to 40 times, tie the top loops, cut the bottom loops, wrap and tie the neck about 1/2 inch below the top, then trim the ends evenly.
What can I use as a bookmark if I do not have one?
Use a folded strip of paper, a paper clip, a sticky note, a receipt, a ribbon or a photo. A quick no-glue origami bookmark takes about 5 minutes from one sheet of paper.
Are handmade bookmarks a good gift?
Yes. Handmade bookmarks are cheap, personal and useful. Add a name, a favorite quote or the reader’s birth flower, and pair it with a book for a complete gift.
Looking for more ways to beat boredom with your hands? Try our easy crafts for adults or our things to do when bored at home.