Easy Crafts for Adults (2026): 40 Relaxing Projects You’ll Actually Finish
The best easy crafts for adults have three things in common: they don’t need special skills, they don’t need a craft-store haul and they look genuinely good when you’re done. That last part matters. Nobody wants to spend a Sunday on something that ends up in a drawer.
So we rated all 40 easy crafts for adults in this guide on the Easy Meter, a simple 10-point score based on time, cost, mess and how much patience each one needs. Every craft lists exactly what you’ll need and how to make it, and the Stash Matcher below shows which crafts you can start right now with the supplies already in your home.
Quick answer: The easiest crafts for adults score 10 out of 10 on our Easy Meter: sashiko visible mending, origami lucky star jar, pamphlet-stitch notebook, yarn tassel garland and one-page mini zine. Each takes about an hour or less, costs under $10 and needs only basic supplies like scissors, paper and twine.
The Stash Matcher: what can you make right now?
Tick the supplies you already own. The matcher ranks all 40 easy crafts for adults by how much of the basic supply list you have, then shows what’s still missing. Tap “Select all basics” for a typical junk-drawer kit.
How we rate every craft: the Easy Meter
Every craft starts at 10 points and loses points for each thing that makes it harder: more time, more money, more mess and more practice. A 10 means you can start tonight with almost no risk. A 7 means it’s still beginner-friendly, just plan for more cleanup or a little shopping first.
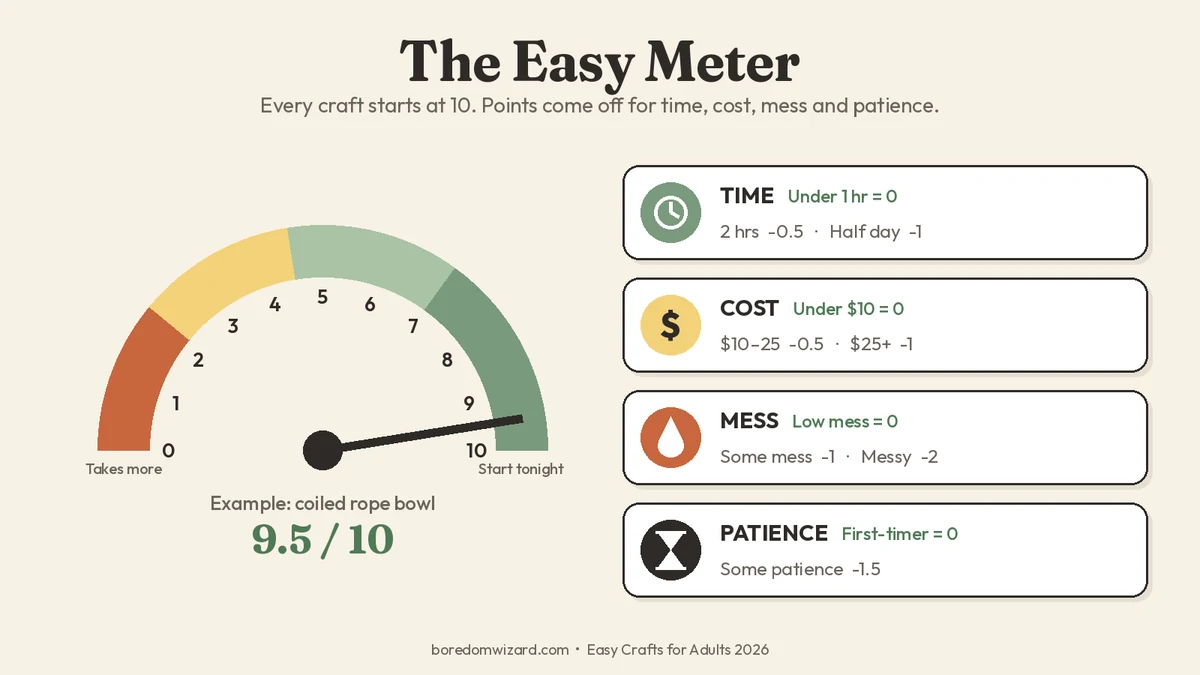
| Factor | No points lost | Points lost |
|---|---|---|
| Time | Under an hour | 2 hours (-0.5), half a day (-1) |
| Cost | Under $10 | $10 to $25 (-0.5), $25+ (-1) |
| Mess | Low mess | Some mess (-1), messy (-2) |
| Patience | First-timer friendly | Needs some patience (-1.5) |
The 12-item starter stash
We counted every supply across all 40 crafts. These 12 items show up again and again, and together they cover the basic supply list for 18 of the projects in this guide, with only one or two special items to buy for most of the others.
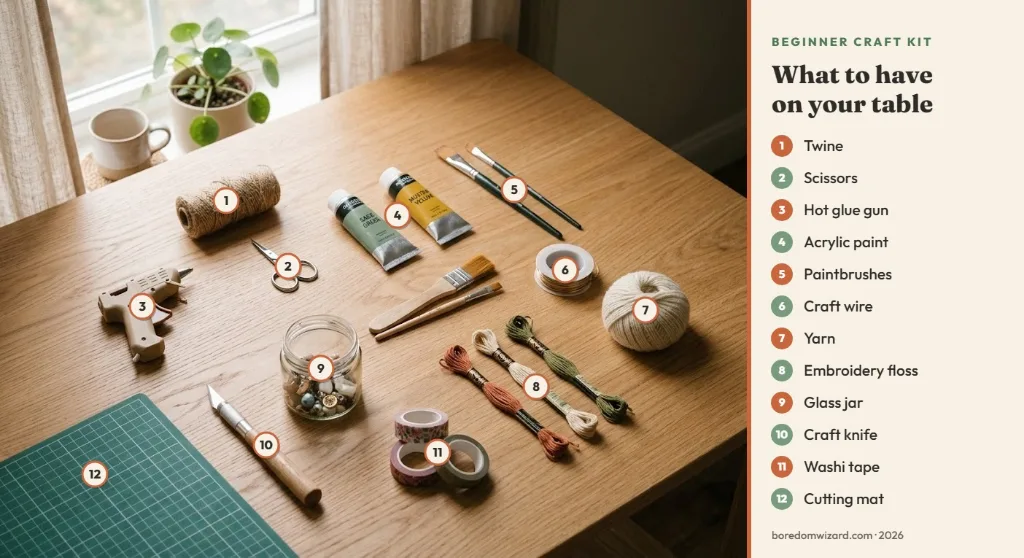
- Scissors: used in 16 crafts
- Pencil: used in 12 crafts
- Paper or cardstock: used in 9 crafts
- Disposable gloves: used in 8 crafts
- White craft glue: used in 7 crafts
- Ruler: used in 6 crafts
- Twine or string: used in 6 crafts
- Craft knife: used in 6 crafts
- Acrylic paint: used in 5 crafts
- Cardboard: used in 4 crafts
- Hot glue gun: used in 4 crafts
- Yarn: used in 3 crafts
Calm, repetitive crafts for unwinding
These calm, easy crafts for adults are the ones to reach for after a long day. Each one has a simple motion you repeat over and over, which is exactly what makes them so relaxing.
1. Punch needle mini wall hanging
Easy Meter 9/10: 2 hrs · $10 to $25 · Low mess · First-timer
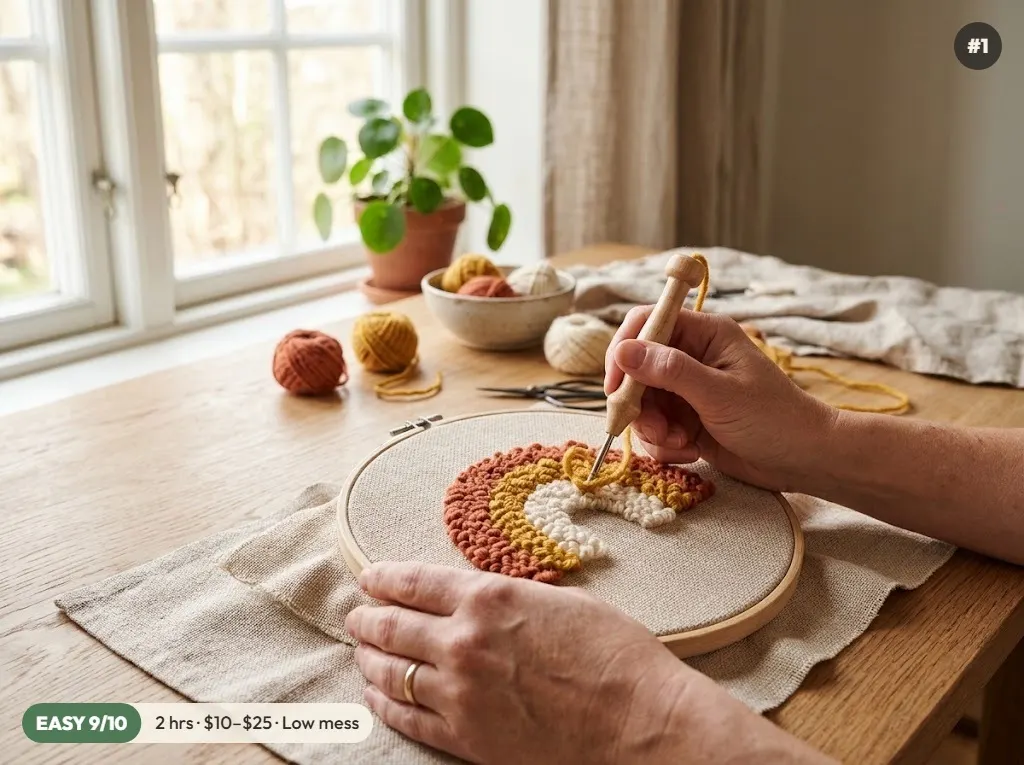
Punch needle feels like drawing with yarn. You push the needle through fabric and it leaves fluffy loops behind, so a small rainbow or mushroom fills in fast and looks impressive.
You’ll need: scissors, yarn, pencil, punch needle tool, monk’s cloth, embroidery hoop.
- Trace a simple design onto monk’s cloth stretched tight in a hoop.
- Punch outlines first, then fill each shape row by row.
- Trim the back, glue down the edges and hang it on the hoop.
Tip: Keep the cloth drum-tight. Loose fabric is the number one reason loops fall out.
2. Sashiko visible mending
Easy Meter 10/10: 1 hr · Under $10 · Low mess · First-timer
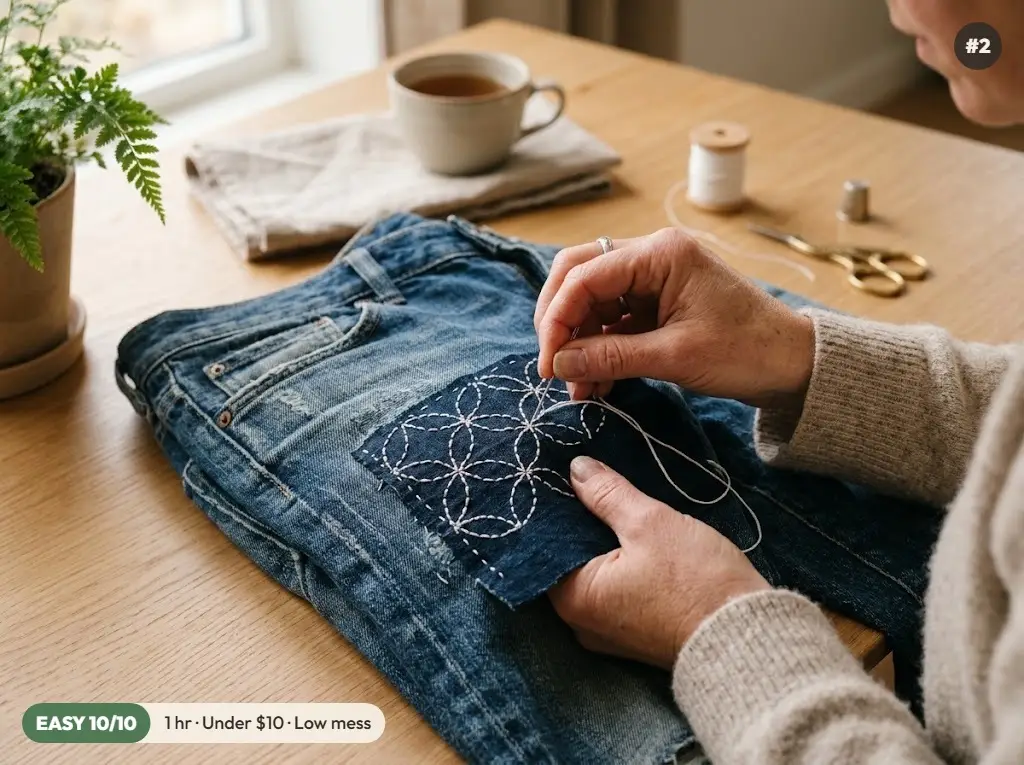
Sashiko is a Japanese running-stitch technique that turns a worn knee or a tear into a design feature. It’s slow, rhythmic and genuinely useful, which makes it perfect evening crafting.
You’ll need: cotton fabric scraps, sewing needle, scissors, pencil, sashiko thread.
- Pin a fabric patch behind the hole or worn spot.
- Mark a simple grid or rows of lines with chalk or a washable pen.
- Sew small, even running stitches along the lines through both layers.
Tip: Regular embroidery floss works if you don’t have sashiko thread; use all six strands.
3. Dot mandala stones
Easy Meter 9/10: 1 hr · Under $10 · Some mess · First-timer
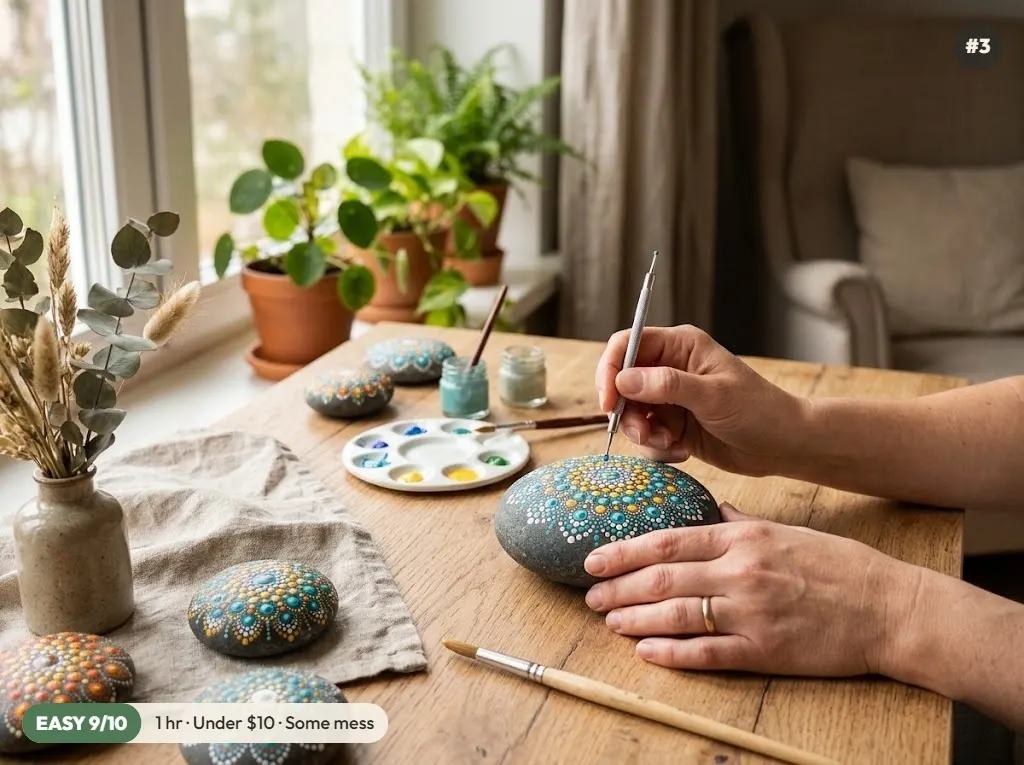
Dot painting is almost impossible to get wrong. You build circles of dots outward from the center, and the repetition is calming in the same way coloring books are.
You’ll need: acrylic paint, pencil, smooth stones, dotting tools.
- Base-coat a smooth stone in a dark color and let it dry.
- Place one big center dot, then add rings of smaller dots around it.
- Seal with a clear spray or brush-on varnish once fully dry.
Tip: The back end of a pencil, a toothpick and a cotton swab make three different dot sizes for free.
4. Needle felted mini animal
Easy Meter 7.5/10: 2 hrs · $10 to $25 · Low mess · Some patience
Needle felting turns fluffy wool into firm little shapes by stabbing it with a barbed needle. Start with a round bird or a mushroom and you’ll have a palm-sized friend in an afternoon.
You’ll need: scissors, felting needles, wool roving, foam pad.
- Roll a loose ball of wool roving and stab it on a foam pad until it firms up.
- Felt smaller pieces for ears, beaks or caps and attach them by stabbing at the joins.
- Add color details with thin wisps of wool.
Tip: Felting needles are very sharp. Go slow, keep fingers clear and stab straight up and down.
5. Paper quilling monogram
Easy Meter 8/10: 2 hrs · Under $10 · Low mess · Some patience
Quilling rolls thin strips of paper into coils and shapes, then glues them on edge to create texture. A single letter filled with coils makes a lovely framed gift.
You’ll need: paper or cardstock, white craft glue, scissors, pencil, quilling tool, quilling paper strips.
- Draw a large block letter on cardstock.
- Glue paper strips on edge along the outline.
- Fill the letter with loose coils, teardrops and scrolls.
Tip: You can cut your own strips from printer paper with a ruler and craft knife.
6. Origami lucky star jar
Easy Meter 10/10: 1 hr · Under $10 · Low mess · First-timer
Lucky stars are tiny puffy stars folded from a single strip of paper. Fold a few while you watch TV and fill a jar over a week; write notes on the strips first for a heartfelt gift.
You’ll need: paper or cardstock, glass jars or bottles, scissors, ruler.
- Cut paper into strips about half an inch wide and 11 inches long.
- Tie a loose knot at one end, flatten it into a pentagon and wrap the strip around it.
- Tuck the tail in and gently pinch each edge to puff the star.
Tip: Pretty scrapbook paper or old magazine pages make colorful stars at no cost.
7. Mini weaving on a cardboard loom
Easy Meter 9.5/10: 2 hrs · Under $10 · Low mess · First-timer
A small woven wall hanging needs nothing more than cardboard and leftover yarn. Weaving over and under is easy to learn, and textures like fringe and loops make it look boutique.
You’ll need: cardboard, yarn, scissors, ruler, twine or string.
- Cut notches every quarter inch along two edges of a cardboard rectangle and wrap string through them.
- Weave yarn over and under, pressing each row down with your fingers or a fork.
- Add a fringe row, then slide it off the loom and tie it to a stick.
Tip: Mix a chunky yarn with a thin one for texture that looks far more expensive than it was.
Paint, print and pour crafts
For when you want color and a little chaos. These adult art projects are the most playful arts and crafts for adults, and none of them require painting skill: the paint, the plate or the pour does most of the work.
8. Acrylic paint pour canvases
Easy Meter 7.5/10: 1 hr · $10 to $25 · Messy · First-timer
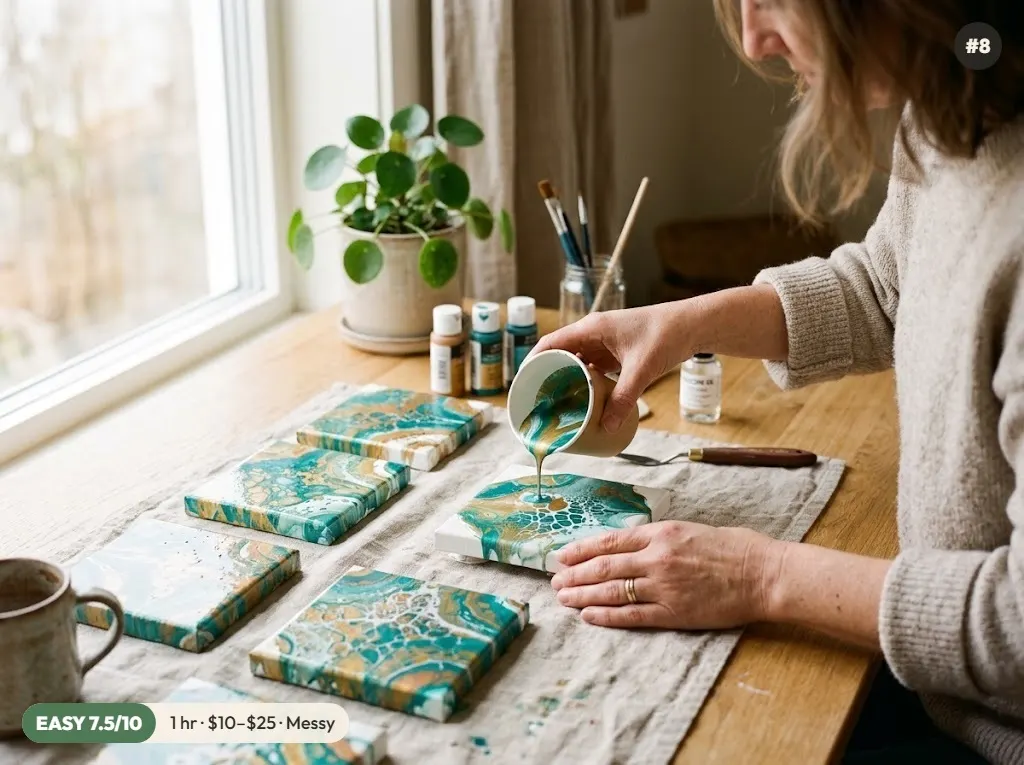
Paint pouring is pure satisfying chaos. You mix acrylics with pouring medium, flip a cup onto a canvas and tilt, and the colors swirl into cells and ribbons you could never paint by hand.
You’ll need: acrylic paint, plastic cups, disposable gloves, pouring medium, mini canvases.
- Mix each color with pouring medium until it flows like warm honey.
- Layer colors in one cup, flip it onto a raised canvas and lift.
- Tilt to cover the edges, then leave it flat to dry for at least a day.
Tip: Cover everything. Raise canvases on plastic cups over a cardboard tray to catch the drips.
9. Gel plate monoprints
Easy Meter 8.5/10: 1 hr · $10 to $25 · Some mess · First-timer
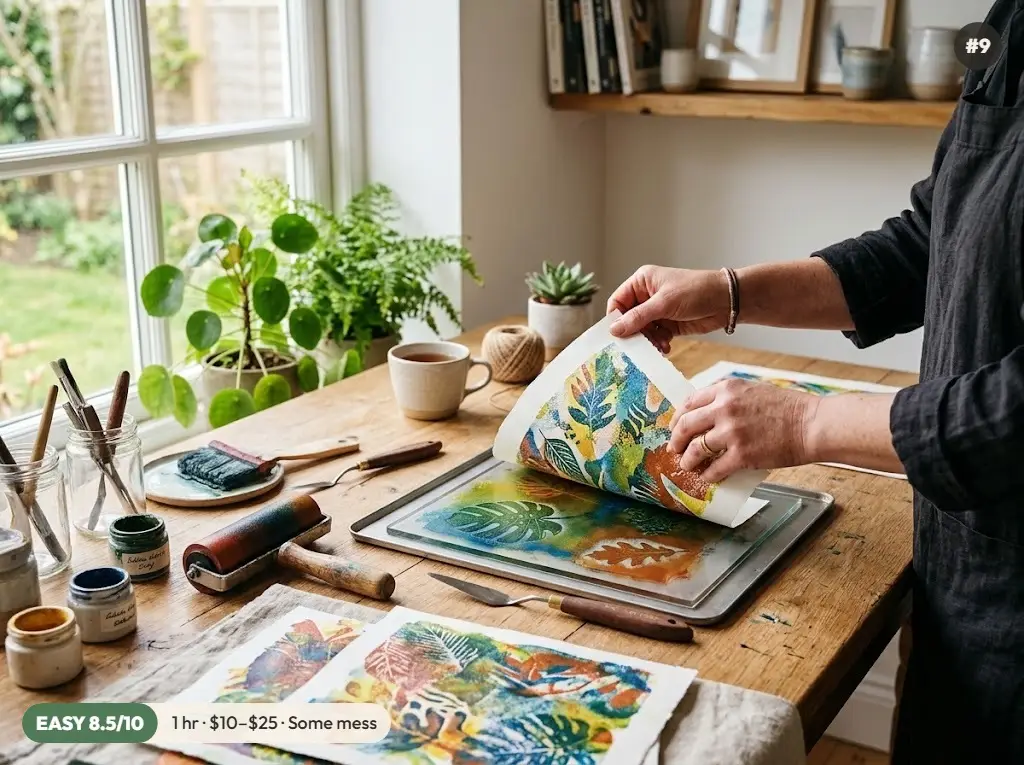
A gel printing plate lets you pull one-of-a-kind prints in seconds. Roll on paint, press leaves or stencils into it, lay paper on top and peel. Every print is a surprise.
You’ll need: acrylic paint, paper or cardstock, leaves or sticks from outside, gel printing plate, brayer.
- Roll a thin layer of acrylic paint across the plate with a brayer.
- Press leaves, string or stencils into the paint.
- Lay paper on top, rub with your palm and pull the print.
Tip: Layer three or four pulls on the same sheet for depth. The background prints are often the best.
10. Shaving cream marbled paper
Easy Meter 8/10: 30 min · Under $10 · Messy · First-timer
This trick makes elegant marbled paper for cards and gift tags using shaving cream from the bathroom cabinet. It takes minutes, and each sheet is unique.
You’ll need: paper or cardstock, ruler, disposable gloves, foam shaving cream, food coloring or liquid watercolor.
- Spread shaving cream in a tray and drip color across the surface.
- Swirl the colors with a skewer.
- Press cardstock on top, lift it and scrape the foam off with a ruler.
Tip: Use cardstock, not printer paper, so it doesn’t curl.
11. Alcohol ink abstract art
Easy Meter 8.5/10: 30 min · $10 to $25 · Some mess · First-timer
Alcohol inks spread, bloom and blend on slick synthetic paper into watery, glowing abstracts. Blowing on the ink with a straw moves it around, so no brush skills are needed.
You’ll need: disposable gloves, alcohol inks, synthetic paper, isopropyl alcohol.
- Drop a few colors onto synthetic paper.
- Add a little rubbing alcohol and tilt or blow through a straw to spread it.
- Let it dry, then frame it or cut it into cards.
Tip: Work in a well-ventilated room away from flames. Alcohol and the inks are flammable.
12. Carved eraser stamps
Easy Meter 8.5/10: 1 hr · Under $10 · Low mess · Some patience
Carving your own stamps is the gateway to block printing. A soft carving block or a big pink eraser cuts like butter, and one stamp can decorate a hundred cards and envelopes.
You’ll need: pencil, craft knife, soft carving block or large erasers, ink pad.
- Draw a simple design in pencil, then press the drawing onto the block to transfer it.
- Carve away everything you don’t want to print, cutting away from your hand.
- Ink it up and test-print on scrap paper.
Tip: Remember the print is a mirror image, so letters must be carved backward.
13. Etched glassware
Easy Meter 9.5/10: 1 hr · $10 to $25 · Low mess · First-timer
Etching cream permanently frosts glass wherever you brush it, so plain jars and glasses become monogrammed gifts that look store-bought.
You’ll need: glass jars or bottles, washi or masking tape, craft knife, disposable gloves, glass etching cream, vinyl or stencils.
- Clean the glass and stick on a stencil, pressing the edges flat.
- Brush on a thick layer of etching cream and wait the time on the label.
- Rinse the cream off thoroughly and peel the stencil.
Tip: Etching cream contains strong acid. Wear gloves, protect your eyes and follow the label exactly.
14. Faux stained glass window art
Easy Meter 8.5/10: 2 hrs · Under $10 · Some mess · First-timer
This trick gives you the look of leaded stained glass with glue and paint. Outline a design in black dimensional paint, then fill the sections with tinted glue and let the light do the rest.
You’ll need: white craft glue, acrylic paint, pencil, clear plastic frame or glass, black dimensional paint.
- Place a design under a glass frame and trace it with black dimensional paint.
- Mix white glue with a few drops of acrylic or food coloring.
- Fill each section, pop bubbles with a pin and dry flat overnight.
Tip: Hang it in a sunny window. The colors look completely different in morning and evening light.
Nature crafts that bring the outdoors in
Leaves, citrus, moss and sunlight are the main supplies here. These easy craft ideas for adults are calming to make and lovely to live with.
15. Cyanotype sun prints
Easy Meter 9.5/10: 1 hr · $10 to $25 · Low mess · First-timer
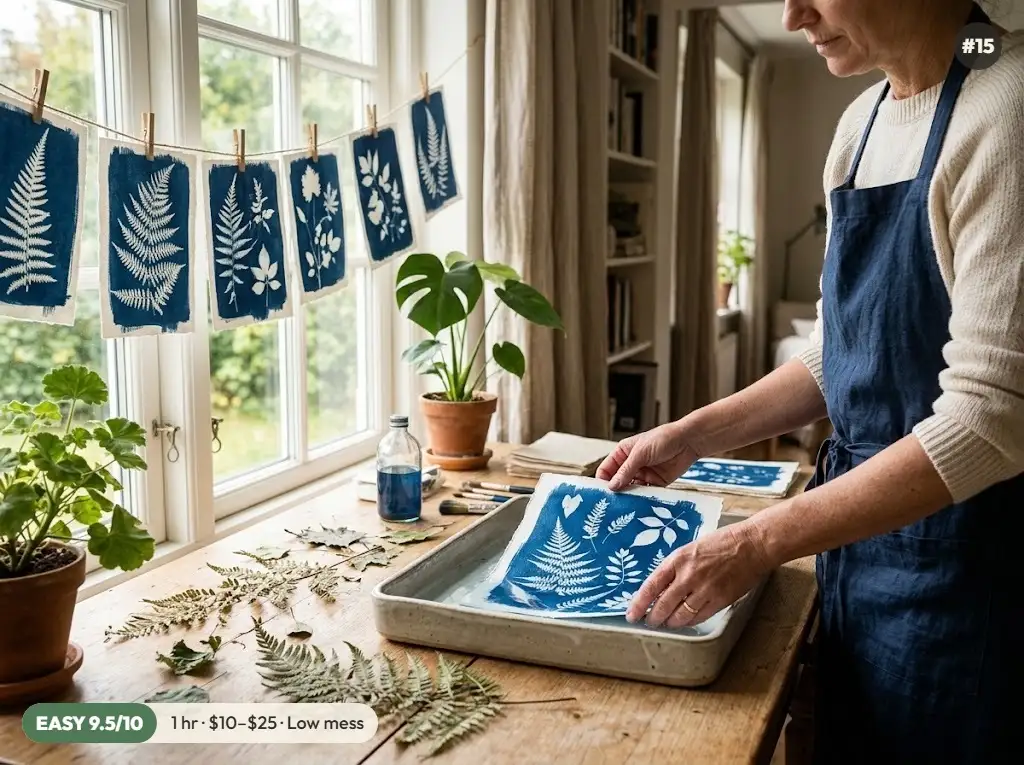
Cyanotype prints use sunlight to turn treated paper deep blue, leaving crisp white silhouettes of leaves and ferns. Pre-coated sun print paper makes it as easy as arranging a bouquet.
You’ll need: leaves or sticks from outside, pre-coated sun print paper, clear acrylic sheet or glass.
- Arrange leaves or flowers on sun print paper and cover with clear acrylic.
- Expose it in direct sun for the time on the pack.
- Rinse in water and watch the blue deepen as it dries.
Tip: Pre-coated paper is the safest start. Mixing your own cyanotype chemicals needs gloves and care.
16. Kokedama moss ball plants
Easy Meter 7.5/10: 1 hr · $10 to $25 · Messy · First-timer
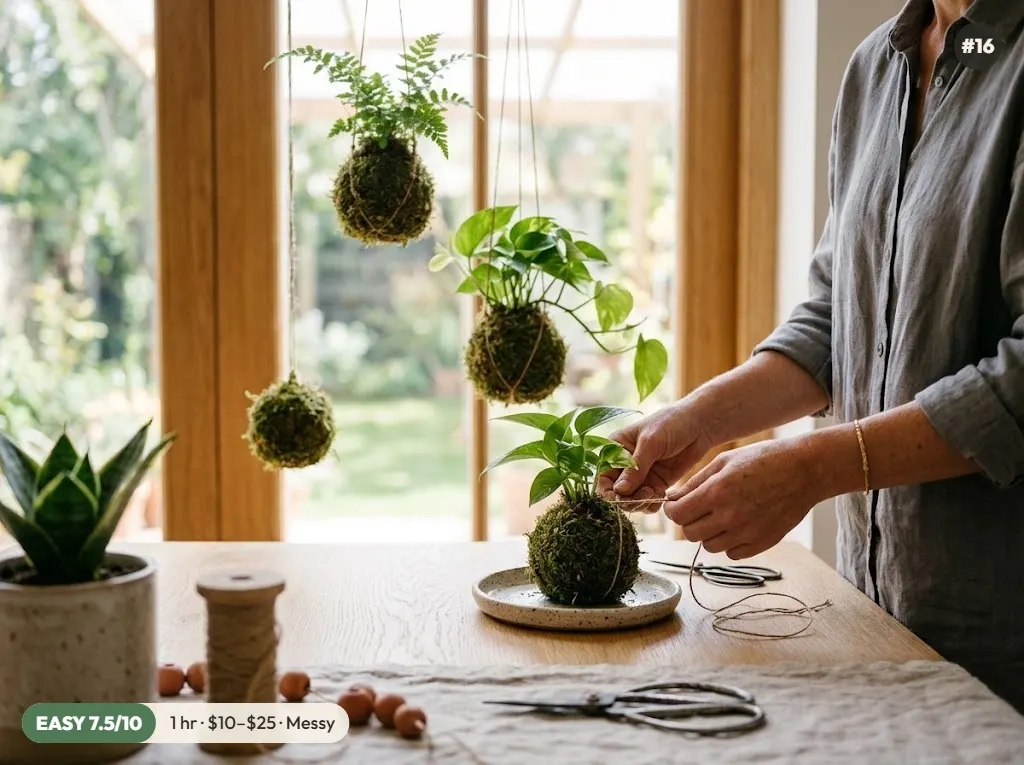
Kokedama is a Japanese way of displaying plants in a ball of soil wrapped in moss, no pot needed. Hang a few at different heights for a living sculpture.
You’ll need: twine or string, scissors, disposable gloves, small plant, bonsai or peat soil, sheet moss.
- Mix soil with a little water until it holds a ball.
- Pack it around the plant’s roots and wrap it in damp moss.
- Bind it tightly with twine and leave a long loop to hang it.
Tip: Water by soaking the ball in a bowl for 10 minutes when it feels light.
17. Dried orange slice garland
Easy Meter 8/10: Half day · Under $10 · Some mess · First-timer
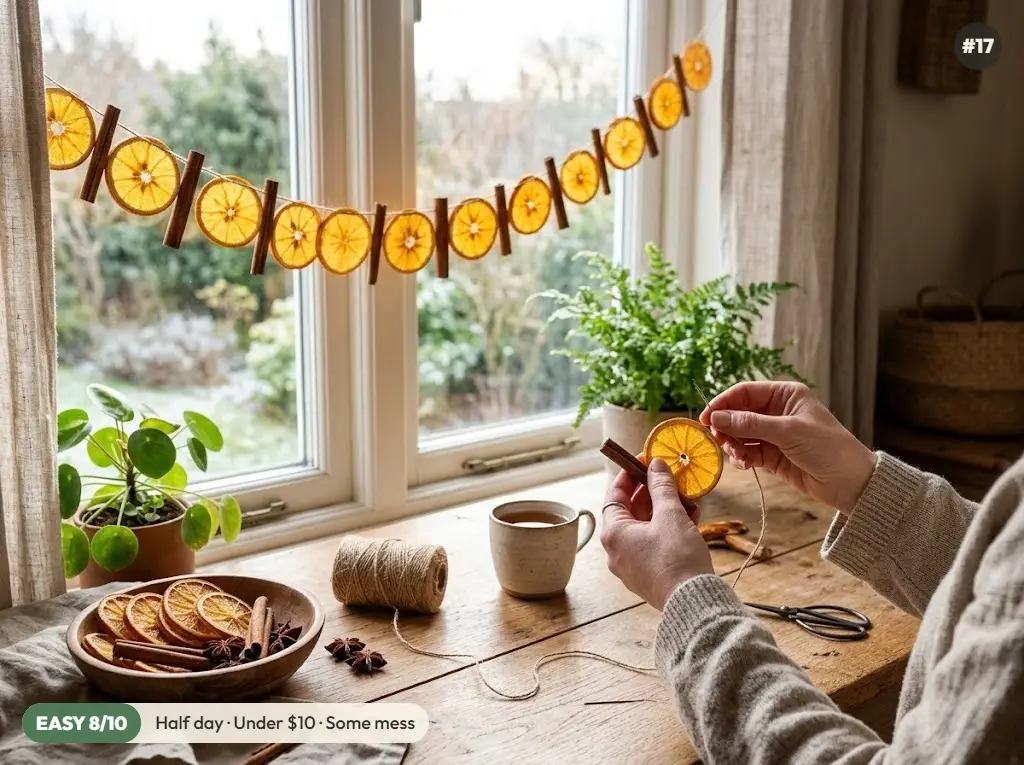
Oven-dried orange slices glow like stained glass when the light hits them. String them with cinnamon sticks or bay leaves for a garland that smells as good as it looks.
You’ll need: oranges, oven, twine or string, craft knife.
- Slice oranges about a quarter inch thick and pat them very dry.
- Bake on a rack at the lowest oven setting for 3 to 4 hours, flipping now and then.
- Thread them onto twine with a needle once completely dry.
Tip: Thinner, even slices dry faster and stay brighter. Check often near the end so they don’t brown.
18. Avocado-dyed napkins
Easy Meter 8/10: Half day · Under $10 · Some mess · First-timer
Avocado pits and skins dye natural fabric a soft, dusty pink. It’s a kitchen-scrap craft with a gorgeous payoff and no harsh chemicals.
You’ll need: cotton fabric scraps, disposable gloves, cotton or linen napkins, large pot.
- Simmer clean avocado pits and skins in a pot of water for about an hour.
- Add pre-washed cotton or linen and keep it at a low simmer, stirring.
- Let it soak until you like the color, then rinse and dry.
Tip: Use a pot you don’t cook with, and stick to natural fibers. Synthetics won’t take the dye.
19. Beeswax food wraps
Easy Meter 8.5/10: 1 hr · $10 to $25 · Some mess · First-timer
Beeswax wraps are a pretty, reusable swap for plastic wrap. Melt wax into cotton fabric in the oven and you have a set that clings to bowls and wraps sandwiches.
You’ll need: cotton fabric scraps, oven, scissors, beeswax pellets, parchment paper.
- Cut cotton fabric into squares and lay one on parchment on a baking sheet.
- Sprinkle beeswax pellets evenly over the fabric.
- Warm in a low oven until melted, spread with a brush and hang to cool.
Tip: Use a brush you’re happy to dedicate to wax. It won’t fully wash out.
20. Leaf-printed tea towels
Easy Meter 9/10: 1 hr · Under $10 · Some mess · First-timer
Brush fabric paint onto real leaves and press them onto cotton for botanical prints with every vein showing. A set of three makes a thoughtful hostess gift.
You’ll need: leaves or sticks from outside, paintbrushes, plain cotton tea towels, fabric paint.
- Wash and iron the towel first so the paint grips.
- Brush a thin coat of fabric paint on the vein side of a leaf.
- Press it onto the fabric, cover with paper, rub and peel. Heat-set as the paint label says.
Tip: Ferns, maple and ginkgo leaves print beautifully. Thick, waxy leaves don’t.
Useful crafts for your home (and great gifts)
Craft projects for adults that end up in daily use. These DIY projects for adults make great gifts, so make one for yourself and a second to give away.
21. No-sew leather card holder
Easy Meter 9.5/10: 1 hr · $10 to $25 · Low mess · First-timer
A slim leather card holder looks like a boutique gift but needs only a template, sharp scissors and a couple of rivets. It gets better with age, too.
You’ll need: scissors, ruler, pencil, hammer and nails, leather scraps, snap rivets or Chicago screws.
- Print or draw a template and trace it onto the back of the leather.
- Cut it out with sharp scissors and punch holes where the rivets go.
- Fold, line up the holes and set the rivets with a hammer.
Tip: Vegetable-tanned leather scraps are cheap online and easy to cut and stamp.
22. Coiled rope bowl
Easy Meter 9.5/10: 1 hr · $10 to $25 · Low mess · First-timer
Coil cotton rope into a spiral, glue as you go and tilt the sides up, and you have a soft catchall bowl for keys, plants or yarn. No sewing machine needed.
You’ll need: hot glue gun, scissors, cotton clothesline rope.
- Start a tight spiral with the rope end and hot glue it flat.
- Keep coiling and gluing to make the base.
- Tilt the coils upward to build the walls, then tuck and glue the end.
Tip: Glue a little at a time, and wrap a strip of fabric around the rim for a pop of color.
23. Mini concrete planters
Easy Meter 6.5/10: Half day · $10 to $25 · Messy · First-timer
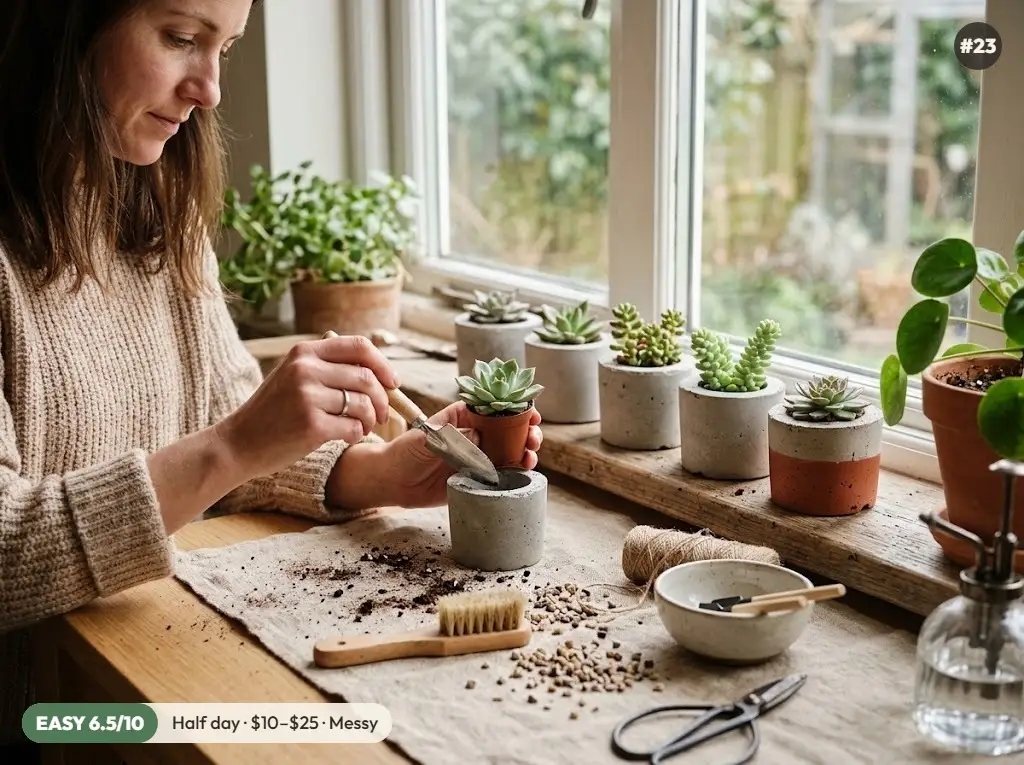
Small concrete pots have that modern, minimalist look and cost pennies each. Two nested plastic cups make the mold, and paint-dipped rims make them pop.
You’ll need: plastic cups, disposable gloves, quick-set concrete mix, cooking spray.
- Mix concrete with water to a thick oatmeal texture.
- Pour it into an oiled cup and press a smaller oiled cup inside, weighed down.
- Unmold after a day and let it cure before planting.
Tip: Wear gloves and a dust mask when mixing dry concrete. It irritates skin and lungs.
24. Wood burned spoon or cutting board
Easy Meter 7.5/10: 2 hrs · $10 to $25 · Low mess · Some patience
Pyrography means drawing with a hot pen on wood. A simple botanical sprig or a family name on a spoon or cutting board looks heirloom-worthy.
You’ll need: pencil, wood burning tool, plain wooden spoon or board.
- Sketch your design lightly in pencil.
- Trace slowly with the burning tool, letting the heat do the work.
- Sand lightly and finish food-contact items with food-safe mineral oil.
Tip: The tip gets extremely hot. Always rest it in its stand and work on a heat-proof surface.
25. Pamphlet-stitch notebook
Easy Meter 10/10: 1 hr · Under $10 · Low mess · First-timer
Bookbinding sounds advanced, but a pamphlet stitch is just three holes and a bow. Make a stack of pocket notebooks for journaling or grocery lists.
You’ll need: paper or cardstock, sewing needle, ruler, twine or string, heavy decorative paper for the cover.
- Fold 5 to 10 sheets of paper in half and wrap them in a cover sheet.
- Poke three holes along the fold with a needle or pushpin.
- Sew through the holes in a figure-eight and tie a knot in the middle.
Tip: Waxed thread or twine holds tighter than regular thread and looks rustic.
26. Mosaic tile trivet
Easy Meter 7/10: 2 hrs · $10 to $25 · Messy · First-timer
Mosaic is like a puzzle you design yourself. Glue colorful tiles onto a square base, grout the gaps and you have a hot-pot trivet that will last for years.
You’ll need: white craft glue, disposable gloves, wood or cork trivet base, mosaic tiles, grout.
- Glue tiles onto the base in a pattern, leaving small gaps.
- Let the glue dry, then press grout into all the gaps.
- Wipe the surface with a damp sponge and polish when dry.
Tip: Pre-cut glass mosaic tiles skip the nipping step, which keeps this beginner-friendly.
27. Wire word art
Easy Meter 8.5/10: 1 hr · Under $10 · Low mess · Some patience
Bend a single length of craft wire into a word like “home” or a name in cursive, and you have minimal wall art or a gift topper. It’s like handwriting in 3D.
You’ll need: craft wire, pliers, pencil.
- Write the word in large cursive on paper as a guide.
- Bend the wire along the letters with pliers, keeping one continuous line.
- Trim the ends and hang it with a small nail or tape.
Tip: Use 14 to 18 gauge aluminum wire. It’s stiff enough to hold shape but easy to bend.
28. Yarn tassel garland
Easy Meter 10/10: 1 hr · Under $10 · Low mess · First-timer
Bright yarn tassels on a string instantly dress up a shelf, a mirror or a party table. Once you make one, the rest go fast.
You’ll need: yarn, scissors, cardboard, twine or string.
- Wrap yarn around a piece of cardboard about 40 times.
- Tie the top loop, slide it off, wrap and tie the neck, then cut the bottom loops.
- Thread all the tassels onto twine and space them evenly.
Tip: Trim all the tassels to the same length at the end for a polished look.
Paper and book crafts
Paper is the cheapest craft supply there is. These easy adult crafts and grown up craft ideas turn it into sculpture, art and tiny books.
29. Folded book art
Easy Meter 7.5/10: Half day · Under $10 · Low mess · Some patience
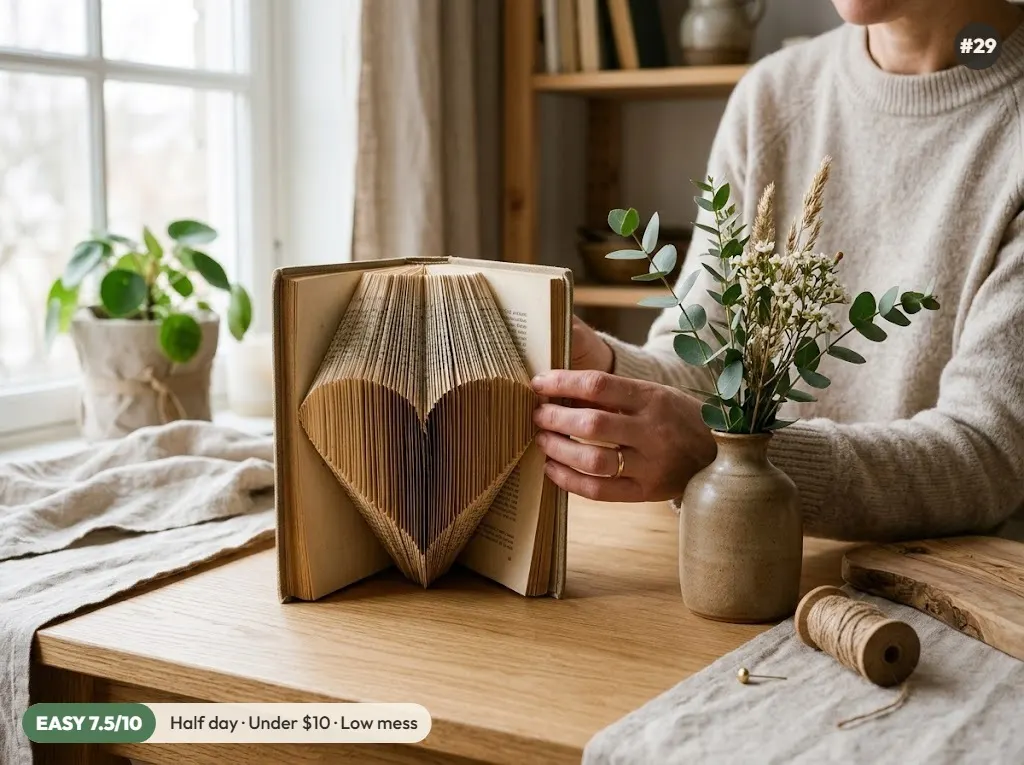
Book folding turns the pages of an old hardcover into a sculpted heart, initial or word. A free pattern tells you exactly where to fold each page, so it’s mostly patience.
You’ll need: old books or magazines, ruler, pencil, printable book folding pattern.
- Choose a hardcover with enough pages for your pattern.
- Mark the measurements from the pattern on each page.
- Fold the corners of each page at the marks, one page at a time.
Tip: Thrift store books cost a dollar or two. Pick one with plain, sturdy pages.
30. Crepe paper flowers
Easy Meter 9.5/10: 1 hr · $10 to $25 · Low mess · First-timer
Crepe paper stretches and cups like real petals, so a peony or ranunculus looks surprisingly lifelike. They never wilt and make a lovely bouquet for any season.
You’ll need: scissors, white craft glue, craft wire, crepe paper, floral wire and tape.
- Cut petals with the grain running from base to tip.
- Gently stretch each petal’s center to cup it.
- Wrap petals around a wire stem and secure with floral tape.
Tip: Stretch the edges, not the center, for ruffled petals.
31. Papercut shadow box
Easy Meter 7.5/10: 2 hrs · $10 to $25 · Low mess · Some patience
Layers of cut paper stacked with spacers create a 3D scene, like a forest or mountain range. Slip fairy lights behind and it glows like a tiny theater.
You’ll need: paper or cardstock, craft knife, white craft glue, cardboard, deep picture frame, battery LED fairy lights.
- Draw 4 to 6 layers of a scene, each with a different horizon line.
- Cut each layer with a craft knife.
- Stack them with foam or cardboard spacers inside a deep frame and add lights.
Tip: Change your knife blade often. Fresh blades cut cleaner and are actually safer.
32. Magazine collage postcards
Easy Meter 9/10: 1 hr · Under $10 · Some mess · First-timer
Collage is a no-pressure way to make art. Cut colors, textures and words from old magazines and arrange them into postcards you’ll actually mail.
You’ll need: old books or magazines, scissors, white craft glue, paper or cardstock.
- Cut a stack of cardstock to postcard size.
- Cut shapes, faces, colors and words from magazines.
- Arrange, glue and press flat under a heavy book.
Tip: Limit yourself to two or three colors per card. The constraint makes them look intentional.
33. One-page mini zine
Easy Meter 10/10: 30 min · Under $10 · Low mess · First-timer
A zine is a tiny handmade magazine. One sheet of paper folds into an eight-page booklet about anything: your favorite recipes, a city guide or a comic.
You’ll need: paper or cardstock, scissors, markers or paint pens.
- Fold a sheet into eight panels and cut a slit along the middle fold.
- Fold it into a booklet.
- Fill the pages with drawings, writing or collage, then photocopy to share.
Tip: Plan your pages on scrap paper first. Page order gets confusing once it’s folded.
34. Brush-lettered quote print
Easy Meter 8.5/10: 1 hr · Under $10 · Low mess · Some patience
Brush lettering uses thin upstrokes and thick downstrokes to make handwriting look like calligraphy. A framed favorite quote is a great first project.
You’ll need: paper or cardstock, pencil, brush pens.
- Practice basic strokes: light pressure up, heavy pressure down.
- Pencil the quote lightly to plan spacing.
- Letter it slowly with a brush pen and erase the pencil once dry.
Tip: Write slower than feels natural. Speed is what makes strokes wobbly.
35. Book nook diorama
Easy Meter 6.5/10: Half day · $25+ · Low mess · Some patience
Book nooks are miniature alleyways or libraries that slot between books on a shelf, often with tiny lights. Kits include every precut piece, so it’s like a grown-up model kit.
You’ll need: white craft glue, craft knife, book nook kit.
- Sort and label the pieces before you start.
- Build the frame, then the floors and details, following the steps in order.
- Add the light kit and slide it onto your shelf.
Tip: Use tweezers and a little craft glue for tiny parts. Too much glue warps thin wood.
Upcycled crafts from things you’d throw away
Tin cans, old T-shirts, bottles and corks get a second life. Many of these DIY crafts for adults cost close to nothing, which makes them the best easy crafts for adults on a budget.
36. Punched tin can lanterns
Easy Meter 10/10: 1 hr · Under $10 · Low mess · First-timer
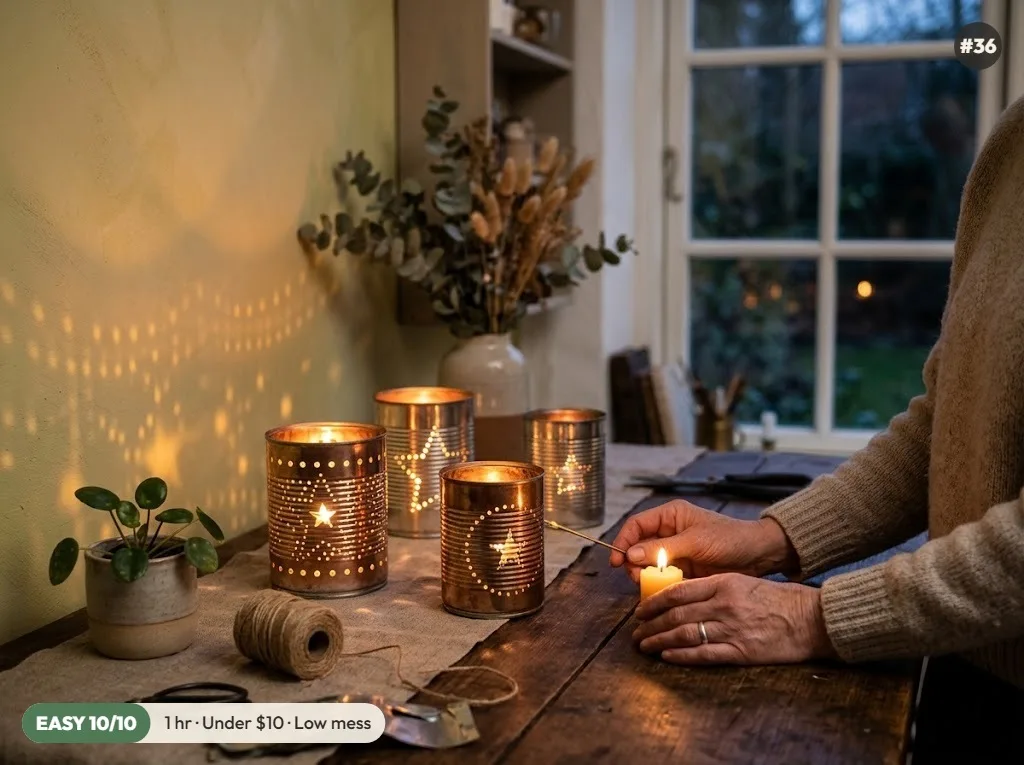
Freeze water in a clean tin can so it holds its shape, then hammer a pattern of holes. Add a tea light and the light spills out in stars and dots.
You’ll need: tin cans, hammer and nails, pencil, tea lights or LED candles.
- Fill a clean can with water and freeze it solid.
- Tape a paper pattern around it and hammer nail holes along the lines.
- Let the ice melt, dry the can and add an LED or tea light.
Tip: Cut edges are sharp. File or cover the rim, and use LED candles if kids or pets are around.
37. T-shirt yarn and a woven trivet
Easy Meter 10/10: 1 hr · Under $10 · Low mess · First-timer
Old T-shirts cut into one continuous strip become stretchy, chunky yarn. Weave or braid it into trivets, mats or baskets and give worn-out tees a second life.
You’ll need: old t-shirts, scissors, cardboard.
- Cut a T-shirt into one long strip by cutting in a spiral.
- Stretch the strip so it curls into round yarn.
- Weave it on a cardboard square or braid and coil it into a mat.
Tip: Shirts without side seams give the longest, cleanest strips.
38. Twine-wrapped bottle vases
Easy Meter 10/10: 1 hr · Under $10 · Low mess · First-timer
Wrap empty glass bottles in jute twine or yarn and they become rustic bud vases. Leave bands of glass showing for a modern look.
You’ll need: hot glue gun, twine or string, scissors, glass jars or bottles.
- Clean the bottle and remove the label.
- Glue the twine end at the base and wrap upward in tight rows.
- Glue every few rounds and finish neatly at the neck.
Tip: Group three bottles of different heights for an instant centerpiece.
39. Wine cork message board
Easy Meter 10/10: 1 hr · Under $10 · Low mess · First-timer
Saved corks glued in a herringbone or grid pattern inside an old frame become a pinboard for photos, notes and recipes. It’s a satisfying use for a jar of corks.
You’ll need: hot glue gun, craft knife, old picture frame or cork board base, saved wine corks.
- Remove the glass from a frame and glue a cardboard or wood backing in place.
- Halve the corks lengthwise with a serrated knife.
- Glue them in tight rows or a herringbone pattern, flat side down.
Tip: Ask a local restaurant for their used corks if you don’t have a stash.
40. Picture frame jewelry organizer
Easy Meter 10/10: 1 hr · Under $10 · Low mess · First-timer
An old frame with the glass removed and chicken wire stretched across the back makes a farmhouse-style organizer for earrings and necklaces.
You’ll need: hot glue gun, pliers, acrylic paint, paintbrushes, old picture frame, chicken wire or lace, small hooks.
- Remove the glass and backing and paint the frame.
- Cut chicken wire or lace to size and glue or staple it to the back.
- Screw small hooks along the bottom for necklaces.
Tip: Wear gloves when cutting chicken wire. The cut ends are sharp.
All 40 easy crafts for adults at a glance
All 40 easy crafts for adults, sorted from easiest to most involved. Use it to pick a project that fits tonight’s time and budget.
| Craft | Time | Cost | Mess | Easy Meter |
|---|---|---|---|---|
| Sashiko visible mending | 1 hr | Under $10 | Low mess | 10 |
| Origami lucky star jar | 1 hr | Under $10 | Low mess | 10 |
| Pamphlet-stitch notebook | 1 hr | Under $10 | Low mess | 10 |
| Yarn tassel garland | 1 hr | Under $10 | Low mess | 10 |
| One-page mini zine | 30 min | Under $10 | Low mess | 10 |
| Punched tin can lanterns | 1 hr | Under $10 | Low mess | 10 |
| T-shirt yarn and a woven trivet | 1 hr | Under $10 | Low mess | 10 |
| Twine-wrapped bottle vases | 1 hr | Under $10 | Low mess | 10 |
| Wine cork message board | 1 hr | Under $10 | Low mess | 10 |
| Picture frame jewelry organizer | 1 hr | Under $10 | Low mess | 10 |
| Mini weaving on a cardboard loom | 2 hrs | Under $10 | Low mess | 9.5 |
| Etched glassware | 1 hr | $10 to $25 | Low mess | 9.5 |
| Cyanotype sun prints | 1 hr | $10 to $25 | Low mess | 9.5 |
| No-sew leather card holder | 1 hr | $10 to $25 | Low mess | 9.5 |
| Coiled rope bowl | 1 hr | $10 to $25 | Low mess | 9.5 |
| Crepe paper flowers | 1 hr | $10 to $25 | Low mess | 9.5 |
| Punch needle mini wall hanging | 2 hrs | $10 to $25 | Low mess | 9 |
| Dot mandala stones | 1 hr | Under $10 | Some mess | 9 |
| Leaf-printed tea towels | 1 hr | Under $10 | Some mess | 9 |
| Magazine collage postcards | 1 hr | Under $10 | Some mess | 9 |
| Gel plate monoprints | 1 hr | $10 to $25 | Some mess | 8.5 |
| Alcohol ink abstract art | 30 min | $10 to $25 | Some mess | 8.5 |
| Carved eraser stamps | 1 hr | Under $10 | Low mess | 8.5 |
| Faux stained glass window art | 2 hrs | Under $10 | Some mess | 8.5 |
| Beeswax food wraps | 1 hr | $10 to $25 | Some mess | 8.5 |
| Wire word art | 1 hr | Under $10 | Low mess | 8.5 |
| Brush-lettered quote print | 1 hr | Under $10 | Low mess | 8.5 |
| Paper quilling monogram | 2 hrs | Under $10 | Low mess | 8 |
| Shaving cream marbled paper | 30 min | Under $10 | Messy | 8 |
| Dried orange slice garland | Half day | Under $10 | Some mess | 8 |
| Avocado-dyed napkins | Half day | Under $10 | Some mess | 8 |
| Needle felted mini animal | 2 hrs | $10 to $25 | Low mess | 7.5 |
| Acrylic paint pour canvases | 1 hr | $10 to $25 | Messy | 7.5 |
| Kokedama moss ball plants | 1 hr | $10 to $25 | Messy | 7.5 |
| Wood burned spoon or cutting board | 2 hrs | $10 to $25 | Low mess | 7.5 |
| Folded book art | Half day | Under $10 | Low mess | 7.5 |
| Papercut shadow box | 2 hrs | $10 to $25 | Low mess | 7.5 |
| Mosaic tile trivet | 2 hrs | $10 to $25 | Messy | 7 |
| Mini concrete planters | Half day | $10 to $25 | Messy | 6.5 |
| Book nook diorama | Half day | $25+ | Low mess | 6.5 |
The craft matrix: pick by time and mess
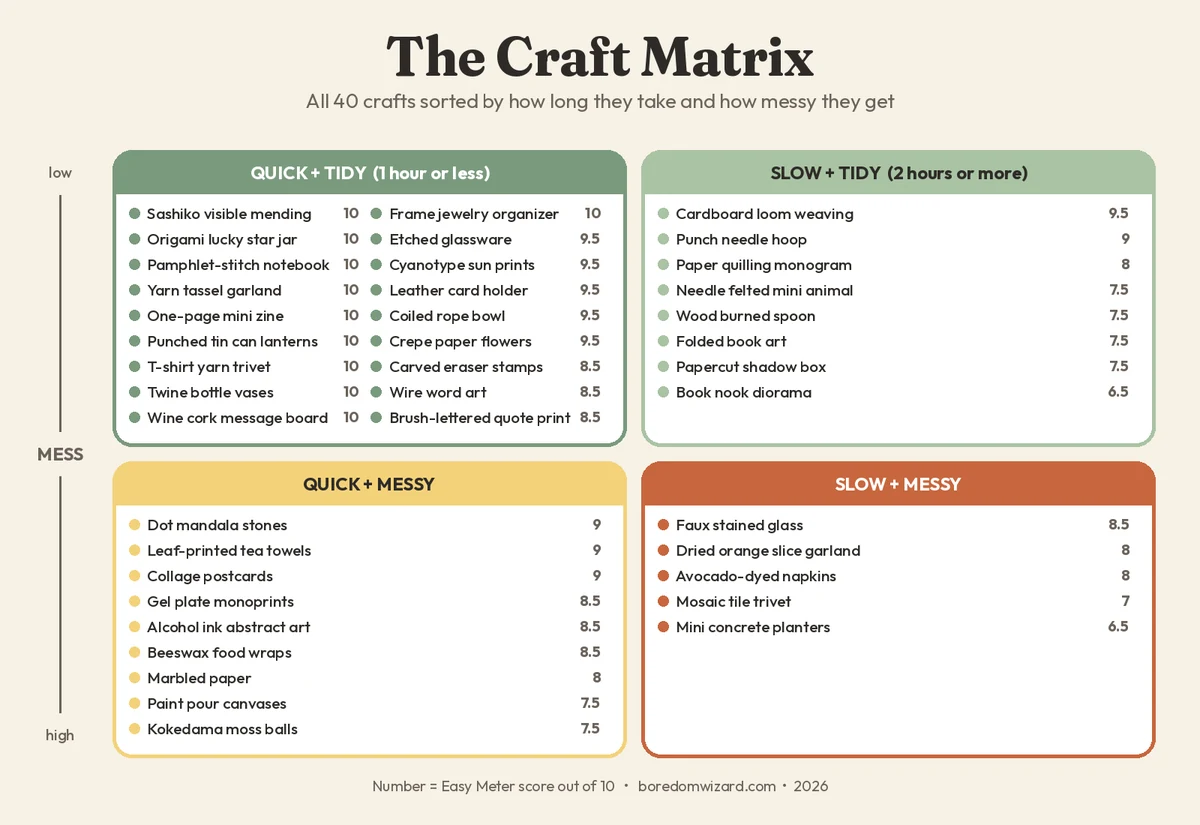
Use the matrix to narrow down crafting ideas for adults fast. Only have an hour and a clean table? Stay in the quick and tidy corner with sashiko, lucky stars or a pamphlet notebook. Got a free Saturday and don’t mind cleanup? Mosaic trivets and concrete planters are worth the wait.
Why crafting is good for adults
Arts and crafts projects for adults aren’t just a nice way to pass the time. A 2024 study of more than 7,000 people in England found that those who did arts and crafts reported higher life satisfaction, more happiness and a stronger sense that life is worthwhile, even after accounting for factors like health and employment, as Frontiers in Public Health reported. The researchers note the study shows a link rather than proof of cause, but the takeaway is encouraging: craft activities for adults are time well spent.
How to start crafting as an adult
Pick, set up and finish your first easy craft in one sitting.
Total Time: 60 minutes
Check your stash
Tick what you own in the Stash Matcher to find crafts you can start without shopping.
Pick a 9 or 10
Choose a craft that scores 9 or higher on the Easy Meter for your first project.
Set up a tray
Gather everything on one tray or baking sheet so setup and cleanup take two minutes.
Finish in one sitting
Pick something you can complete today. A finished small project beats an abandoned big one.
Keep making
Found your craft? Go deeper with our guides to candle making, air dry clay, pottery, embroidery for beginners, crochet for beginners and pressed flower art. Crafting with friends? Try our girls night craft ideas. Want to earn from your hobby? See crafts to make and sell, or take the hobby quiz to find your next obsession.
Easy crafts for adults FAQ
What are the easiest crafts for adults?
Origami lucky stars, a one-page zine, a pamphlet-stitch notebook, punched tin can lanterns and twine-wrapped bottle vases all score 10/10 on our Easy Meter. They take an hour or less and cost under $10.
What crafts can adults do at home with no supplies?
With just paper, scissors and a pencil you can fold origami lucky stars, make a mini zine or cut magazine collage postcards. Old T-shirts become T-shirt yarn, and tin cans become lanterns.
What is a relaxing craft for adults?
Repetitive crafts are the most relaxing: punch needle, sashiko mending, dot mandala stones, cardboard-loom weaving and paper quilling all have a steady rhythm that helps you unwind.
What are good craft ideas for adults on a budget?
Dried orange garlands, tin can lanterns, collage postcards, lucky star jars and cork boards all cost under $10, using things you’d otherwise throw away.
What are good adult craft ideas for beginners?
Start with anything that scores 9 or higher on the Easy Meter, like crepe paper flowers, a coiled rope bowl or cyanotype sun prints. They look impressive but forgive mistakes.
What crafts can adults make as gifts?
Leather card holders, wood burned spoons, etched glasses, beeswax wraps, leaf-printed tea towels and mosaic trivets all make useful, personal gifts.
What are fun crafts for adults to do with friends?
Paint pouring, gel plate printing and shaving cream marbling are messy and social. For a full party plan, see our girls night craft ideas.
Are arts and crafts good for mental health?
Research links crafting with higher life satisfaction and happiness. A 2024 study of over 7,000 adults found crafters reported feeling their lives were more worthwhile, though it shows a link rather than proof of cause.
What craft supplies should a beginner buy first?
Start with scissors, a pencil, paper or cardstock, white glue, a ruler, twine, a craft knife and acrylic paint. Those basics cover a big share of beginner projects.
What is the Easy Meter?
It’s our 10-point score for how beginner-friendly a craft is. Every craft starts at 10 and loses points for extra time, cost, mess and patience.
How long do easy crafts take?
Most crafts in this guide take one to two hours. A few, like dried orange garlands and concrete planters, need a half day mostly because of drying or baking time.