55 Candle Making Ideas With Materials, Cost and the One Mistake to Avoid (2026)
Every candle making ideas list on the internet does the same thing — shows you twenty pretty candle photos, writes two sentences underneath each one, and expects you to figure out the rest. No wax type. No cost. No mention of what went wrong when the candle tunnelled, the scent vanished, or the wick drowned after the first burn.
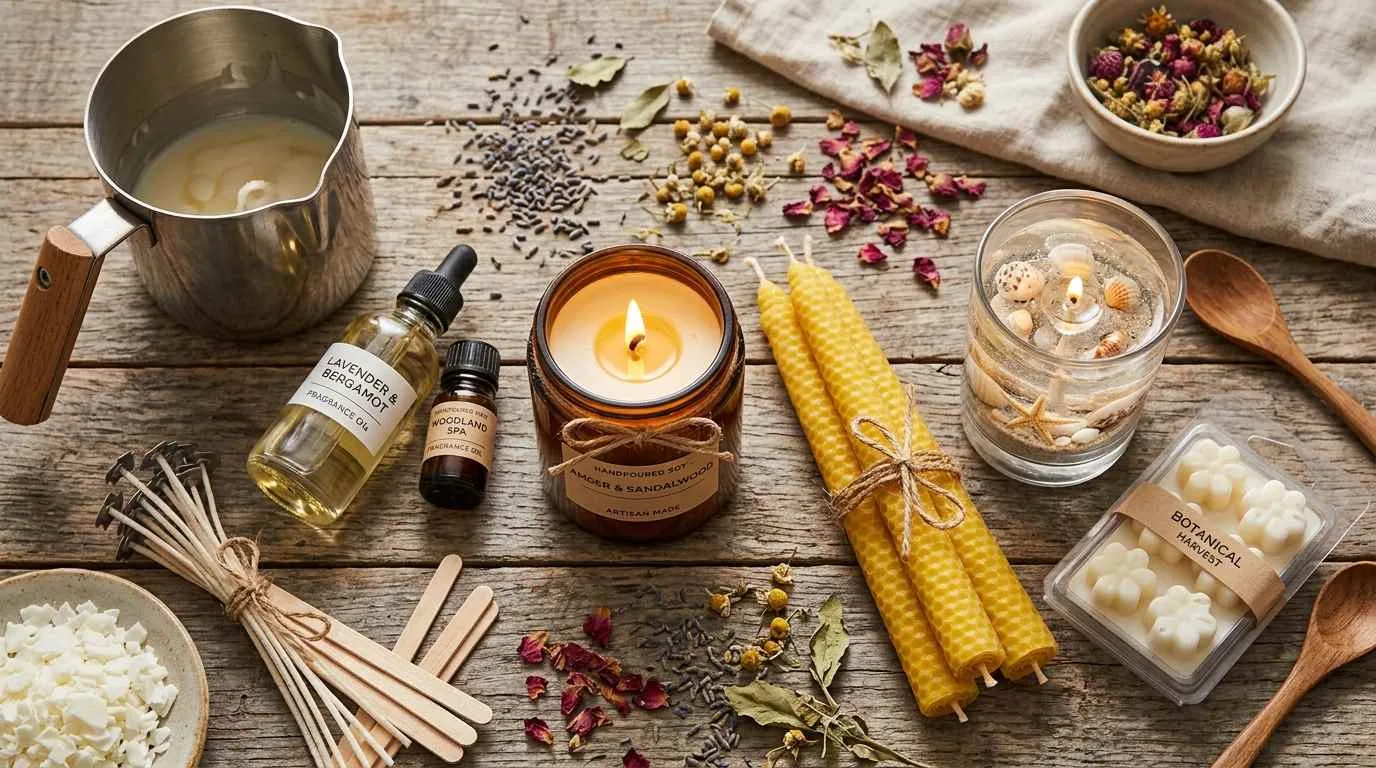
This guide is different. Every idea below includes the wax type, the supplies you need, a realistic cost range, and the one mistake that ruins the project. They’re sorted by wax type and difficulty so you can jump straight to the section that matches your experience level and your budget. Whether you’re pouring your first soy jar on a Tuesday night or sculpting a beeswax taper for a wedding centrepiece, there’s a project here that works.
If candle making sounds like your kind of creative escape, you’ll also love our full list of DIY projects at home — it covers everything from resin art to embroidery for when you want to switch gears.
Essential Candle Making Supplies (Quick Reference)
Before you pick a project, here’s what every candle maker needs regardless of wax type. Each idea below lists project-specific supplies, but these are the universals.
- Wax ($5–20/lb): Soy (beginner-friendly, clean burn), beeswax (natural honey scent, expensive), paraffin (strong scent throw, cheapest), gel (transparent, decorative), coconut (luxury feel, blends well). Buy in bulk to drop the per-candle cost below $2.
- Wicks ($3–8/pack): Cotton-core for soy and paraffin. Wood wicks for crackling effect. Pre-tabbed wicks save time. The most critical variable — wrong wick size = tunnelling or drowning.
- Fragrance oils ($6–15/bottle): Use 6–10% fragrance load for soy, 8–12% for paraffin. Essential oils work but throw weaker scent. Always add fragrance at the recommended temperature (usually 185°F / 85°C) — too hot burns off the scent.
- Containers ($1–15): Mason jars, tins, ceramic pots, teacups, concrete vessels. Must be heat-resistant. Dollar store finds work fine.
- Dye ($4–10): Liquid dye for soy, dye blocks for paraffin, mica powder for shimmer. A little goes far — start with one drop per pound.
- Tools ($8–15 total): Double boiler or pouring pitcher, thermometer, wick centering tool (or two pencils and tape), scale for measuring wax.
Easy Candle Making Ideas for Beginners
Starting from zero? These ten projects use forgiving wax types, simple techniques, and containers you probably already own. Every one can be completed in under two hours with no prior experience. If you’re looking for more beginner-friendly creative hobbies to try alongside candle making, we’ve got you covered.
1. Classic Soy Mason Jar Candle
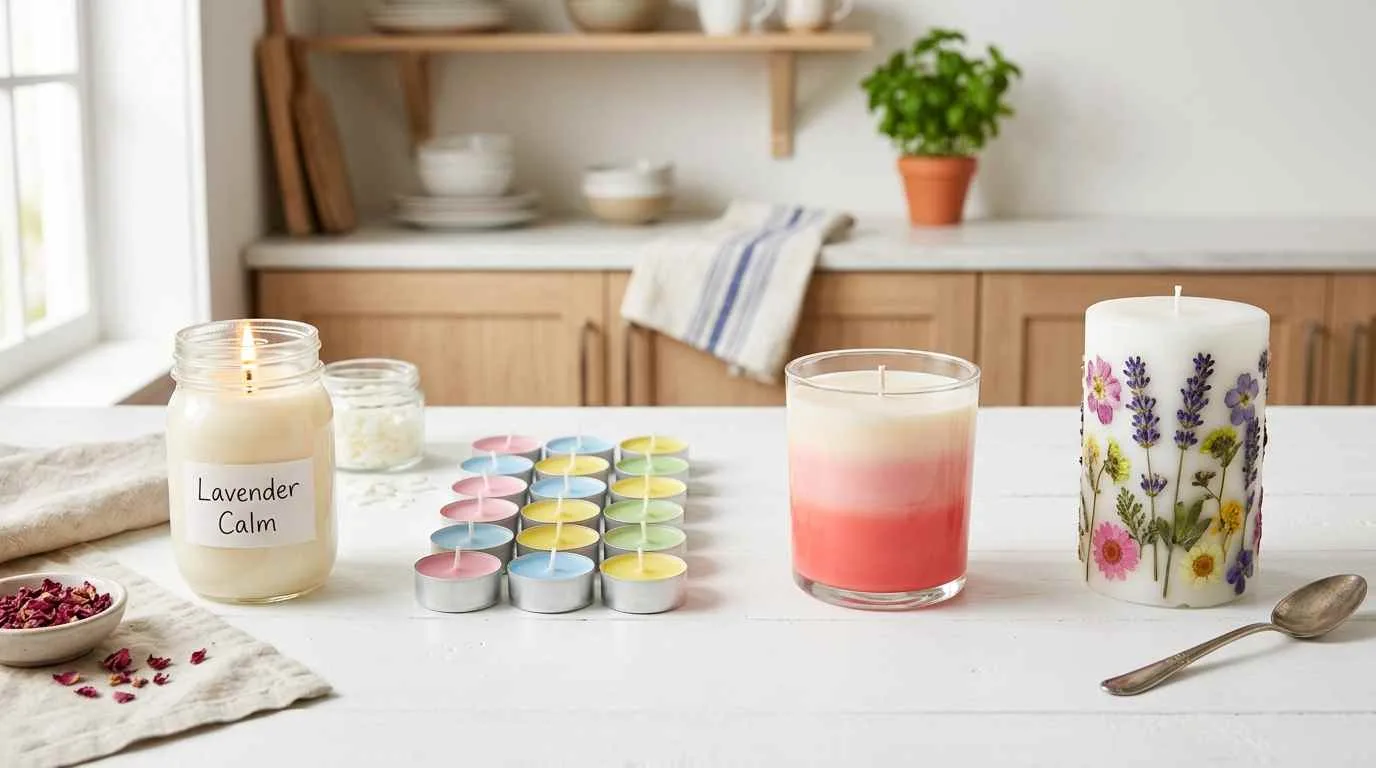
The starter project every candle maker should begin with. A wide-mouth mason jar, soy wax flakes, a pre-tabbed cotton wick, and your favourite fragrance oil. Soy wax is the most forgiving — it melts at a low temperature, cleans up with soap and water, and gives you a long, even burn. This is the project that teaches you temperature control, wick centring, and pour technique before you move to anything fancier.
Wax: Soy wax flakes. Cost: $4–8 per candle. Difficulty: 1/5.
Mistake to avoid: Pouring too hot. Soy wax should be poured at 120–140°F (49–60°C). Pour hotter and you get sinkholes, rough tops, and poor scent throw.
2. Upcycled Tin Can Candle
Clean out a food tin (soup, tomato, coffee), peel the label, and pour a candle directly into it. The industrial look works in kitchens, workshops, and outdoor spaces. Sand the sharp rim edge with fine sandpaper for safety. These make fantastic gifts when you add a hand-stamped label and a lid cut from cardboard.
Wax: Soy or paraffin. Cost: $2–5 per candle. Difficulty: 1/5.
Mistake to avoid: Forgetting to check the tin is food-grade. Some decorative tins have coatings that release fumes when heated. Stick to food tins you’ve eaten from.
3. Tea Light Candles (Bulk Batch)
Buy aluminium tea light cups in bulk (100 for under $5 online), melt a pound of soy or paraffin, add fragrance, and pour 20–30 tea lights in one session. This teaches you batch production — the rhythm of pour, wick, cool that every serious candle maker needs. Tea lights also make the best first gifts because people actually use them.
Wax: Paraffin (cleanest release from cups) or soy. Cost: $0.15–0.30 per tea light. Difficulty: 1/5.
Mistake to avoid: Using pre-cut wicks that are too long. Tea light wicks should be trimmed to 0.5cm above the wax surface. Too tall = flickering, soot, and fast burnout.
4. Crayon Chunk Candle
Chop old crayons into small chunks, scatter them into a container, and pour clear or white wax over them. As the candle burns, the crayon chunks melt into the pool creating a swirling colour effect. This is the ultimate kids-helped-me-make-it candle — the imperfection IS the aesthetic.
Wax: Paraffin (melts crayons cleanly). Cost: $3–6. Difficulty: 1/5.
Mistake to avoid: Using crayons AS the wax. Crayons clog wicks when used as the primary wax. Use them as decorative chunks only — max 10% of total wax weight.
5. Citronella Outdoor Candle
A large candle poured into a terracotta pot or a cleaned-out coconut shell, scented with citronella essential oil. Functional and decorative — these keep mosquitoes at bay on summer evenings. Pour a thick candle (at least 7cm deep) so it burns for hours. Add a wooden wick for that campfire crackle sound.
Wax: Soy or coconut wax blend. Cost: $5–10. Difficulty: 2/5.
Mistake to avoid: Skimping on citronella oil. You need 10–12% fragrance load for genuine insect-repellent strength. At 6%, it smells nice but doesn’t actually repel anything.
6. Floating Candles
Small, disc-shaped candles designed to float in a bowl of water. Use a muffin tin as your mould — each cup produces one floating candle. Add flower petals or floating greenery to the water bowl for a centrepiece that takes ten minutes to assemble but looks like it took all day.
Wax: Paraffin (harder, floats better than soy). Cost: $0.30–0.50 per candle. Difficulty: 2/5.
Mistake to avoid: Making them too thick. Floating candles should be no more than 3cm tall — heavier candles sink or tip. The disc shape keeps the centre of gravity low.
7. Pressed Flower Candle
Pour a plain pillar candle, let it set, then use a heat gun or a warm spoon to press dried flowers onto the exterior surface. The flowers embed into the softened wax and stay locked in place when it cools. Lavender, daisies, and fern fronds work best — anything flat that won’t catch fire near the flame.
Wax: Pillar-blend paraffin or beeswax. Cost: $5–12. Difficulty: 2/5.
Mistake to avoid: Placing flowers near the wick. Keep all botanicals on the outer 1cm of the candle. Dried flowers close to the flame are a fire hazard.
8. Coffee Bean Candle
Line the inside of a glass container with whole coffee beans pressed against the glass, then pour vanilla or hazelnut-scented soy wax inside. The heat from burning releases a faint coffee aroma that blends with the fragrance oil. This is the candle that makes people ask how you made it.
Wax: Soy. Cost: $5–9. Difficulty: 2/5.
Mistake to avoid: Using ground coffee instead of whole beans. Grounds in the wax pool clog the wick and create uneven burning. Whole beans stay decorative without interfering.
9. Layered Colour Candle
Pour wax in layers, adding a different dye colour to each layer. Let each layer cool and form a skin (about 20 minutes) before pouring the next. Three to five layers in complementary colours — ombre from dark at the bottom to light at the top looks the cleanest. This teaches you patience and temperature control.
Wax: Soy or paraffin. Cost: $5–10. Difficulty: 2/5.
Mistake to avoid: Pouring the next layer when the previous one is fully solid. The layers won’t bond and will separate when burning. Pour when the previous layer is firm but still slightly warm to touch.
10. Wax Melts (No Wick Needed)
Pour scented wax into silicone moulds (ice cube trays, candy moulds, or dedicated wax melt shapes) and pop them out when cool. No wick, no container, no burn time calculations. These are used in wax warmers and they’re the single easiest candle-adjacent project you can make. Excellent for testing fragrance blends before committing to a full candle.
Wax: Soy or coconut-soy blend. Cost: $0.20–0.50 per melt. Difficulty: 1/5.
Mistake to avoid: Using too much fragrance. Wax melts are heated gently in a warmer, so the scent throw is already strong. 6–8% fragrance load is plenty — more than that creates a cloying, headache-inducing room.
Soy Candle Ideas
Soy wax is the most popular choice for homemade candles and for good reason — it burns clean, holds fragrance well, and is easy to work with. These ideas go beyond the basic jar candle and explore what soy can really do.
11. Wood Wick Soy Candle
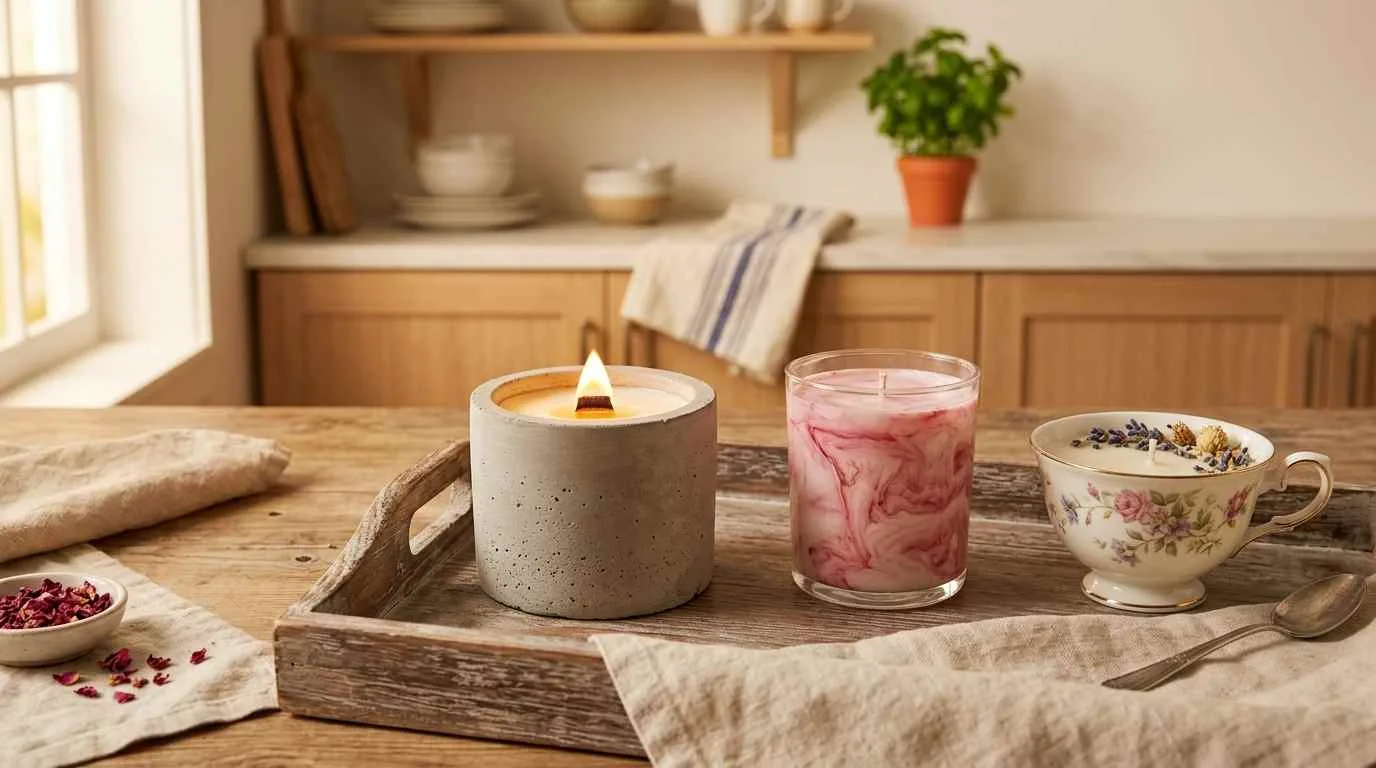
Swap the cotton wick for a wooden wick and your soy candle becomes an experience. Wood wicks create a soft crackling sound that mimics a fireplace — it’s auditory comfort that cotton wicks simply can’t replicate. Use a wide wood wick (the narrow ones extinguish easily) and trim to 3mm above the wax before each burn.
Cost: $6–10 per candle. Difficulty: 2/5.
Mistake to avoid: Buying thin wood wicks. They don’t generate enough heat to maintain a full melt pool in soy wax. Use booster-width or double-layered wood wicks.
12. Concrete Vessel Soy Candle
Mix quick-set concrete, pour into a silicone mould (a plastic cup works too), let it cure for 24 hours, then pour your soy candle inside the concrete vessel. The industrial-meets-cozy contrast is why these sell for $25–40 at craft markets. Sand the rim smooth and seal the interior with a thin coat of mod podge so the concrete doesn’t absorb the wax.
Cost: $4–8 per candle (concrete mix is cheap). Difficulty: 3/5.
Mistake to avoid: Pouring wax before the concrete is fully cured. Damp concrete releases moisture that creates bubbles in the wax and weakens the vessel. Wait a full 48 hours.
13. Soy Candle with Dried Herb Topping
Pour a plain soy candle, then scatter dried herbs, flower buds, or lavender sprigs on top of the still-soft wax. The result is an apothecary-style candle that looks like it belongs in a boutique. Rosemary, chamomile, and rose petals are the most photogenic options. Keep botanicals around the outer edge only.
Cost: $5–9 per candle. Difficulty: 2/5.
Mistake to avoid: Piling herbs in the centre near the wick. Dried botanicals are flammable. Keep them around the rim where the flame won’t reach, and trim any that curl inward as the candle burns down.
14. Marbled Soy Candle
Melt two batches of soy wax to different colours. Pour one colour into the container, then immediately pour the second colour in a thin stream. Use a skewer to swirl them together — two or three strokes maximum. Restraint is everything here. Overswirl and you get a muddy single colour. Underswirl and you get stunning marble veins.
Cost: $6–10. Difficulty: 3/5.
Mistake to avoid: Letting the first colour set before adding the second. Both batches must be liquid and at the same temperature. Pour the second within 30 seconds of the first.
15. Whipped Soy Candle
Pour soy wax into a bowl and whip it with a fork or hand mixer as it cools. The wax transforms into a fluffy, frosting-like texture that you can scoop into containers. Top a regular candle with the whipped wax for a dessert-style finish, or fill a decorative teacup for a candle that looks like hot cocoa with whipped cream.
Cost: $5–8. Difficulty: 2/5.
Mistake to avoid: Whipping too early. If the wax is still fully liquid, it won’t hold texture. Wait until it’s opaque and starting to thicken (around 100°F / 38°C) before whipping.
16. Three-Wick Soy Candle
A large container (a salad bowl, a pie dish, or a wide ceramic pot) with three wicks spaced evenly. Three wicks create a full melt pool across a wide surface, which means stronger scent throw and a more dramatic flame display. These are statement pieces for coffee tables and dining rooms.
Cost: $10–18. Difficulty: 3/5.
Mistake to avoid: Spacing wicks too close together. Each wick needs its own 7–8cm diameter zone. Too close and the flames merge, overheat the wax, and create a fire hazard. Too far apart and you get unmelted wax between them.
17. Soy Candle in a Vintage Teacup
Thrift-store teacups with ornate patterns make stunning candle vessels. The saucer catches drips and doubles as a decorative base. These are the bestseller at every craft fair because the container is worth more than the candle — people buy them for the cup and the candle is a bonus.
Cost: $3–8 per candle. Difficulty: 2/5.
Mistake to avoid: Not pre-heating the teacup. Cold porcelain can crack when hot wax hits it. Warm the cup in the oven at 150°F (65°C) for ten minutes before pouring.
18. Soy Candle with Embedded Crystal
Pour soy wax, wait until it’s partially set, then press a small crystal (amethyst, rose quartz, or clear quartz) into the surface. The crystal is both decorative and a keepsake — once the candle burns down, the crystal remains. Pair the crystal meaning with the scent: rose quartz with rose fragrance, amethyst with lavender.
Cost: $7–14. Difficulty: 2/5.
Mistake to avoid: Using large crystals in small candles. A heavy crystal can tip a wick or sink into the melt pool. Use tumbled stones under 2cm for containers smaller than 300ml.
Beeswax Candle Ideas
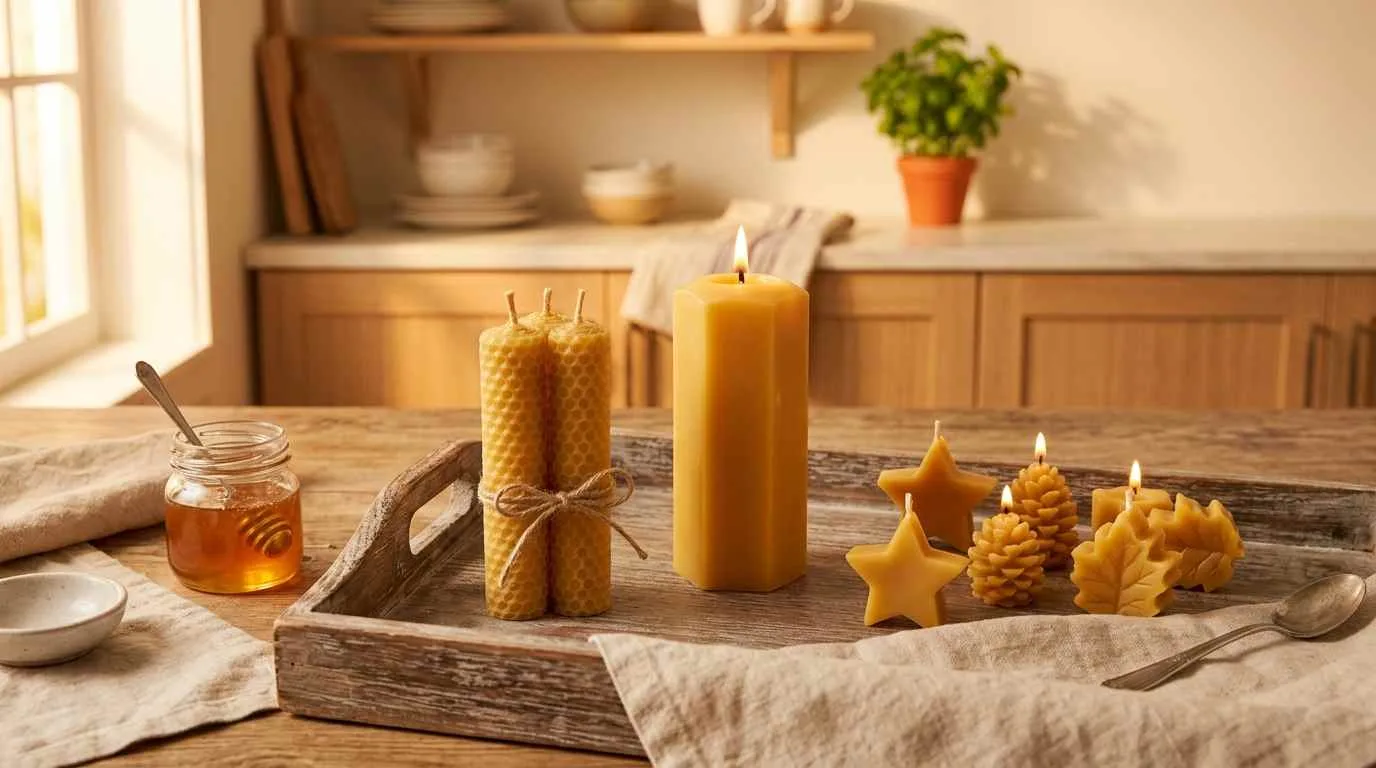
Beeswax is the premium choice — it burns longer than any other natural wax, produces a warm honey aroma without added fragrance, and purifies the air by releasing negative ions. The trade-off is cost (roughly 3× the price of soy) and a higher melting point that demands more attention to temperature.
19. Rolled Beeswax Taper Candles
Buy beeswax sheets (honeycomb-textured sheets sold at craft stores), lay a wick along one edge, and roll tightly. That’s it — no melting, no pouring, no thermometer. You can make a pair of taper candles in under five minutes. These are the single fastest candle project in existence and they look expensive because beeswax has that natural honeycomb texture.
Cost: $3–6 per pair. Difficulty: 1/5.
Mistake to avoid: Rolling loosely. A loose roll creates air gaps that cause uneven burning and the candle collapses on itself. Press firmly as you roll and keep the base edge flat.
20. Beeswax Pillar Candle (Moulded)
Melt beeswax pellets, pour into a pillar mould (metal or silicone), and let it cool for six to eight hours. Beeswax pillars burn for an absurdly long time — a 10cm pillar can burn for 50+ hours. The natural golden colour and subtle honey scent mean these need zero fragrance or dye to be impressive.
Cost: $8–15 per candle. Difficulty: 3/5.
Mistake to avoid: Demoulding too early. Beeswax shrinks significantly as it cools. If you pull it from the mould before it’s fully hardened (at least 8 hours), it cracks. Be patient.
21. Beeswax Birthday Candles
Roll thin beeswax sheets around birthday candle wicks to create hand-rolled birthday candles. Use sheets in different colours for a rainbow set. They burn cleaner and longer than the cheap paraffin birthday candles from the supermarket, and making them is a ten-minute project you can do with kids.
Cost: $0.30–0.50 per candle. Difficulty: 1/5.
Mistake to avoid: Using sheets that are too cold. Cold beeswax sheets crack when you try to roll them. Warm them with a hairdryer for 10 seconds until they’re pliable.
22. Dipped Beeswax Taper Candles
The traditional method. Hang a wick from a dowel, dip it into melted beeswax, let it cool, dip again. Repeat 20–30 times until the taper reaches your desired thickness. The process is meditative and the result is a hand-dipped candle with slightly uneven layers that scream handmade authenticity. These make wedding-calibre table candles.
Cost: $5–10 per pair. Difficulty: 3/5.
Mistake to avoid: Dipping too fast. Each dip needs to be slow — one second in, one second out. Fast dipping doesn’t allow enough wax to adhere, so you’ll dip 50 times instead of 25.
23. Beeswax Ornament Candles
Pour beeswax into small silicone moulds shaped like stars, hearts, pinecones, or animals. Insert a wick before pouring, or leave them wickless as decorative wax ornaments. These double as Christmas tree decorations (without a wick) or tiny gift candles (with a wick). Buy a multi-shape mould pack for variety.
Cost: $1–3 per ornament. Difficulty: 2/5.
Mistake to avoid: Overfilling moulds. Beeswax expands slightly as it sets. Fill to 90% capacity and the candle will level off perfectly as it cools.
24. Beeswax Ear Candles — Don’t (A Safety Note)
We’re including this specifically to tell you NOT to make ear candles. They don’t work (studies show they don’t remove earwax), they’re dangerous (hot wax dripping into the ear canal), and the FDA has taken action against manufacturers making medical claims. If you see “beeswax ear candle” on a tutorial list, close the page. Stick to candles that sit on a table.
Gel Candle Ideas
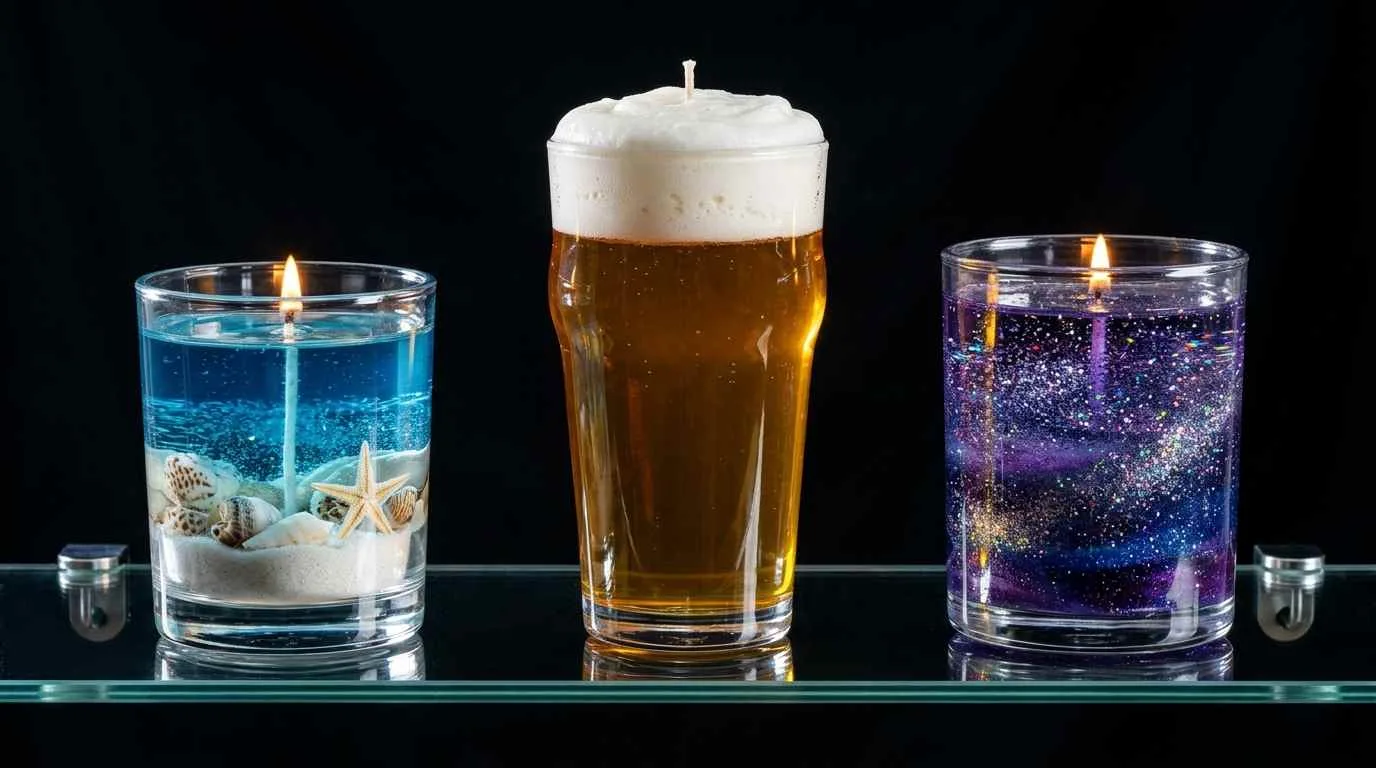
Gel wax is transparent — and that changes everything. Where soy and beeswax hide their interiors, gel candles PUT their interiors on display. Embedded objects, layered colours, and underwater scenes all become possible when your wax is see-through. Gel burns slower than soy (up to twice as long per ounce) but requires gel-specific fragrance oils and zinc-core wicks.
25. Ocean Scene Gel Candle
Layer blue-tinted gel wax in a clear glass container with white sand at the bottom, tiny seashells, and a miniature plastic sea creature. The transparent gel looks like water, and the embedded objects appear to float at different depths. This is the candle that stops people in their tracks — it looks impossible.
Cost: $8–15. Difficulty: 3/5.
Mistake to avoid: Using regular fragrance oils. Gel wax requires gel-safe fragrance oils — standard oils cloud the gel and can cause the candle to leak. Check the label before buying.
26. Beer Glass Gel Candle
Pour amber-tinted gel wax into a pint glass to about three-quarters full. When it’s almost set, use a chopstick to create tiny bubbles near the surface. Top with whipped white wax (see idea #15) to create a foam head. The finished candle looks exactly like a pint of beer. These are the most popular novelty candles at craft fairs and Father’s Day is their peak season.
Cost: $6–10. Difficulty: 3/5.
Mistake to avoid: Using yellow dye instead of amber. Yellow gel looks like cooking oil. Amber dye (or a mix of yellow + tiny amount of brown) is what gives the beer-glass illusion.
27. Fruit Slice Gel Candle
Embed wax fruit slices (purchased or hand-made from coloured paraffin) into clear gel wax poured in a wide glass bowl. Lemon slices, orange wedges, and lime rounds work best. Pair with a matching citrus fragrance — lemon verbena, blood orange, or grapefruit. The candle doubles as kitchen décor.
Cost: $8–12. Difficulty: 3/5.
Mistake to avoid: Using real fruit. Real fruit releases moisture into the gel, causes mould, and can catch fire. Only use wax or plastic replicas.
28. Terrarium-Style Gel Candle
Fill a clear glass vessel with small pebbles, artificial moss, and tiny plastic figurines (animals, mushrooms, or fairy garden pieces), then pour clear gel over everything. The result looks like a terrarium trapped in crystal — all the charm with zero watering required. If you love this aesthetic, check out our full terrarium ideas guide for the living version.
Cost: $10–18. Difficulty: 3/5.
Mistake to avoid: Pouring gel too fast. Fast pours trap air bubbles that cloud the gel permanently. Pour in a thin, steady stream and tap the container gently to release bubbles.
29. Galaxy Gel Candle
Layer gel wax in purple, deep blue, and black tints. Between layers, sprinkle fine glitter (cosmetic-grade, not craft glitter) and tiny star-shaped sequins. The finished candle looks like deep space in a jar — nebulae, star fields, and cosmic depth. Use a lavender or midnight-jasmine fragrance to complete the celestial theme.
Cost: $8–14. Difficulty: 3/5.
Mistake to avoid: Using craft glitter. It’s not heat-safe and can release microplastics. Cosmetic-grade or candle-specific glitter is rated for heat exposure.
30. Wine Glass Gel Candle
Pour red-tinted gel wax into a wine glass. The clear stem and base make the candle look like a glass of red wine frozen in time. Add a black cherry or merlot fragrance for the full sensory illusion. Place the wick off-centre toward the back so the flame doesn’t obscure the wine illusion from the front.
Cost: $5–9. Difficulty: 2/5.
Mistake to avoid: Using a wine glass that’s too thin. Thin glass can crack from heat stress. Use thicker restaurant-grade wine glasses or thrift-store finds with heavier bases.
Creative and Unique Candle Making Ideas
Once you’ve mastered the basics, these projects push into techniques and designs that most candle makers never try. Every one of these is a conversation starter — the kind of candle people photograph before they burn. If you’re always hunting for unique hobbies that go beyond the ordinary, candle sculpting and carving are exactly that.
31. Ice Candle (Swiss Cheese Effect)
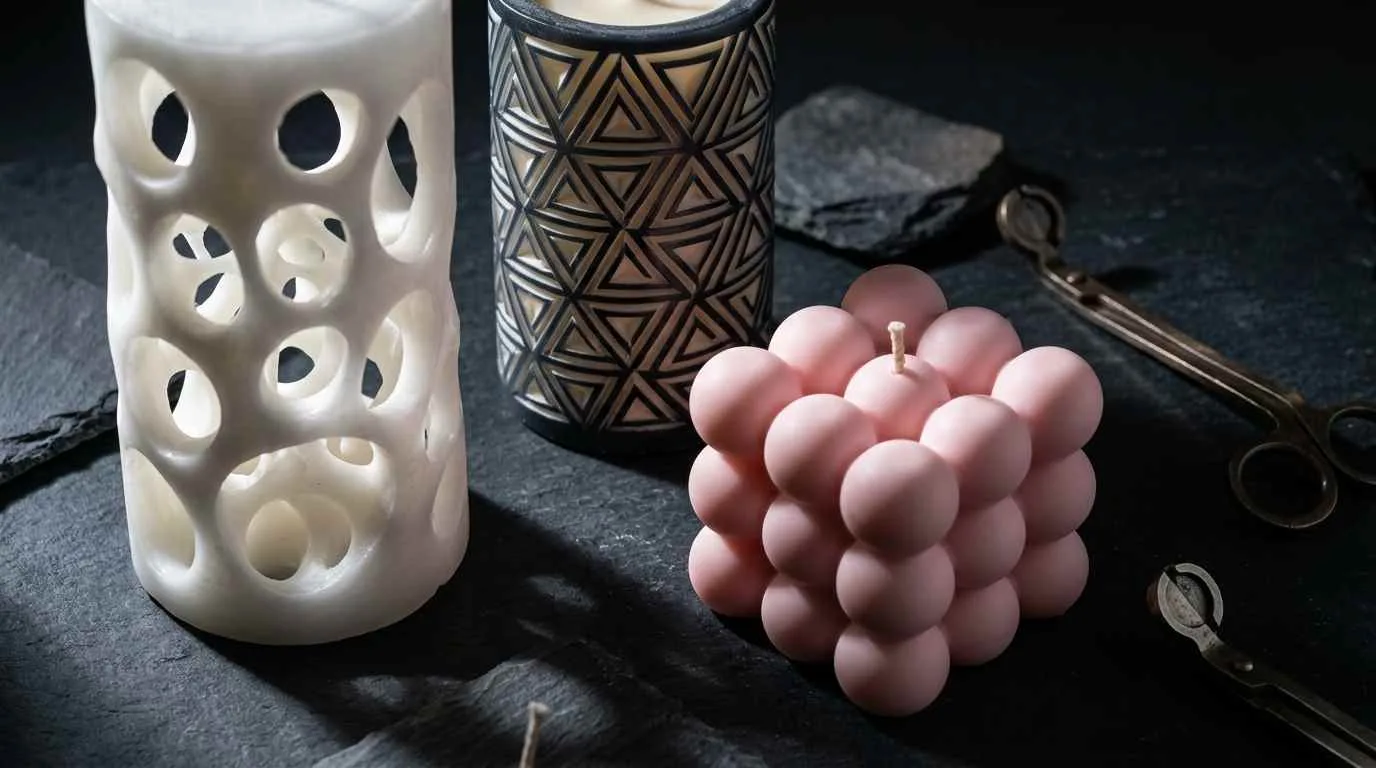
Place a taper candle in the centre of a milk carton, fill the carton with ice cubes, and pour hot paraffin wax over the ice. As the ice melts, it creates holes and tunnels throughout the wax. Drain the water, peel away the carton, and you’re left with a dramatic, organic-looking pillar with a lace-like structure. The taper inside serves as the primary wick.
Wax: Paraffin (hardens firmly around ice). Cost: $5–8. Difficulty: 3/5.
Mistake to avoid: Not draining the water completely. Water trapped inside the wax will sputter and pop when the candle burns. Turn the candle upside down for an hour after demoulding.
32. Sand Candle
Fill a bucket with damp sand, push a shape into it (your fist, a bowl, or a carved design), and pour hot wax directly into the sand impression. The wax bonds with a thin layer of sand on the outside, creating a rustic, textured shell. These look like they were formed by nature — rough-hewn, earthy, and completely unique every time.
Wax: Paraffin. Cost: $3–6. Difficulty: 2/5.
Mistake to avoid: Using dry sand. The sand must be damp enough to hold its shape (like sandcastle consistency). Dry sand collapses when you pour the wax.
33. Carved Pillar Candle
Pour a thick pillar candle, then carve designs into the surface with linoleum cutting tools or a heated craft knife. Geometric patterns, botanical motifs, or your initials — the carving reveals the lighter wax interior beneath a coloured exterior. This is the candle equivalent of printmaking.
Wax: Hard paraffin with dye. Cost: $5–10. Difficulty: 4/5.
Mistake to avoid: Carving too deep. Go no deeper than 3–4mm or you’ll weaken the candle structure. The candle should burn FROM the wick, not collapse through a thin wall.
34. Cinnamon Stick Candle
Line the outside of a pillar candle (or a jar candle) with whole cinnamon sticks held in place with a rubber band or twine. When the candle burns, the heat gently warms the cinnamon, releasing a natural spice scent that blends with whatever fragrance you used in the wax. This is a five-minute upgrade that turns a $4 candle into a $15 gift.
Wax: Any. Cost: $5–10. Difficulty: 1/5.
Mistake to avoid: Not securing the sticks tightly. Loose cinnamon sticks fall off as the candle shrinks while burning. Tie them with twine in two places — near the top and near the bottom.
35. Cement-Dipped Taper Candle
Dip the bottom half of a standard taper candle into a thin cement slurry (quick-set cement mixed to a runny consistency). Let it dry for 24 hours. The result is a half-elegant, half-industrial taper that looks like something from a design museum gift shop. Use white or pastel tapers for the best contrast against grey cement.
Cost: $3–6 per candle. Difficulty: 2/5.
Mistake to avoid: Making the cement layer too thick. A thick coat cracks as it dries. Dip once for a thin, even coating — not twice.
36. Candle in a Fruit (Temporary)
Hollow out an orange, lemon, or apple, fill with melted wax, and insert a wick. The fruit skin acts as a natural container and releases its own scent as the candle warms it. These last only one to three burns before the fruit dries out — they’re made for a specific evening, not a shelf. Perfect for dinner parties where everything on the table is edible or ephemeral.
Wax: Soy or coconut. Cost: $2–4. Difficulty: 2/5.
Mistake to avoid: Hollowing too thin. Leave at least 1cm of fruit wall or the heat will soften it to the point of collapse. Set the fruit on a small plate to catch any wax if it does fail.
37. Hidden Message Candle
Pour wax halfway up a container, place a small metal charm, a rolled-up paper message (in a metal holder — not bare paper), or a piece of jewellery on the set wax, then pour the second half over it. As the candle burns down, the hidden object is revealed. These are the basis of an entire candle business category — the surprise candle.
Wax: Soy (safe for embedding objects). Cost: $8–25 depending on the hidden object. Difficulty: 2/5.
Mistake to avoid: Using flammable hidden objects. The message or charm must be metal, glass, or ceramic. Paper must be in a metal tube or foil wrap — bare paper near a wick is a fire hazard.
38. Bubble Candle (Sculptural)
Pour wax into a silicone bubble mould — the kind that creates a cluster of spheres stacked together. The finished candle looks like a molecule model or a bunch of grapes. These have exploded on TikTok and Instagram because they’re sculptural objects first and candles second. Pastel colours (sage green, dusty rose, soft lavender) photograph best.
Wax: Soy-paraffin blend (holds detail better than pure soy). Cost: $4–9. Difficulty: 2/5.
Mistake to avoid: Using pure soy in a detail mould. Soy is too soft and crumbles during demoulding. A soy-paraffin blend (70/30) holds shape and still burns clean.
Candle Making Ideas for Gifts and Selling
Making candles for yourself is satisfying. Making candles that other people pay money for is a different skill set — it requires consistency, presentation, and an understanding of what people actually want to buy (hint: it’s not what you’d make for yourself). If you’re thinking about turning candle making into income, our guide on crafts to make and sell breaks down the business side.
39. Gift Set Trio (Three Scents)
Three small soy candles (100ml tins or 4oz jars) in complementary scents, packaged in a kraft box with tissue paper and a printed label. Morning (citrus), Afternoon (green tea), and Evening (vanilla) is a classic trio. Gift sets sell for 40–60% more than three individual candles because the packaging does the selling.
Cost: $8–14 per set. Sells for: $25–40. Difficulty: 2/5.
Mistake to avoid: Choosing three scents that fight each other when sniffed together. Shoppers smell the whole set before buying — make sure the scents are pleasant as a group, not just individually.
40. Wedding Favour Candle
Small soy candles in 2oz tins with a custom label (the couple’s names, date, and a thank-you message). Order printed labels from an online label printer ($15–25 for 100 labels) and pour candles in bulk. At 50 cents per candle in materials, even a 200-guest wedding favour order is profitable.
Cost: $0.50–1.00 per favour. Sells for: $3–5 each. Difficulty: 2/5.
Mistake to avoid: Using fragrance that not everyone likes. For wedding favours, stick to universally pleasant scents — vanilla, fresh linen, or lavender. Skip divisive fragrances like patchouli or musk.
41. Seasonal Subscription Candle
Design four candles — one per season — and sell them as a quarterly subscription. Spring (cherry blossom), Summer (sea salt + coconut), Autumn (pumpkin spice + amber), Winter (pine + cinnamon). Subscribers get a new candle every three months with matching seasonal packaging. The subscription model provides predictable income — the holy grail for craft businesses.
Cost: $5–8 per candle. Sells for: $20–30 per quarter. Difficulty: 3/5.
42. Personalised Name Candle
A plain soy candle in a clear glass jar with the recipient’s name in vinyl lettering on the outside, or hand-painted in glass paint. Personalisation is the fastest way to turn a commodity ($8 candle) into a premium product ($20+ candle). Buy a vinyl cutter (Cricut or Silhouette) if you’re doing volume — it pays for itself within 30 orders.
Cost: $5–9 per candle. Sells for: $18–28. Difficulty: 2/5.
43. Candle-Making Kit Gift
Package all the supplies someone needs to make their own candle: pre-measured wax, a wick, a tin or jar, fragrance oil in a small dropper bottle, dye, and printed instructions. This is the meta-gift — you’re not giving them a candle, you’re giving them the experience. DIY kits sell for a premium because they include the instructions that raw supplies don’t.
Cost: $6–12 per kit. Sells for: $25–40. Difficulty: 2/5.
Mistake to avoid: Complicated instructions. Write for someone who has never made a candle. Five steps maximum, with photos. The more accessible the kit, the more five-star reviews it gets.
44. Charity Candle (Fundraiser Edition)
Partner with a local cause or school and create a branded candle where a portion of proceeds goes to the organisation. The organisation promotes it to their audience (free marketing for you) and you both benefit. This is the fastest way to build a candle brand from zero — cause marketing gives people a reason to buy from you instead of a big brand.
Cost: $4–7 per candle. Sells for: $15–22. Difficulty: 2/5.
Christmas and Holiday Candle Making Ideas
Candle making peaks during the holidays — gift-giving season and the time of year when people actually light candles regularly. These six ideas are designed for the November–December rush. Start now and you’ll have stock ready when the gift panic hits. For more seasonal planning, our fall bucket list and things to do during holiday guides have you covered.
45. Christmas Tree Candle
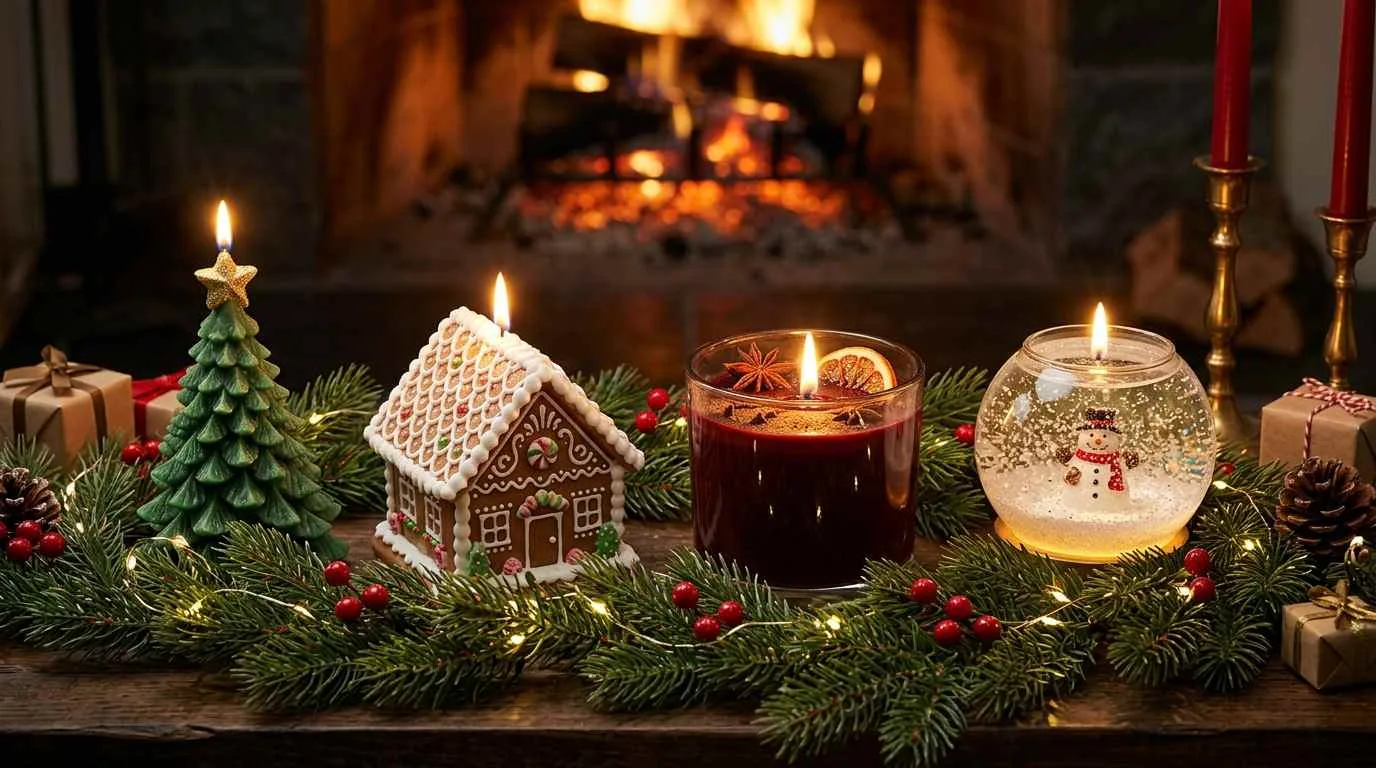
Pour green-tinted wax into a Christmas tree silicone mould, embed a gold star-shaped sequin at the top, and add pine or fir needle fragrance. These tiny (8–10cm) tree candles work as table place settings, stocking stuffers, or clustered together as a forest centrepiece. Pour a dozen in one batch — the mould does all the work.
Wax: Soy-paraffin blend (for mould detail). Cost: $2–4 each. Difficulty: 2/5.
46. Gingerbread House Candle
Use a miniature house silicone mould, brown-tinted wax, and gingerbread fragrance oil. Pipe white whipped wax on the edges to mimic icing. The scent throws powerfully in a warm room — people will think you’re actually baking gingerbread. These sell out instantly at holiday markets.
Wax: Soy-paraffin blend. Cost: $4–8. Difficulty: 3/5.
Mistake to avoid: Demoulding before 12 hours. House moulds have thin walls that crack if the wax hasn’t fully hardened. Overnight cooling is best.
47. Advent Countdown Candle
A tall pillar candle with 24 numbered marks on the side (one per day of December). Burn it to the next mark each day — a candle-based advent calendar. Mark the lines by pressing a heated ruler into the surface at even intervals and numbering with a gold paint pen. This is a tradition piece — families will buy it every year.
Wax: Beeswax or hard paraffin. Cost: $8–14. Difficulty: 3/5.
48. Snow Globe Candle
A clear gel candle with white glitter snow, a small ceramic figurine (a snowman, a deer, or a miniature house), and cool-blue tinting at the base fading to clear at the top. When the flame flickers, the glitter catches the light and the whole thing shimmers like a snow globe. This is the holiday candle that people keep even after it’s burned down.
Wax: Gel wax. Cost: $10–16. Difficulty: 3/5.
49. Mulled Wine Candle
A deep burgundy soy candle scented with a custom blend of cinnamon, clove, orange peel, and nutmeg fragrance oils. Drop a few whole star anise and dried orange slices on the surface. This candle IS the holidays — it fills a room with the smell of mulled wine without you having to uncork anything. Package it in a kraft bag with a cinnamon stick tied to the outside.
Wax: Soy. Cost: $6–10. Difficulty: 2/5.
50. Diwali Diya Candles
Small candles poured into traditional clay diya lamps (available at Indian grocery stores or online for under $1 each). Use jewel-toned wax — gold, red, orange, and magenta. These honour the festival of lights and make meaningful gifts for Diwali celebrations. Arrange five or seven diyas (odd numbers are traditional) in a circle for a table display.
Wax: Soy or coconut. Cost: $1–3 per diya. Difficulty: 1/5.
Candle Making Ideas for Kids
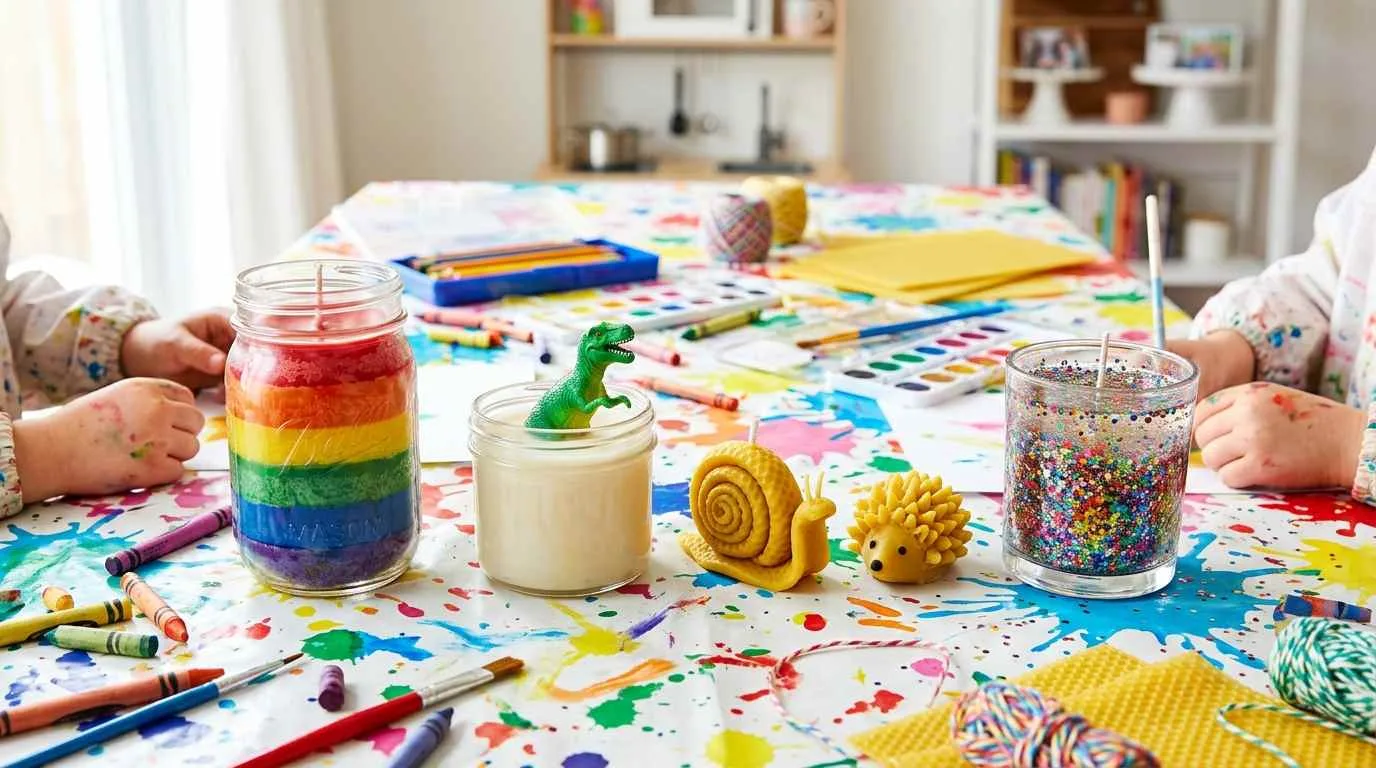
Candle making is a brilliant rainy-day activity for kids aged 8 and up (with adult supervision for the melting step). These five projects are designed for small hands — they minimise hot wax handling and maximise the creative parts kids actually enjoy. Looking for more screen-free activities? Our fun things to do when bored list has 150+ ideas sorted by mood.
51. Crayon Rainbow Candle
Kids sort old broken crayons by colour, an adult melts each colour separately in small batches, and the child layers them into a glass jar. The pouring is the adult’s job — the colour selection and layer order is all theirs. The finished candle is a rainbow in a jar and every kid will tell you exactly why they chose that specific colour order.
Cost: $3–5 (crayons you already have). Difficulty: 1/5 for kids.
52. Dinosaur Excavation Candle
Embed a small plastic dinosaur toy in a soy candle. As the candle burns over the next few days, the dinosaur slowly emerges from the wax — a palaeontological dig in candle form. Kids will check the candle every evening to see how much more of their dinosaur has been revealed. Pour the wax in two stages: half, place the dinosaur, then the other half.
Cost: $4–7. Difficulty: 1/5 for kids.
53. Rolled Beeswax Animals
Cut beeswax sheets into shapes and roll or fold them into animal forms — a snail (spiral roll), a caterpillar (stacked circles), a hedgehog (folded with snipped spines). No heat required. This is pure tactile crafting that develops fine motor skills. Provide a template and let kids cut and assemble. The beeswax is naturally sticky enough to hold shapes without glue.
Cost: $3–6. Difficulty: 2/5 for kids.
54. Glitter Jar Candle
A clear glass jar with biodegradable glitter mixed into soy wax. As the candle burns, the glitter in the melt pool catches the flame light and sparkles. Use pastel colours and unicorn-themed fragrance (cotton candy + vanilla) for maximum kid appeal. This is the candle that ends up on every kid’s nightstand — supervised burning only.
Cost: $5–8. Difficulty: 1/5 for kids.
Mistake to avoid: Using regular craft glitter. It’s not heat-safe and releases microplastics. Use biodegradable or candle-specific glitter rated for heat exposure.
55. Sand Art Candle
Layer coloured sand in a clear glass container (kids love choosing the colour order and creating patterns with a skewer), then an adult pours clear or lightly tinted wax over the top. The sand layers stay visible through the wax, creating a permanent sand art display with a candle on top. The wax seals the sand in place — no more knocking it over and losing the design.
Cost: $4–7. Difficulty: 1/5 for kids.
Candle Making Troubleshooting Guide
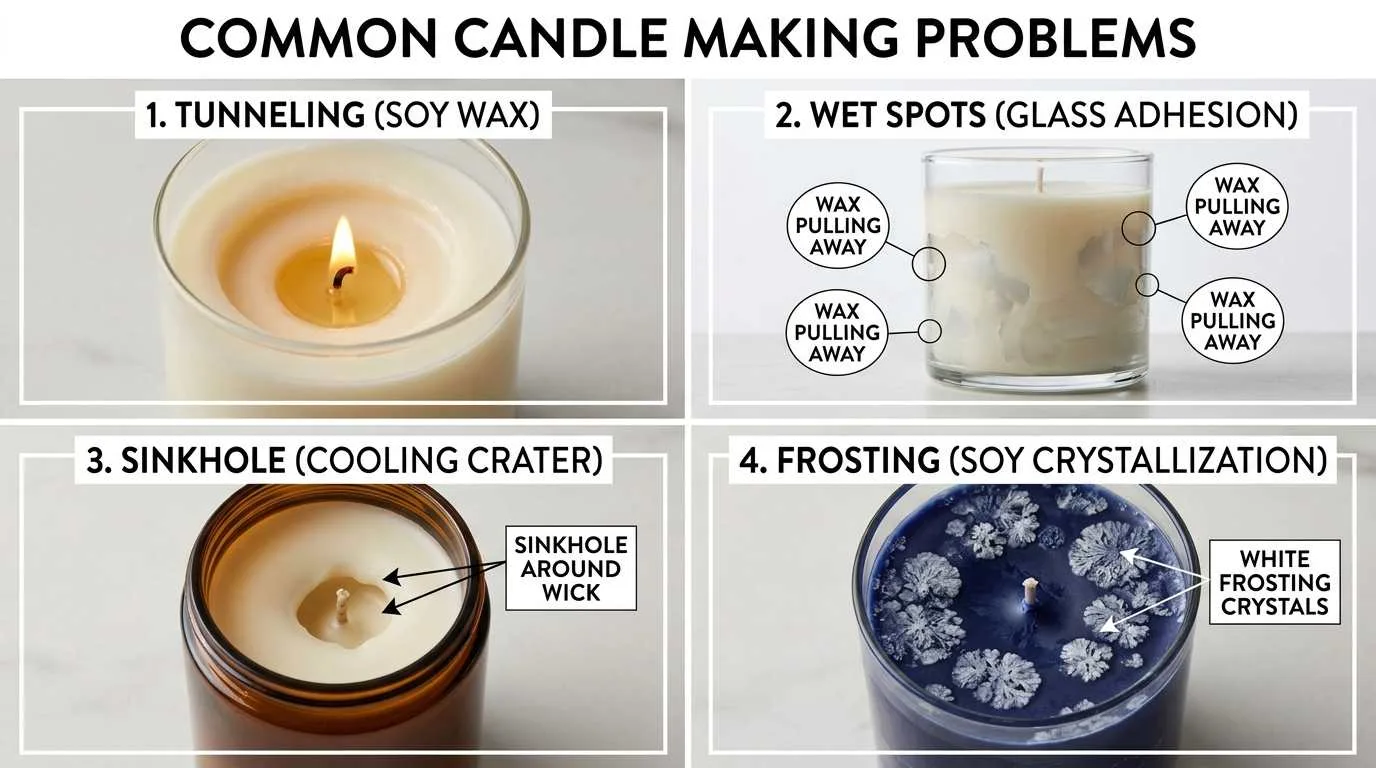
Every candle maker hits these problems. Here’s the fast fix for each one.
Tunnelling (Wax Only Melts Around the Wick)
Cause: Wick too small for the container diameter. The flame can’t generate enough heat to melt the wax to the edges.
Fix: On your next candle, size up one wick width. For the current candle, wrap aluminium foil around the top edge to reflect heat inward and force a full melt pool. Always burn until the melt pool reaches the edges on the first burn — this sets the ‘memory’ for every burn after.
Wet Spots (Patches Where Wax Pulls Away from Glass)
Cause: Wax cooling too fast and shrinking away from the container wall.
Fix: Pre-heat your containers. Pour at a lower temperature (closer to 120°F for soy). Cool candles slowly at room temperature — never in a fridge or freezer.
Weak Scent Throw
Cause: Fragrance added at the wrong temperature, too little fragrance oil, or not enough cure time.
Fix: Add fragrance at 185°F (85°C) for soy — this is the binding temperature. Use 8–10% fragrance load. Cure soy candles for at least 5–7 days before burning — the wax needs time to bond with the fragrance molecules.
Sinkholes (Craters Around the Wick)
Cause: Air trapped in the wax during cooling.
Fix: Poke relief holes around the wick with a chopstick after the first cooling, then do a second pour (top-off) with wax at 5°F lower than your original pour temperature.
Wick Drowning (Flame Goes Out on Its Own)
Cause: Wick too short, melt pool too deep, or wick not primed with wax.
Fix: Pour out some liquid wax to lower the pool level. On your next candle, use a longer wick and consider a harder wax that doesn’t melt as deeply.
Frosting (White Crystal Layer on Soy Candles)
Cause: Natural polymorphism in soy wax — it’s cosmetic, not a defect.
Fix: You can’t eliminate it completely with 100% soy wax. Pouring at a cooler temperature reduces it. If it bothers you, blend 10–15% coconut wax in — it produces a smoother finish.
Candle Making Ideas: FAQ
Is candle making cheaper than buying candles?
Yes, significantly — once you own the basics. A homemade soy candle costs $2–5 in materials. An equivalent store-bought candle runs $15–30. The upfront investment in supplies ($30–50 for a starter set) pays for itself within your first 10–15 candles.
What is the easiest candle to make for beginners?
A soy wax container candle in a mason jar. Soy is the most forgiving wax (low melt point, easy cleanup, no special equipment), and container candles don’t require moulds or demoulding. Start there and branch out after your first three or four successful burns.
How long do homemade candles last?
A 240ml (8oz) soy candle burns for approximately 40–50 hours. Beeswax burns even longer. Paraffin is the shortest at around 25–35 hours per 8oz. Burn time depends on wick size, wax type, and container diameter.
Can you make money selling homemade candles?
Yes — the handmade candle market is worth over $1 billion in the US alone. Your margins are strong (60–75% on materials) and the entry cost is low. The challenge isn’t making candles — it’s marketing, branding, and consistent quality. Start selling at local markets and Etsy before investing in a website.
What is the best wax for candle making?
It depends on your goal. Soy for everyday container candles (clean burn, good scent throw). Beeswax for premium pillars and tapers (longest burn, natural scent). Paraffin for moulds and strong scent (cheapest, best detail). Gel for decorative transparent candles. Coconut for luxury blends (smoothest finish, great scent). Most serious candle makers work with at least two wax types.
Do you need a licence to sell candles?
In the US and UK, you don’t need a specific candle-making licence, but you do need general business registration, product liability insurance, and compliance with safety labelling requirements (CLP in the UK/EU, ASTM in the US). You must test your candles for burn safety and include warning labels on every product.
More Creative Ideas from BoredomWizard
If candle making sparked something, these guides take the same creative energy in different directions:
- DIY Projects at Home — the full creative project hub from resin to embroidery
- Crafts to Make and Sell — turn your candle hobby into a side income
- Creative Hobbies — 40+ hands-on hobbies ranked by cost and commitment
- Hobbies to Do at Home — indoor projects for rainy days and quiet evenings
- Terrarium Ideas — another hands-on craft that creates a living display
- Scrapbook Ideas — document your candle-making journey visually
- Things to Do on Weekends — plan a weekend candle-making session with friends
- Girls Night Craft Ideas — candle pouring makes a perfect group activity