25+ Pressed Flower Ideas: Art, Crafts, Gifts and Projects That Actually Last (2026)
You spent two weeks pressing flowers between the pages of a dictionary, and now you have a stack of delicate petals sitting in wax paper with no plan for them. Sound familiar? Most pressed flower articles give you a Pinterest-style gallery of pretty pictures and zero practical guidance — no adhesive recommendations, no sealing methods, no mention of what happens when UV light fades your petals to brown within a month.
This guide covers 25+ pressed flower ideas organised by project type — framed art, home decor, paper crafts, wearable accessories, gifts, and kid-friendly projects. Every idea includes the materials that actually work, the technique that keeps your flowers from falling apart, and the common mistake that ruins the project. We also start with a complete how-to-press-flowers section, because the pressing method you choose determines which projects are even possible.
How to Press Flowers (The Foundation for Every Project Below)
The pressing method you use affects colour retention, petal thickness, and flexibility — all of which determine which projects your flowers will work for. A microwave-pressed flower is too brittle for resin jewellery. A book-pressed flower that wasn’t fully dry will mould inside a sealed frame. Get this step right and everything else is easy.
Method 1: Book Pressing (Best for Beginners)
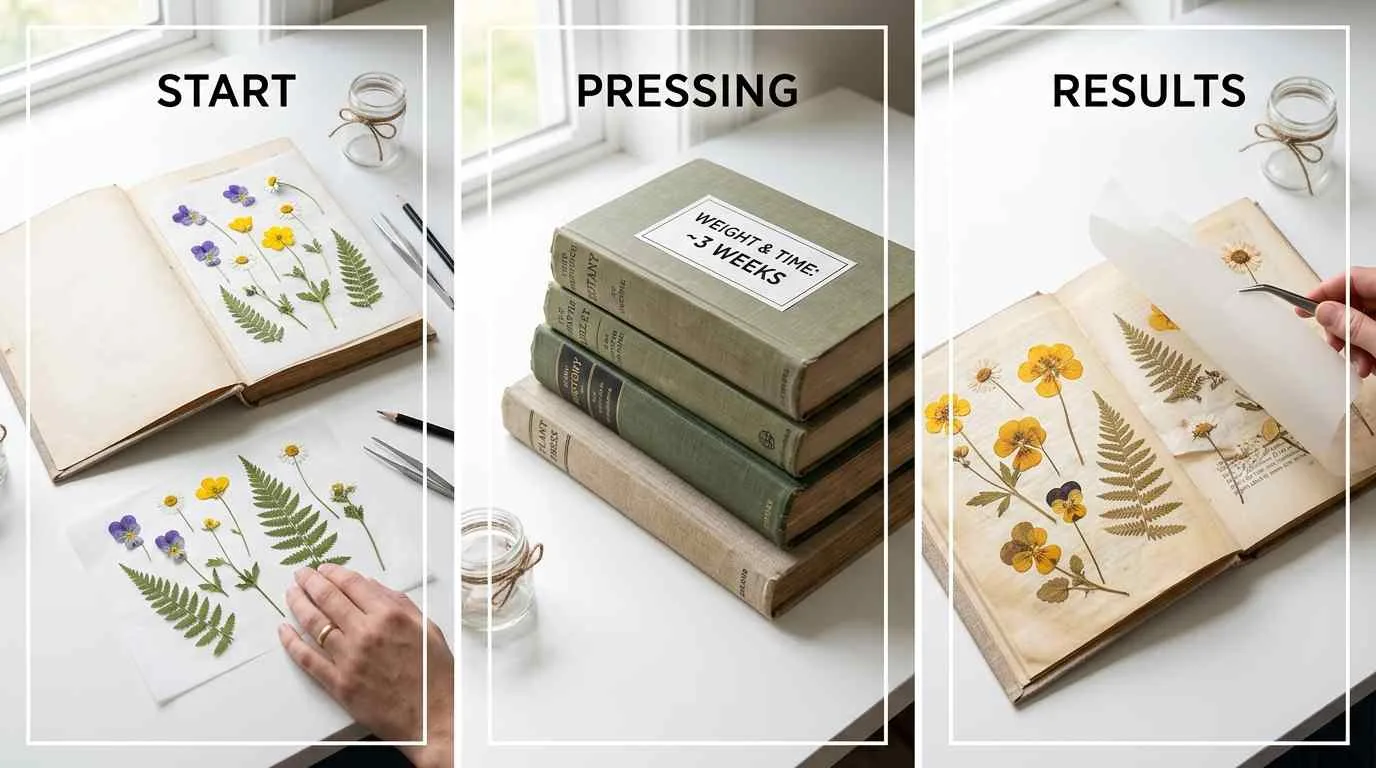
Place flowers between two sheets of parchment paper, tuck them inside a heavy book, and stack additional books on top for weight. The key detail most guides skip: use parchment paper, not printer paper. Regular paper absorbs moisture but also transfers dye and sometimes sticks to delicate petals. Parchment is non-stick and pulls away cleanly.
Timeline: 2–4 weeks for full drying. Thicker flowers like roses need the full four weeks. Flat flowers like pansies and violets are ready in two.
Best for: Framed art, cards, bookmarks, scrapbook pages — any project where the flower sits flat.
Method 2: Flower Press (Best Results Overall)
A dedicated flower press with tightening bolts applies even pressure across the entire surface. You can stack multiple layers with cardboard spacers between them and press a dozen flowers at once. Wooden presses cost $15–25 and last years, or you can build one from two pieces of plywood and four bolts for under $10.
Timeline: 1–3 weeks depending on petal thickness.
Best for: All projects. The even pressure produces the flattest, most consistent results.
Method 3: Microwave Pressing (Fastest)
Place flowers between parchment paper, sandwich between two ceramic tiles or microwave-safe plates, and microwave in 30-second bursts. Check between each burst — overheating turns petals brown. Total time is usually 2–3 minutes.
Timeline: Under 5 minutes.
Best for: Quick projects when you need pressed flowers today. Colours stay vivid because there’s less time for oxidation. Not ideal for thick or multi-layered blooms.
How long do pressed flowers last? Properly pressed and sealed flowers last 5–10 years indoors. The two enemies are UV light and humidity. Frames behind glass in indirect light last longest. Unsealed flowers exposed to direct sunlight fade noticeably within 3–6 months. A UV-resistant spray or resin coating extends life significantly.
Framed Pressed Flower art
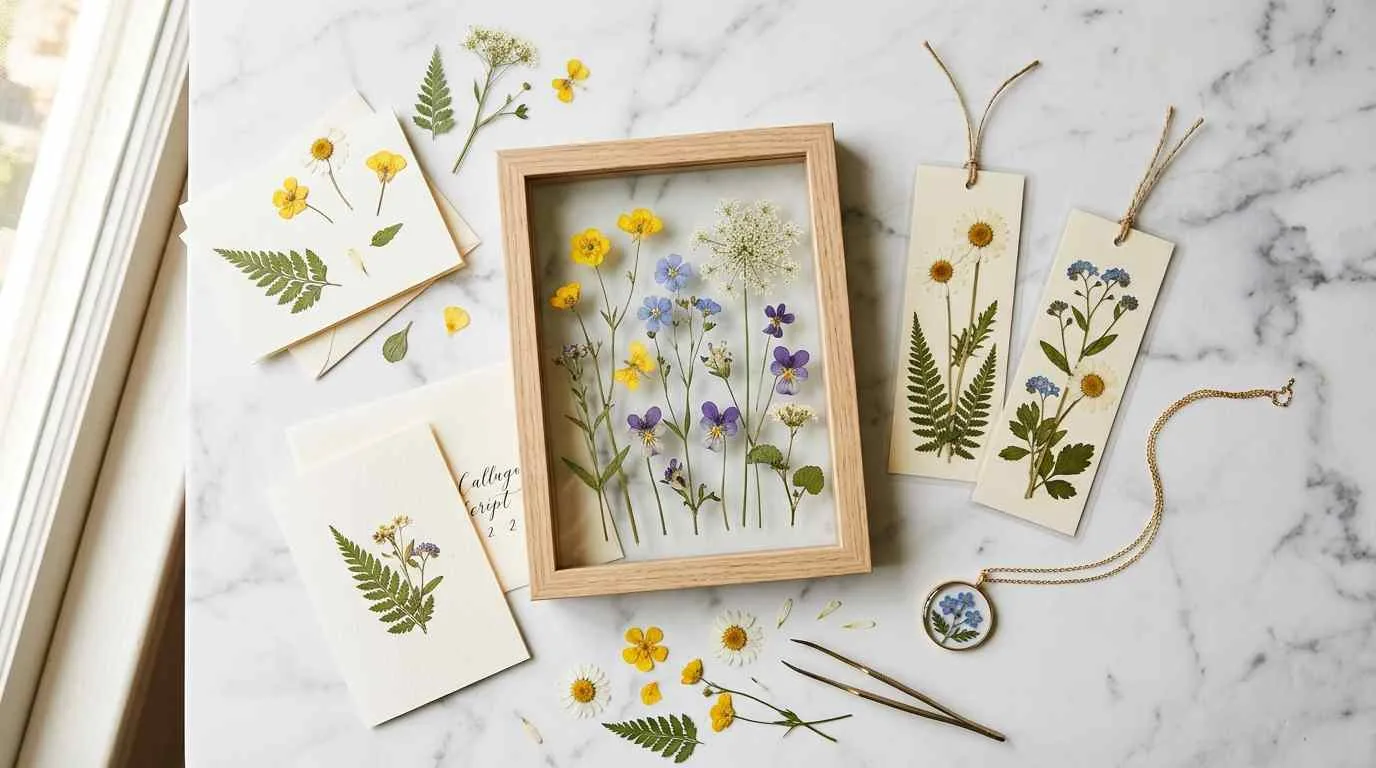
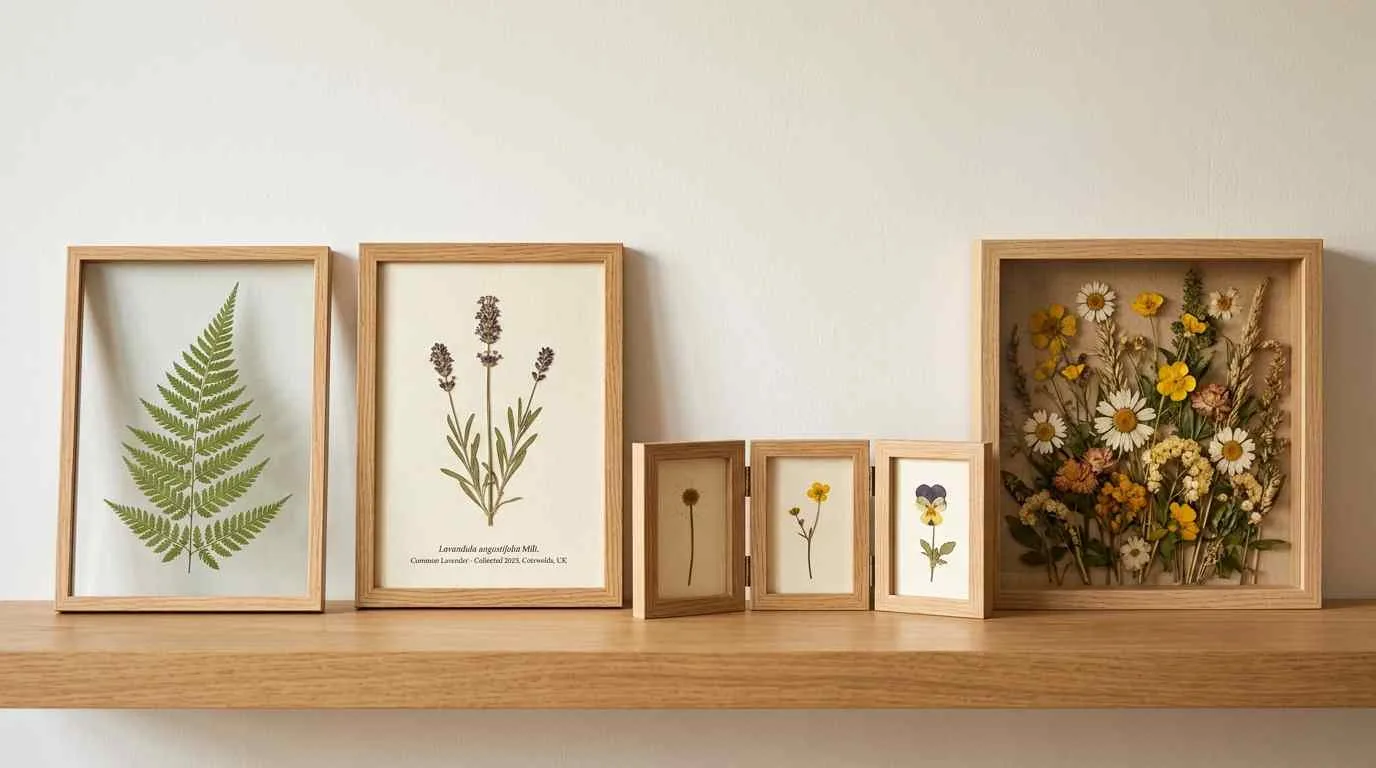
Framing is the most popular use for pressed flowers and the easiest to get right — as long as you choose the right type of frame and the right adhesive. The mistake most people make is using a regular photo frame with a solid backing, which traps moisture and causes mould over time.
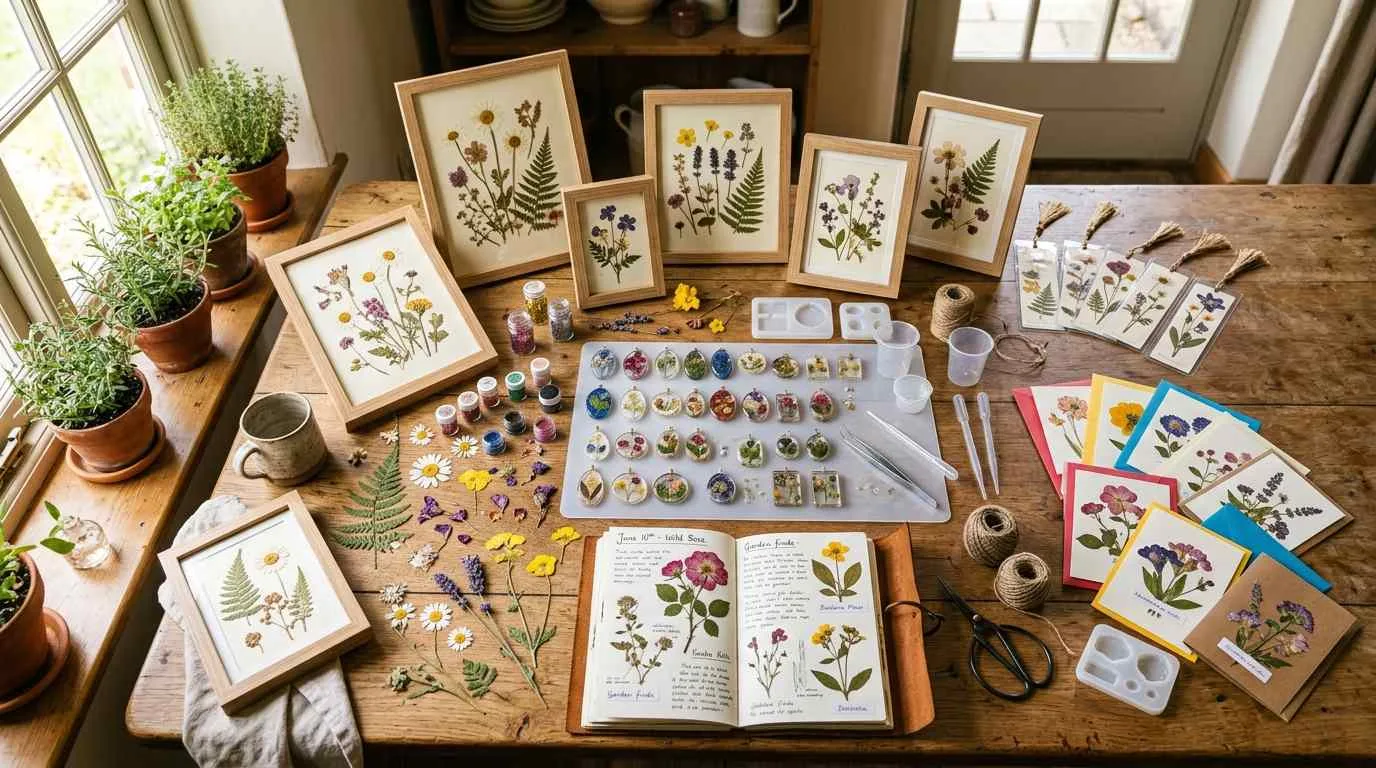
1. Floating Glass Frames
Two panes of glass held together by a metal or wooden edge, with your pressed flowers suspended between them. Light passes through from both sides, creating a translucent botanical look that works on walls, windowsills, or standing on shelves. This is the single most popular pressed flower display and the one you see all over social media.
What works: Thin, flat flowers with interesting silhouettes — ferns, cosmos, Queen Anne’s lace, individual rose petals. Arrange them before sealing so you can adjust placement.
Common mistake: Using regular craft glue to hold flowers in place. The glue yellows over time and shows through the glass. Use a tiny dot of acid-free glue or museum wax, or skip adhesive entirely and let the glass pressure hold everything.
2. Herbarium-Style Botanical Prints as pressed flower ideas
Museum-quality botanical displays where a single specimen is mounted on archival paper with a handwritten or printed label identifying the species, date collected, and location. This style turns pressed flowers into something that looks like it belongs in a natural history collection.
What works: Whole stems with leaves attached. Ferns, wildflowers, and herbs (lavender, rosemary, thyme) look especially striking in this format.
How to mount: Use acid-free paper and attach stems with thin strips of archival tape. Never use regular tape — it yellows and the adhesive degrades the paper. Frame behind UV-protective glass for maximum longevity.
3. Gallery Wall Arrangement
A set of 4–9 matching frames, each containing a different pressed flower or botanical specimen, hung together as a grid or salon-style cluster. The repetition of identical frames creates a cohesive look that makes even simple wildflowers feel curated.
Design tip: Use odd numbers (5, 7, or 9 frames) and vary the specimens but keep the background paper the same colour throughout. White or cream cardstock works best. A consistent 2-inch gap between frames keeps the arrangement clean.
4. Shadow Box Pressed Flower Art
Deep frames (1–2 inches of depth) that give you room to layer flowers at different heights, add dried grasses, or include small objects alongside your pressed specimens. Shadow boxes work well for preserving wedding bouquet flowers or creating memorial displays.
What works: Combine flat pressed flowers with semi-dried elements like seed pods, dried grasses, or small feathers. The depth variation adds dimension that flat frames can’t achieve.
Pressed Flower Home Decor
Beyond framing, pressed flowers transform everyday household items into one-of-a-kind pieces. These projects require slightly more technique than framing but produce gifts and decor that genuinely impress people.
5. Pressed Flower Candles
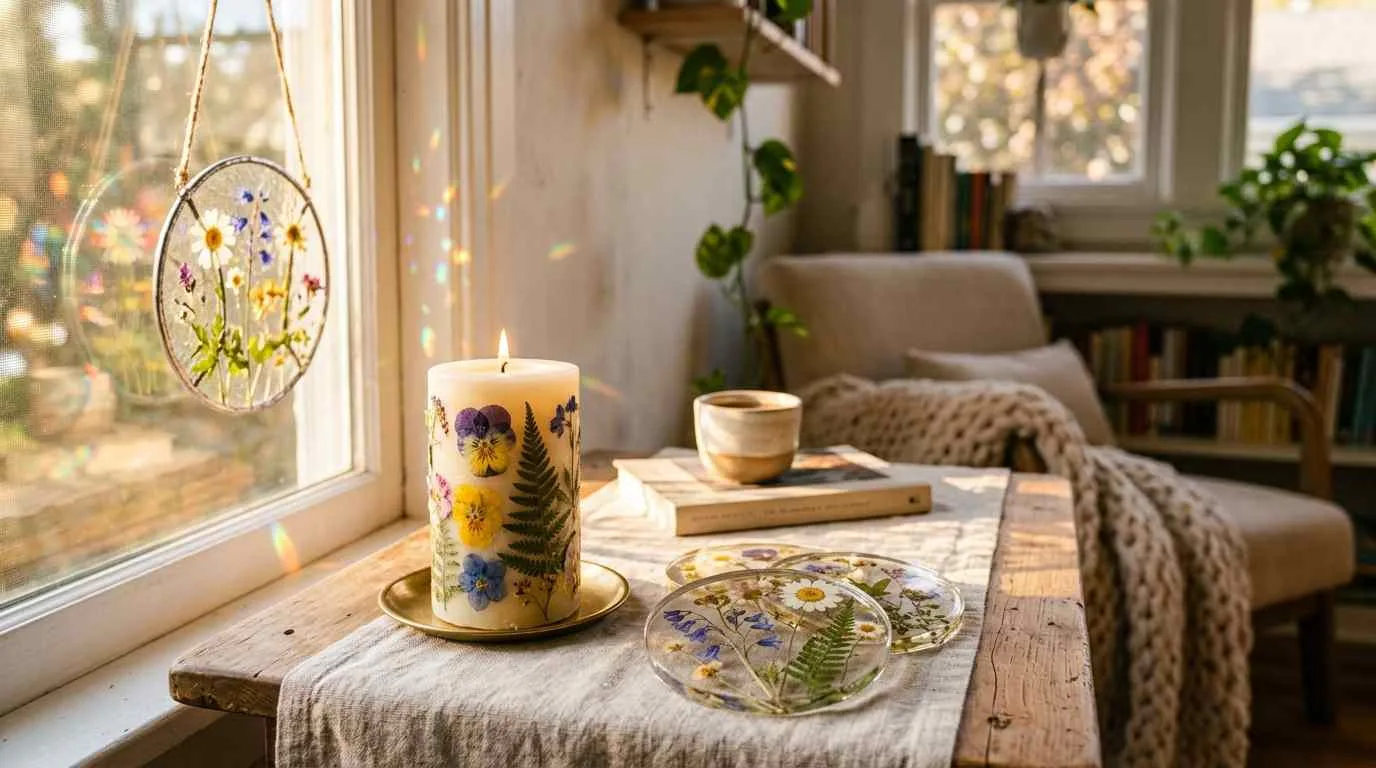
Attaching pressed flowers to the outside of pillar candles creates stunning botanical candles that look like they cost $40 from a boutique. The technique uses melted wax as both adhesive and sealant — you essentially laminate the flowers onto the candle surface with a thin wax layer.
Method: Hold a pressed flower against the candle with tweezers. Dip a foam brush in melted wax (from a separate tealight or wax warmer) and paint a thin layer over the flower, pressing it flat as you go. Apply 2–3 thin coats, letting each coat cool for 30 seconds between applications.
Safety note: Use thin, flat petals only. Thick flowers create air pockets that can flare when the flame reaches them. Keep flowers on the upper portion of the candle — they’re decorative, not fuel.
6. Resin Coasters and Trays
Embedding pressed flowers in clear epoxy resin creates waterproof, durable coasters, trays, and decorative discs. The resin preserves the flowers permanently and adds a glassy, professional finish.
Key technique: Pour a thin base layer of resin into your mould, let it partially cure (about 4–6 hours until tacky), arrange your flowers on top, then pour the final layer. This two-stage pour prevents flowers from floating to the surface. If your flowers still drift, press them gently into the tacky first layer with a toothpick.
Common mistake: Not sealing flowers before embedding. Fresh pressed flowers contain trace moisture that creates bubbles in resin. Spray flowers with a thin coat of clear acrylic sealer and let it dry completely before pouring.
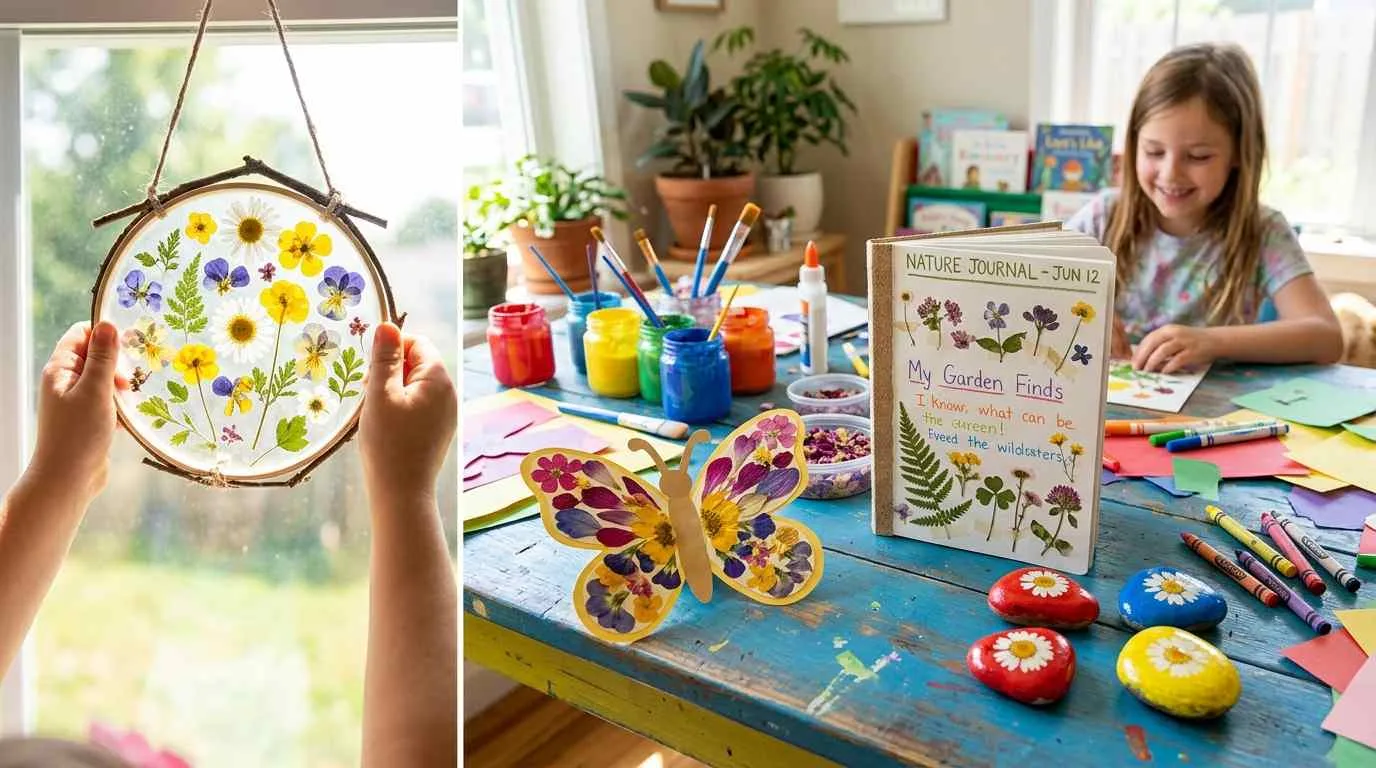
7. Pressed Flower Suncatchers
Arrange pressed flowers between two sheets of contact paper (clear self-adhesive film), trim to your desired shape, and hang in a window. Light shines through the petals and creates a stained-glass effect. This is one of the simplest and cheapest pressed flower projects — a roll of contact paper costs under $5 and makes dozens of suncatchers.
Upgrade option: Use self-laminating pouches instead of contact paper for a stiffer, more polished result. Punch a hole at the top, thread a ribbon through, and hang from a suction-cup hook on the window.
8. Pressed Flower Luminarias
Wrap pressed flowers between layers of wax paper, fold into a cylinder or square lantern shape, and place a battery-operated tealight inside. When lit, the flowers glow with a warm, translucent light. These make beautiful centrepieces for dinner parties or outdoor gatherings.
Construction: Iron two sheets of wax paper together on low heat with flowers sandwiched between them. The heat melts the wax coating and seals the sheets together, trapping the flowers inside. Use copper tape along the edges for a clean, rigid finish.
9. Pressed Flower Wall Art (Spray Paint Silhouette)
Tape pressed flowers or fern leaves to a canvas, spray paint over them, and peel the flowers away to reveal botanical silhouettes. The flowers act as stencils, leaving behind crisp, detailed outlines.
Best results: Use fern fronds, large leaves, or flowers with distinctive shapes. White spray paint on a dark canvas (navy, forest green, or black) produces the most dramatic effect. Apply light, even coats from 10–12 inches away to prevent paint from seeping under the edges.
Pressed Flower Paper Crafts
Paper projects are the most accessible entry point for working with pressed flowers. They require no special tools, no resin or wax, and they produce results that are immediately useful or giftable.
10. Pressed Flower Bookmarks
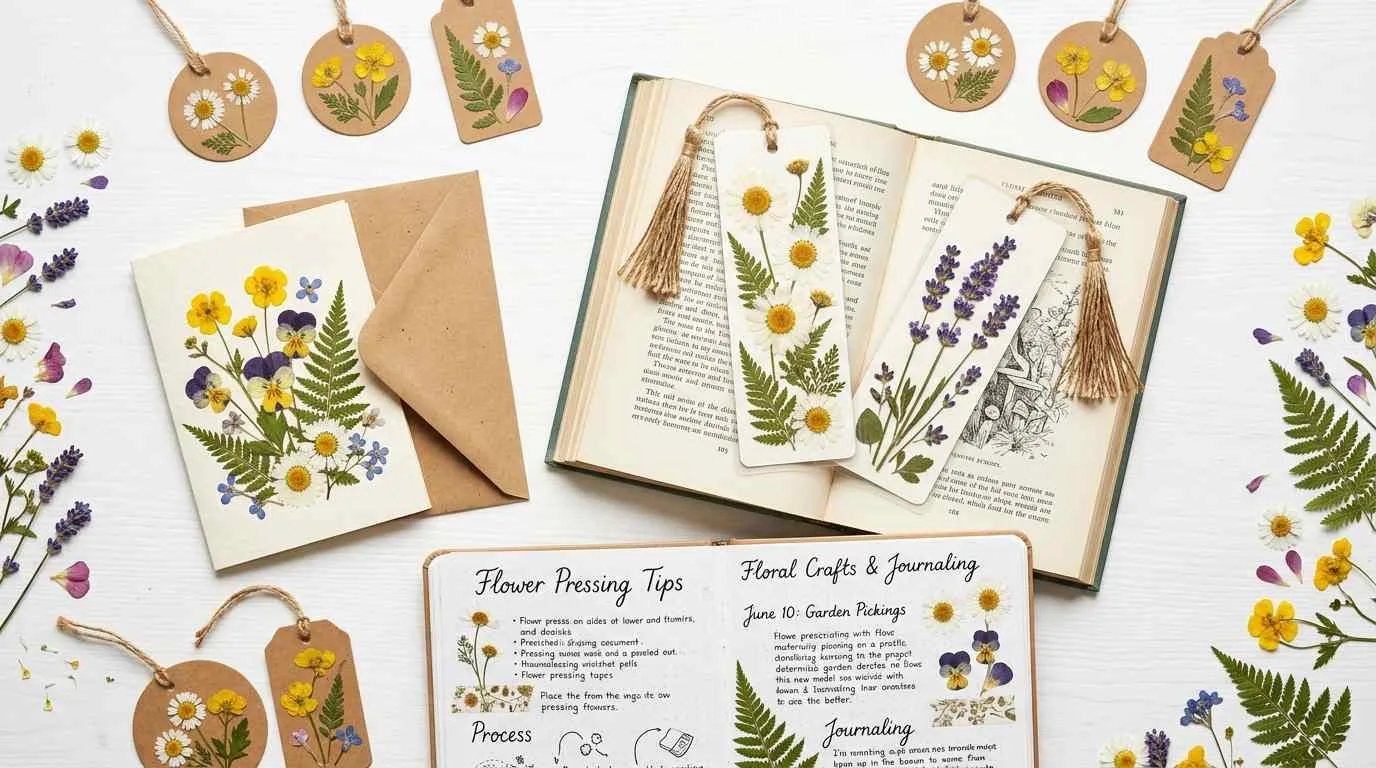
The classic pressed flower project and still one of the best. Arrange flowers on a strip of cardstock, cover with a self-laminating pouch or clear contact paper, and trim to size. The lamination protects the flowers from handling and keeps them flat through years of use.
Materials: Heavy cardstock (200gsm+), pressed flowers, self-laminating pouches (cold lamination — no machine needed), scissors, hole punch, ribbon or tassel.
Dimensions that work: 2 inches wide by 6–7 inches long. Narrow enough to fit between pages without bulk, long enough to show above the book edge.
11. Pressed Flower Greeting Cards
Handmade cards with real pressed flowers attached carry a presence that printed cards simply can’t match. The flowers add texture and dimension, and recipients almost always keep them — they tend to end up framed rather than recycled.
Method: Use acid-free cardstock folded to A6 or A5 size. Attach flowers with a thin line of PVA glue applied with a toothpick — never craft glue sticks, which create a visible ridge. Cover the design with a sheet of vellum or glassine if mailing, to protect the flowers in transit.
Occasions that work especially well: Thank-you cards, sympathy cards, birthday cards for people who garden, Mother’s Day, and wedding congratulations.
12. Pressed Flower Journal Pages
Adding pressed flowers to journal pages, bullet journals, or planners creates nature-inspired spreads that double as mini herbariums. Date each entry and note where you found the flower — over time, your journal becomes a botanical record of your year.
How to attach: Use small pieces of washi tape across the stems, or apply a thin layer of Mod Podge over the entire flower and surrounding area. The Mod Podge dries clear and seals the flower flat against the page.
13. Pressed Flower Gift Tags
Cut small rectangles or circles of kraft paper, glue a single pressed flower to the centre, cover with a self-laminating circle or rectangle, and punch a hole for twine. These take under 2 minutes each to make and elevate any wrapped gift from ordinary to memorable.
14. Pressed Flower Scrapbook Layouts
Pressed flowers add genuine texture and organic shapes to scrapbook pages in a way that stickers and printed embellishments can’t replicate. Use them as border elements, corner accents, or centrepieces alongside photos.
Preservation tip: Seal flowers under a piece of clear packing tape or a self-adhesive laminating sheet before adding them to the page. This prevents them from crumbling when the scrapbook is handled over the years.
Pressed Flower Wearables and Accessories
Wearing pressed flowers takes more technique than paper crafts because the flowers need to survive being handled, bumped, and exposed to body heat and moisture. Resin is the standard solution — it encases the flower in a clear, durable shell that can be shaped into almost any form.
15. Resin Pendants and Necklaces
Small silicone moulds (circles, teardrops, rectangles) filled with clear resin and a single pressed flower produce jewellery-quality pendants. The flower is suspended inside a crystal-clear dome that magnifies the colours and details.
Key technique: Use UV resin for small pieces — it cures in 2–4 minutes under a UV lamp, which means you can make a batch of 10 pendants in an hour. Epoxy resin works too but requires 24–48 hours of cure time per piece.
Flower selection: Tiny flowers work best — forget-me-nots, baby’s breath, small daisies, individual hydrangea florets. Large flowers look crowded in small moulds.
16. Pressed Flower Earrings
Same technique as pendants but with smaller moulds and earring hooks attached to the cured resin with jump rings. Lightweight petals (rose petals, pansy petals) work better than whole flowers because the finished earring needs to be light enough to wear comfortably.
17. Pressed Flower Phone Case
Arrange pressed flowers on a clear phone case, seal them with a layer of clear resin or several coats of clear acrylic sealer, and let cure completely. The result is a one-of-a-kind phone case with real flowers visible through the clear backing.
Longevity tip: Apply at least 3 coats of UV-resistant clear sealer. Phone cases take a lot of UV exposure from being out in sunlight, and without protection the flowers will brown within a few weeks.
18. Pressed Flower Hair Accessories
Glue small pressed flowers to hair clips, bobby pins, or headband blanks using strong clear-drying adhesive, then seal with 2–3 coats of clear resin or nail topcoat. These work beautifully for weddings, garden parties, and spring events.
Best flowers: Tiny daisies, baby’s breath clusters, small fern tips, and individual hydrangea florets. Anything larger overwhelms the clip and catches on hair.
Pressed Flower Gift Ideas
Pressed flower gifts carry a personal weight that store-bought alternatives can’t match, because the flowers themselves tell a story — they came from a garden, a walk, a specific place and season. That backstory is what makes these gifts land.
19. Wedding Bouquet Preservation Frame
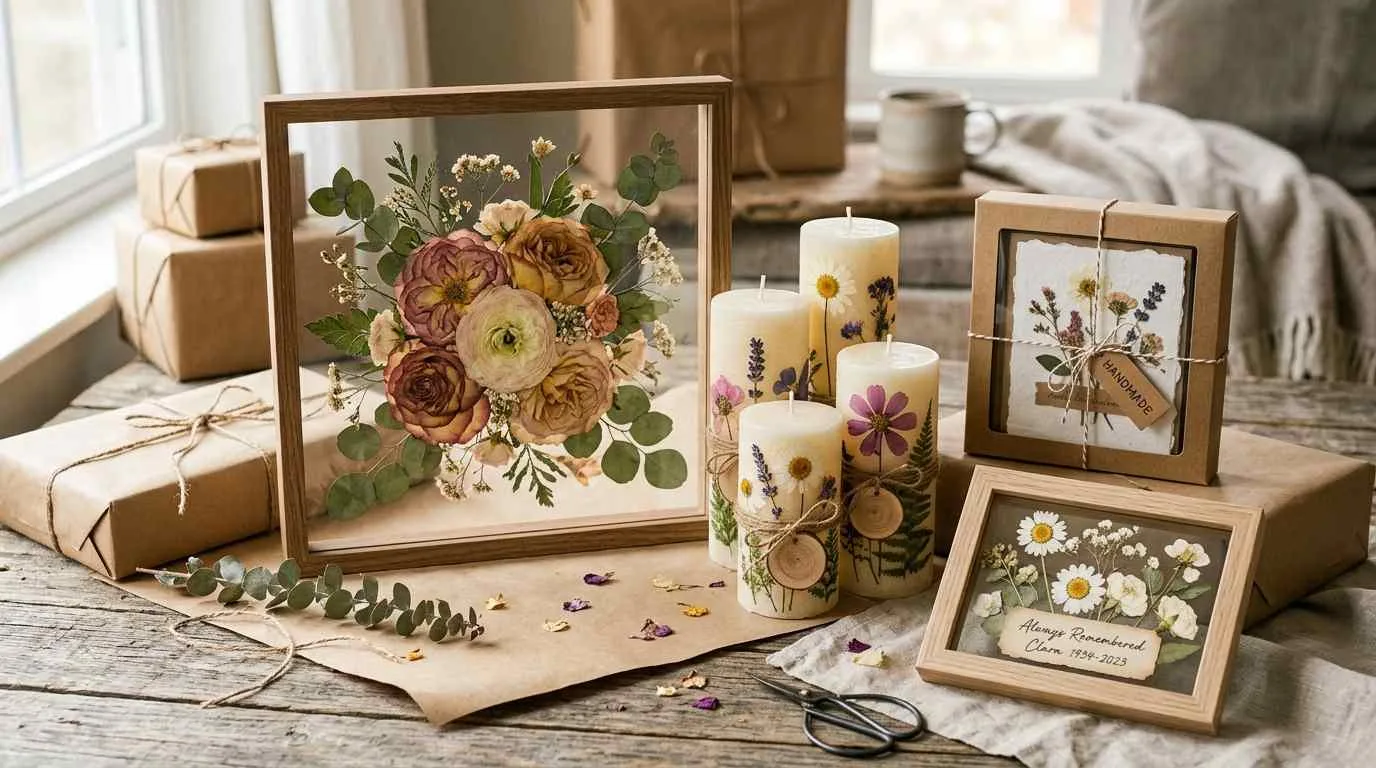
Pressing flowers from a wedding bouquet and arranging them in a large floating frame preserves the bouquet indefinitely. This is one of the most requested custom pressed flower projects and a meaningful gift for newlyweds.
Timeline: Start pressing within 24–48 hours of the wedding, while the flowers are still fresh. Roses should be separated into individual petals. The full pressing takes 3–4 weeks, and arrangement and framing adds another day.
20. Pressed Flower Candle Set
A set of 3 pillar candles with coordinated pressed flower designs, wrapped together with twine and a sprig of dried lavender. This makes a complete, professional-looking gift for housewarmings, hostess gifts, or birthdays.
21. Personalised Pressed Flower Stationery
A set of 8–10 matching note cards, each with a pressed flower from the same garden or location, packaged in a kraft paper box tied with ribbon. Include a small card noting which flowers are featured and where they were collected.
22. Memorial Keepsake Frame
Pressing flowers from funeral arrangements or memorial gardens and displaying them in a dedicated frame creates a lasting tribute. Pair the pressed flowers with a small printed label noting the person’s name, dates, and where the flowers came from.
Sensitive handling: Ask before pressing memorial flowers — some people find comfort in watching flowers naturally fade, and others want them preserved. When in doubt, offer rather than assume.
Pressed Flower Projects for Kids
These projects use simple materials, tolerate imperfect flower placement, and produce results that kids are genuinely proud of. They also double as nature education — the pressing process itself teaches kids about plant anatomy, water content, and preservation.
23. Contact Paper Suncatchers
Peel the backing off a sheet of clear contact paper (sticky side up), let kids arrange pressed flowers, leaves, and petals in any pattern they want, then press a second sheet of contact paper on top to seal. Cut into circles, hearts, or freeform shapes and tape to a sunny window.
Why kids love it: No glue, no drying time, and the sticky contact paper holds everything in place immediately. Even toddlers can participate with supervision.
24. Pressed Flower Butterfly Wings
Draw or print a simple butterfly outline on cardstock. Fill each wing section with pressed petals arranged in overlapping layers to create colourful, textured wings. Glue a small twig down the centre as the body and add pipe cleaner antennae.
25. Nature Journal with Pressed Specimens
Give kids a blank notebook and encourage them to collect and press flowers from walks, parks, and gardens. Each page gets a pressed specimen, the date it was collected, and any observations the child wants to add — colour, smell, where it was growing. Over a season, the journal becomes a personal field guide.
Educational angle: This project teaches botanical observation, patience (waiting for flowers to press), and documentation skills. Teachers often use it as a cross-curricular project linking science, writing, and art.
26. Pressed Flower Rock Art
Glue small pressed flowers onto smooth, flat stones using Mod Podge or clear-drying craft glue, then seal with 2–3 coats of Mod Podge or clear acrylic spray. The stones become paperweights, garden markers, or decorative objects that kids can give as gifts.
Advanced Pressed Flower Techniques
27. Cyanotype Prints (Sun Printing)
Cyanotype is a photographic printing process that uses UV-sensitive chemicals to create vivid blue-and-white botanical prints. You coat watercolour paper with the cyanotype solution, arrange pressed flowers on top, expose to sunlight for 10–20 minutes, and rinse in water. Where the flowers blocked the light, the paper stays white. The exposed areas turn deep Prussian blue.
Where to get supplies: Pre-coated cyanotype paper is available online for around $10–15 for a pack of 12 sheets. Or buy cyanotype solution separately and coat your own paper or fabric.
Best results: Flowers with intricate silhouettes — ferns, Queen Anne’s lace, and grasses — produce the most detailed prints.
28. Pressed Flower Resin Tray
A large-format resin project where pressed flowers are arranged in a tray mould and sealed in clear epoxy. The tray is functional — waterproof, heat-resistant (to a point), and beautiful enough to use as a centrepiece or serving piece.
Scale tip: Large resin pours generate heat as they cure (an exothermic reaction). Pour in two layers and allow the first to reach a tacky gel state before adding the second. Single thick pours can yellow, crack, or warp.
29. Pressed Flower Fabric Printing
Arrange fresh (not dried) flowers face-down on natural fabric (cotton or muslin), cover with parchment paper, and hammer firmly until the plant pigments transfer onto the fabric. The result is a botanical print made with nothing but flower pigments and force.
Fixing the print: Soak the printed fabric in a solution of water and alum (potassium aluminium sulfate) for 30 minutes to set the pigments. Without this mordant step, the colours wash out in the first laundry cycle.
Best for: Tote bags, pillow covers, fabric wall hangings, and cotton handkerchiefs.
Frequently Asked Questions
What are the best flowers to press?
Flat, thin flowers with low moisture content press best: pansies, violets, daisies, cosmos, ferns, Queen Anne’s lace, lavender, and buttercups. Thick or fleshy flowers like succulents and orchids don’t press well because they hold too much water and either mould or lose their shape during pressing.
How long does it take to press flowers?
Book pressing takes 2–4 weeks. A dedicated flower press takes 1–3 weeks. Microwave pressing takes under 5 minutes. The variable is petal thickness — thin flowers like violets are done in a week, while thick petals like rose petals need the full 3–4 weeks.
Can you press flowers that have already dried?
Yes, but the results are different. Already-dried flowers are more brittle and often curl or crack during pressing. Mist them lightly with water, let them soften for 30 minutes, then press them between heavy books with parchment paper. They won’t be as flat or vivid as flowers pressed while fresh.
How do you keep pressed flowers from fading?
UV light is the main cause of fading. Frame behind UV-protective glass, display away from direct sunlight, or coat with UV-resistant clear spray. Resin embedding provides the best long-term colour preservation because the resin blocks UV light and seals out oxygen.
What is the best way to store pressed flowers before using them?
Keep pressed flowers flat between sheets of parchment paper inside a heavy book or archival storage box. Store in a cool, dry place away from sunlight and humidity. Properly stored pressed flowers maintain their colour and integrity for years. Avoid plastic bags — trapped moisture causes mould.
Are pressed flowers safe to use on candles?
Yes, with precautions. Use only thin, flat petals attached to the outer surface of pillar or taper candles. The wax coating over the flowers insulates them from direct flame. Keep flowers on the upper portion of the candle and always burn on a heat-resistant surface. Never use thick dried flowers or anything that could create a secondary wick or air pocket.
More Creative Ideas from BoredomWizard
If candle making sparked something, these guides take the same creative energy in different directions:
- DIY Projects at Home — the full creative project hub from resin to embroidery
- Crafts to Make and Sell — turn your candle hobby into a side income
- Creative Hobbies — 40+ hands-on hobbies ranked by cost and commitment
- Hobbies to Do at Home — indoor projects for rainy days and quiet evenings
- Terrarium Ideas — another hands-on craft that creates a living display
- Scrapbook Ideas — document your candle-making journey visually
- Things to Do on Weekends — plan a weekend candle-making session with friends
- Girls Night Craft Ideas — candle pouring makes a perfect group activity