Whittling Ideas: 40 Easy Projects from First Cut to Gift-Worthy Carvings
Whittling is the simplest form of woodworking: one knife, one piece of wood, and whatever your hands can shape from it. No power tools, no workshop, no dust extraction system. You can whittle on a park bench, on a porch, in a tent, or at a kitchen table with a sheet of newspaper underneath. The only investment is a knife and a block of wood, and the first project takes less time than watching a movie.
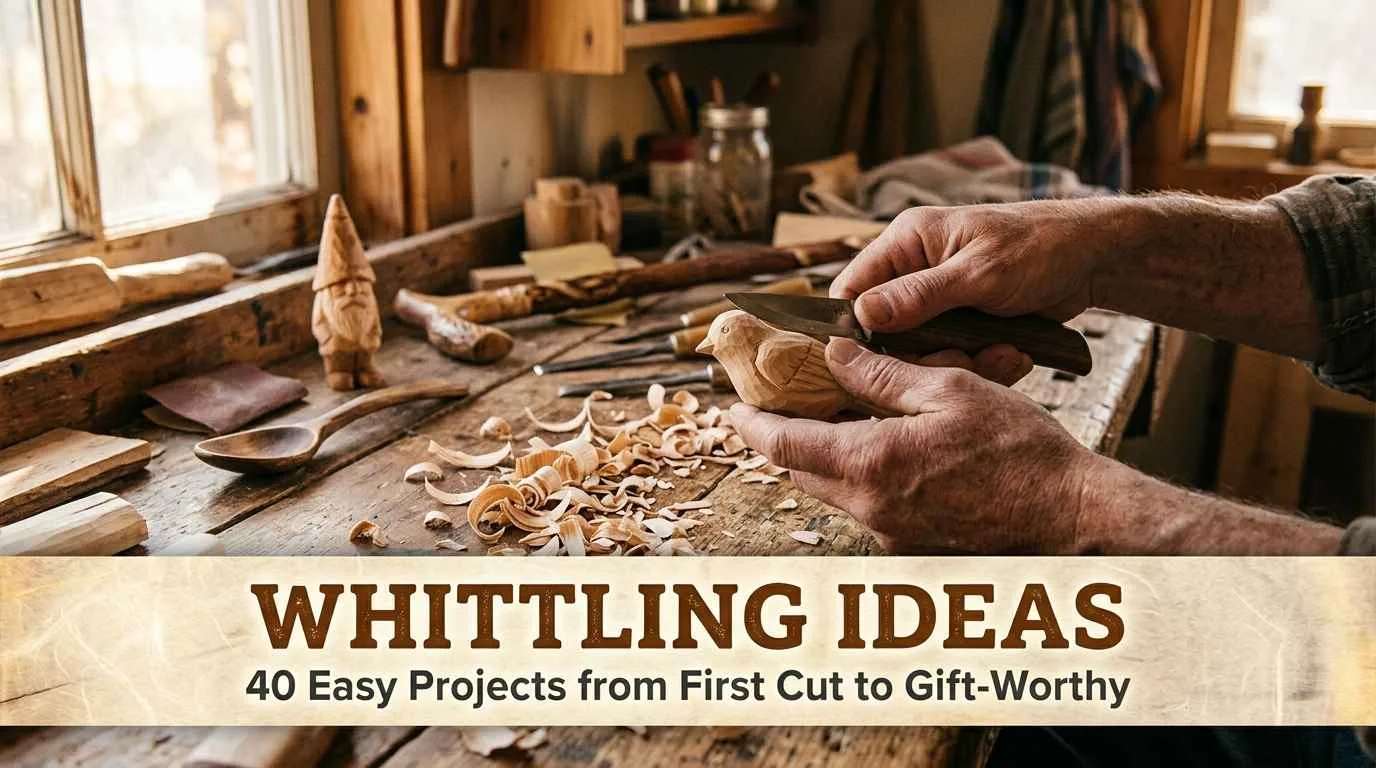
This guide has 40 whittling ideas sorted by difficulty, from a pointed stick (yes, really — it teaches you how the knife moves) to carved animals and functional kitchen tools. Every project includes what wood to use, what cuts to make, and the one mistake beginners always make on that specific piece. No product pitches for expensive knife sets — a $10 knife and a piece of basswood are all you need to start.
Whittling is the craft of carving wood using only a knife — no chisels, no gouges, no power tools. The best wood for beginners is basswood (soft, straight-grained, widely available in craft stores). The best first project is a simple pointed stick or a flat wooden spatula, which teaches the two essential cuts: the push cut (pushing the blade away from you along the grain) and the pull cut (pulling the blade toward your thumb). A basic whittling knife costs $8–15 and will last years with occasional sharpening.
What you need to start whittling
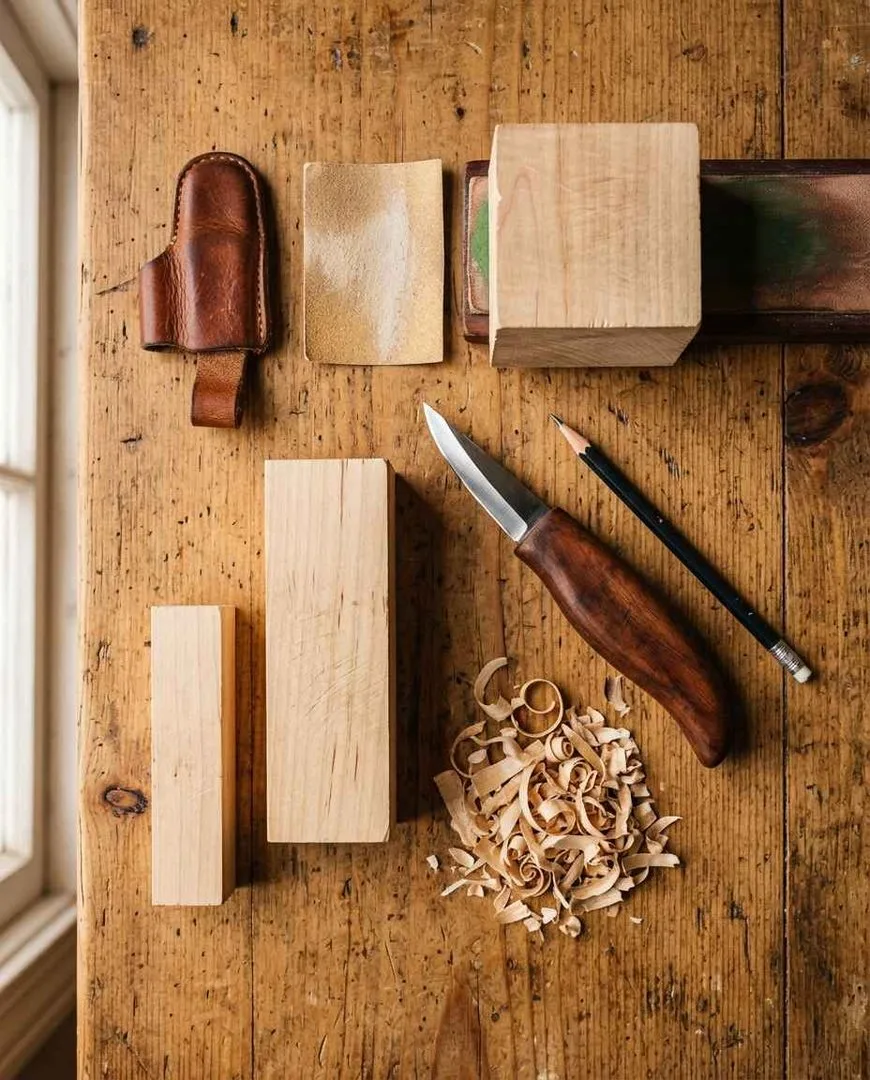
- A whittling knife. A fixed-blade knife with a short (1.5–2 inch) blade. Mora 106, Flexcut KN13, or BeaverCraft C1 are all excellent beginner knives at $10–20. A sharp pocket knife also works for your first projects. The blade must be sharp — a dull knife is more dangerous than a sharp one because it requires more force and is more likely to slip.
- Basswood. The beginner standard. Soft, even-grained, light in colour, carves like firm butter. Available as blocks, blanks and sticks from craft stores and online. It costs $2–5 per block. Alternatives: butternut, white pine, balsa (very soft, almost too easy).
- A thumb guard or cut-resistant glove. Leather thumb pads or a Kevlar glove on your holding hand. You will cut yourself eventually. The guard makes it a nick instead of a trip to A&E. $5–10 and worth every penny.
- A leather strop. A strip of leather with polishing compound for touching up the blade edge between sessions. Stropping takes 30 seconds and keeps the knife sharp for weeks. $8–15.
- A pencil. For sketching the outline on the wood before cutting. Draw the front profile and the side profile before making the first cut.
- Fine sandpaper (220+ grit). Optional. Some whittlers sand their finished pieces smooth; others prefer the faceted, knife-cut texture. Both are valid aesthetic choices.
The two cuts you need to know
Every whittling project uses some combination of these two cuts. Learn them on a simple pointed stick and they transfer to everything else.
- Push cut (also called the straightaway cut). Hold the wood in your non-dominant hand, the knife in your dominant hand. Push the blade away from you along the grain, shaving a thin curl of wood. This is the workhorse cut for rough shaping. Always cut away from your body. Always cut with the grain, not against it — cutting against the grain tears the wood instead of shaving it.
- Pull cut (also called the paring cut or thumb push). Grip the knife with four fingers and place your thumb on the back of the wood (not the blade). Pull the blade toward your thumb in a controlled arc, using your thumb as a pivot and a brake. This cut gives you the most control and is used for detail work, rounding and finishing. The thumb never touches the blade edge — it presses against the flat back of the blade or the wood itself.
A third technique worth learning early: the stop cut. Press the blade straight down into the wood to create a vertical wall, then carve toward that wall from the side. The stop cut prevents you from accidentally removing wood beyond where you want to stop. It is how you create clean shoulders, eye sockets and defined edges.
Easy whittling ideas for beginners
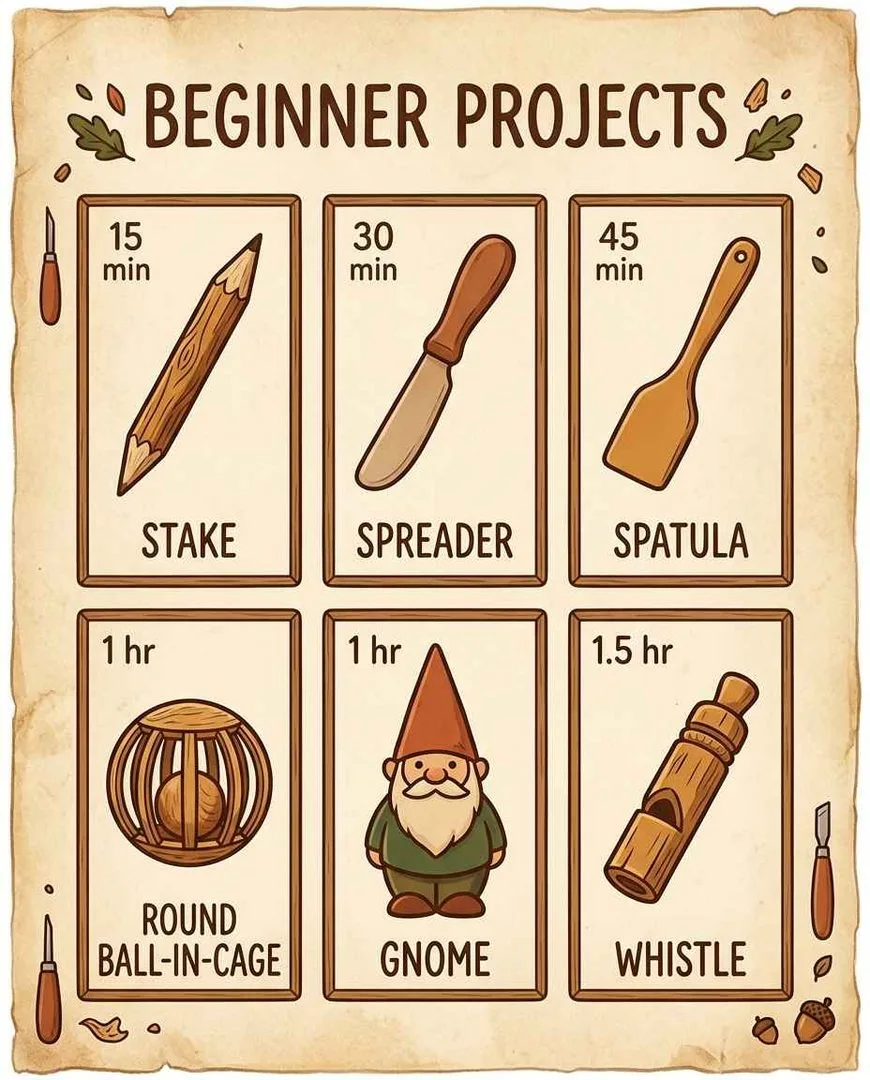
Start here. Each project teaches a specific skill while producing something satisfying. They are ordered by difficulty — the pointed stick is genuinely your first project, even if it feels too simple.
1. Pointed stick
Your first cut. Take a straight stick or a basswood dowel and sharpen one end to a point using only push cuts. Rotate the stick after each cut so the point stays centred. This is not a joke project — it teaches you how the knife enters the wood, how much pressure to use, and how the grain direction affects the cut. A clean, symmetrical point with no torn fibres means you are ready for the next project. Time: 15 minutes. The mistake to avoid: cutting against the grain. If the wood tears instead of curling, you are cutting the wrong direction. Flip the stick and try the other way.
2. Flat butter knife or spreader
A basswood block carved into a flat blade with a handle. Draw the profile on two sides of the block, rough-cut the outline with push cuts, then thin the blade with careful pull cuts. The transition from handle to blade is your first experience with shaping a compound curve. Time: 30–45 minutes. The mistake to avoid: making the blade too thin too fast. Take small cuts and check thickness constantly. You can always remove more; you cannot put wood back.
3. Wooden spatula
A wider, flatter version of the butter knife. The broad blade surface teaches you to create an even, flat plane with the knife — harder than it sounds because the blade naturally wants to follow a curved path. Time: 45 minutes. The mistake to avoid: rocking the blade side to side while cutting. Keep it flat and let the push cut do the work.
4. Simple wooden spoon
The first project that feels like a real achievement. Carve the handle and bowl exterior with a knife, then hollow the bowl with a hook knife or gouge (the one tool beyond a standard knife that is worth buying early). A finished wooden spoon is a functional kitchen tool you made with your hands. Time: 2–3 hours. The mistake to avoid: making the bowl walls too thin. Leave them at least 3mm thick or the spoon cracks when it dries.
5. Whittled ball
Carve a basswood block into a sphere by rounding every corner evenly. Rotate constantly and take small cuts from every angle. A perfect sphere is nearly impossible — but getting close teaches you to see and correct asymmetry, which is the core skill of all figurative whittling. Time: 30–45 minutes. The mistake to avoid: flattening one side by over-carving. Rotate after every two cuts.
6. Letter opener
A dagger-shaped piece with a pointed blade and a simple handle. The bilateral symmetry (both sides must match) is the teaching point. Draw a centreline and carve evenly from both sides toward it. Time: 45–60 minutes. The mistake to avoid: carving one side beautiful and forgetting the other. Alternate sides every few cuts.
7. Simple gnome or wizard
A small figure with a pointed hat, a round nose and a long beard — all achievable with push cuts and pull cuts. The hat is a cone (already learned from the pointed stick), the nose is a ball left proud while you cut away the surrounding wood, and the beard is a series of V-shaped cuts. This is the gateway to figurative whittling. Time: 1–1.5 hours. The mistake to avoid: carving the face before the hat. Work top-down: hat shape first, then face, then beard.
8. Wooden pendant
A small flat shape (circle, heart, leaf, fish) cut from a thin basswood slice, refined with a knife, sanded smooth, and drilled with a small hole for a cord. Wearable art from a scrap of wood. Time: 30–45 minutes. The mistake to avoid: making it too thick. A pendant should be 5–8mm thick — thin enough to be delicate, thick enough to be durable.
9. Chip-carved coaster
A flat disc of basswood with geometric chip-carving patterns on the surface. Chip carving uses a single knife to make triangular cuts that remove small chips, creating repeating patterns. The technique is meditative and the results are immediately impressive. Time: 1–2 hours. The mistake to avoid: using dull blade. Chip carving requires a razor-sharp edge. Strop before starting.
10. Mushroom
A stem and a cap. The cap is a dome shape carved from a block; the stem is a cylinder underneath. The mushroom is the perfect first 3D object because the shapes are simple and the proportions are forgiving — every mushroom looks different in nature, so yours cannot be wrong. Time: 45–60 minutes. The mistake to avoid: making the stem too thin where it meets the cap. This joint is the weakest point and snaps easily if under-carved.
Intermediate whittling projects
These require more control, more planning and more patience. Each one builds on the beginner skills and adds new techniques: stop cuts for defined features, undercutting for depth, and grain management on complex shapes.
11. Small owl
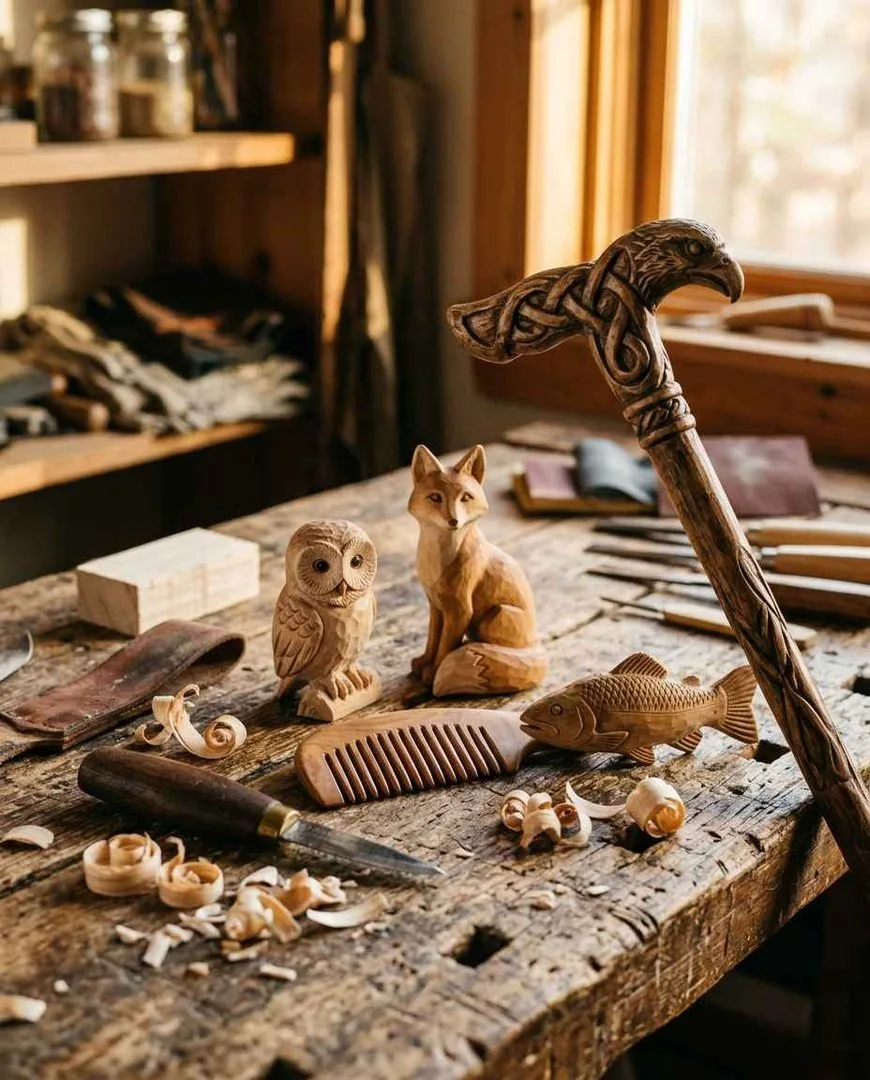
A compact shape that teaches you to carve details on a curved surface: round eyes created with stop cuts, a V-shaped beak, feather lines scored with the knife tip, and small ear tufts left proud. The owl’s body is essentially a rounded cylinder, which makes the basic shape easy while the surface detail is challenging. Time: 2–3 hours. The mistake to avoid: carving the eyes too deep. Shallow stop cuts with a sharp knife create crisp eyes. Deep gouges look like wounds.
12. Sitting fox
A more complex animal form with a tapered snout, pointed ears, a curved back and a thick tail wrapped around the paws. The fox teaches you to manage grain direction on angled features — the ears and snout point in different directions from the body, so you must change your cutting direction constantly. Time: 3–4 hours. The mistake to avoid: snapping the ears. Leave them thick during rough shaping and thin them only at the very end.
13. Wooden comb
Functional and impressive. Carve the spine and handle from a single piece of hardwood (fruitwood or cherry works better than basswood for durability), then cut the teeth with a small saw and refine with a knife and sandpaper. A finished wooden comb is a genuine daily-use object. Time: 2–3 hours. The mistake to avoid: spacing the teeth too close together. Wide-spaced teeth are stronger and more functional on a first attempt.
14. Walking stick handle
Find a straight branch (hazel, ash or hickory), strip the bark, and carve a comfortable grip at the top: a ball knob, a dog’s head, a simple scroll, or an ergonomic palm grip. The handle is the project; the stick is the excuse. Time: 2–4 hours for the handle. The mistake to avoid: carving green (fresh) wood and not accounting for shrinkage. Green wood is easier to carve but shrinks and can crack as it dries. Carve slightly oversized and let it dry slowly.
15. Wooden fish
A classic whittling subject because the streamlined shape flows naturally with the grain. Carve the body profile, thin the tail, add fin details with V-cuts, and carve gill lines and an eye with stop cuts. A school of three fish in different sizes makes a beautiful display. Time: 1.5–2 hours per fish. The mistake to avoid: making the tail too thin where it meets the body. The tail should flare, not narrow.
16. Whittled spoon with carved handle
An upgrade from the beginner spoon. The handle gets a carved design: a flower, a knot pattern, a name, or an animal head. The bowl is refined to an even wall thickness. This is the spoon you give as a gift. Time: 3–5 hours. The mistake to avoid: trying to carve the handle design before the bowl is finished. Always complete the functional parts first.
17. Small wooden bowl
A block of basswood or butternut hollowed into a small bowl (10–15cm diameter). A hook knife or gouge handles the interior; the exterior is shaped with the standard knife. The wall thickness must be even throughout. Time: 3–4 hours. The mistake to avoid: going too deep in the centre before widening the interior. Work from the rim inward in progressive passes.
18. Wooden whistle
A functional whistle carved from a single piece of wood. The air channel, the sound hole (the fipple) and the resonating chamber all must be precisely aligned. When it works and actually makes a sound, the satisfaction is enormous. Time: 2–3 hours. The mistake to avoid: making the fipple slot too wide. A narrow slot (2–3mm) produces a cleaner tone than a wide one.
19. Kuksa (Nordic drinking cup)
A traditional Scandinavian carved cup, typically from birch burl but achievable in basswood for practice. The hollow interior and the handle require patience with a hook knife. A finished kuksa is a camp cup, a desk ornament and a conversation piece. Time: 4–6 hours. The mistake to avoid: starting with wood that is too hard. Use basswood for your first kuksa, then graduate to birch for the real thing.
20. Chain links from a single piece
Two or three interlocking chain links carved from one block of wood with no joints or glue. The links move freely. This is the whittling equivalent of a magic trick and the project that makes non-whittlers say “how?” The technique involves carving a long bar, defining the link shapes with stop cuts, then carefully separating them with thin cuts. Time: 3–5 hours. The mistake to avoid: rushing the separation cuts. One slip breaks a link and you start over.
Animals and figures to whittle
Figurative carving is where whittling becomes art. Each animal or character teaches specific skills: proportions, expression, texture, and the ability to see the finished form inside the raw block.
21. Bear
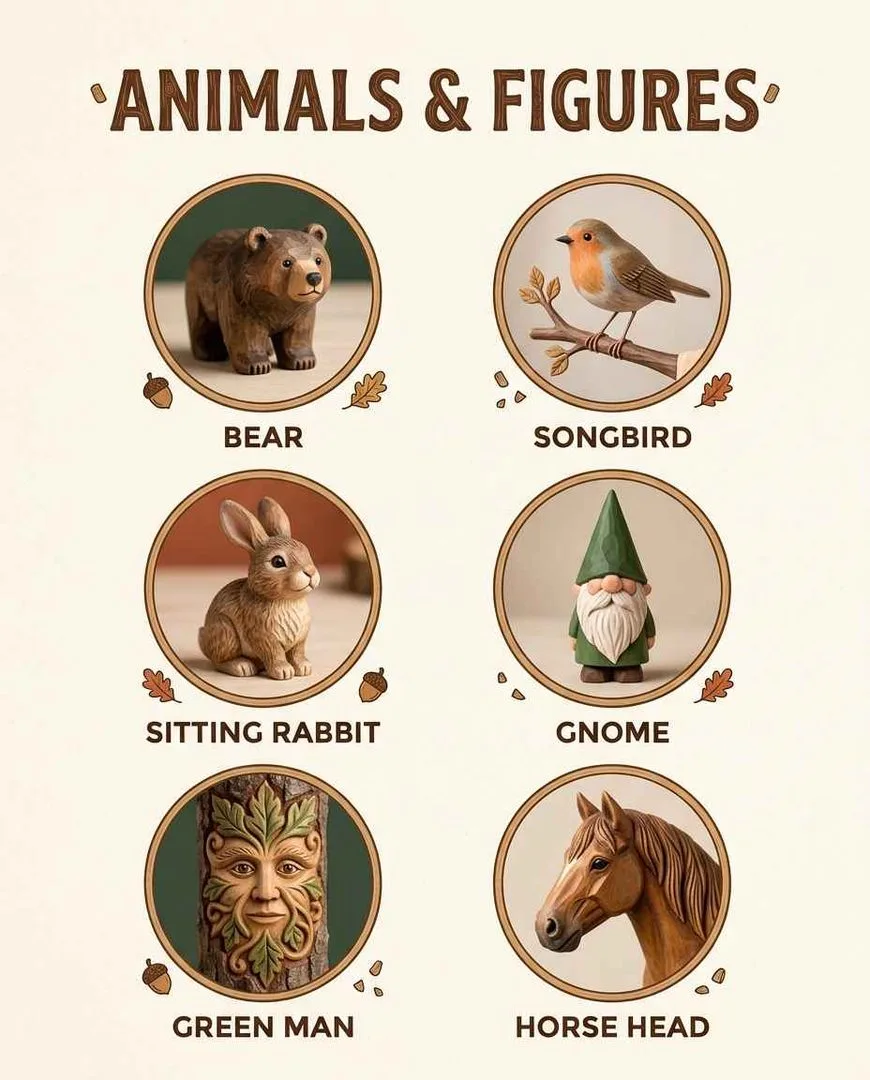
A stocky, powerful form. Start with a blocky body shape and round it gradually. The bear’s proportions are forgiving because bears are naturally chunky — a thick neck, heavy shoulders, round belly. Carve the muzzle last. Time: 3–4 hours. The mistake to avoid: making the legs too thin. Bear legs are thick and columnar.
22. Songbird on a branch
A small bird perched on a carved branch base. The bird teaches you to carve thin forms (the beak, the tail) without snapping them, and the branch base gives the piece stability for display. Time: 2–3 hours. The mistake to avoid: carving the beak too early. Shape the head and body first, then thin the beak as the final step.
23. Sitting rabbit
Long ears, round body, cotton tail. The ears are the challenge — they must be thin enough to look like ears but thick enough to survive handling. Carve them from the same block, not as separate attachments. Time: 2–3 hours. The mistake to avoid: detaching the ears from the head with too-deep cuts. Leave a bridge of wood connecting each ear to the skull.
24. Detailed gnome with expression
An upgrade from the beginner gnome. This version has carved eyes (not just dots), individual fingers on the hands, a textured beard with separated strands, and a facial expression. The expression is created by the relationship between the brow, the eyes and the mouth — tiny changes create different moods. Time: 4–6 hours.
25. Green man or spirit face
A face emerging from foliage, traditionally carved into a flat or slightly curved piece of wood. Leaves, vines and branches frame and merge with the facial features. This is a bas-relief carving (the face projects from a flat background) and teaches a different approach from in-the-round carving. Time: 4–8 hours.
26. Wooden letter or initial
A large decorative letter carved from a thick block, refined with a knife and sanded smooth. Can be left natural, painted, or stained. A carved initial is a genuinely impressive personalised gift. Time: 2–4 hours depending on letter complexity. S and R are harder than L and I.
27. Caricature face
A small face with exaggerated features: a huge nose, deep-set eyes, a big grin, prominent chin. Caricature carving is the most fun and the most forgiving style because exaggeration hides proportional errors. Time: 2–3 hours.
28. Miniature cabin or house
A tiny house shape with a carved door, windows, a chimney and a textured roof. The roof texture is created by scoring parallel lines with the knife tip. A row of three houses in different sizes makes a village display. Time: 2–3 hours per house.
Stick whittling ideas — no bought wood needed
Everything in this section uses sticks and branches you find outside. No craft store, no basswood, no cost. Just a knife and whatever the trees dropped.
29. Roasting stick with carved handle
Find a straight green stick (hazel, willow or ash), strip the bark from the top third, and carve a comfortable grip with finger grooves and a decorative notch pattern. Sharpen the opposite end for marshmallows. Time: 15–20 minutes. The campfire essential that starts every whittling habit.
30. Walking stick with stripped bark pattern
Strip the bark from a sturdy stick in a spiral pattern, leaving alternating strips of bark and bare wood. The contrast creates a natural barber-pole effect without carving into the wood itself. Time: 30 minutes.
31. Tent pegs
Whittle a batch of tent pegs from hardwood sticks. Sharpen one end, carve a notch near the blunt end for the guy rope, and bevel the top so it does not split when hammered. Functional and satisfying in sets of eight. Time: 10 minutes per peg.
32. Twig pencil
Sharpen a straight stick and insert a graphite rod (from a mechanical pencil refill) into a drilled or carved channel at the tip. A fully functional pencil made from a twig. Time: 20 minutes.
33. Carved bark boat
Carve a small boat from a thick piece of bark (birch bark is ideal). Shape the hull, carve a slot for a leaf sail, and test it on water. The simplest toy in existence and genuinely fun regardless of age. Time: 15 minutes.
Best wood for whittling — what to carve and what to avoid
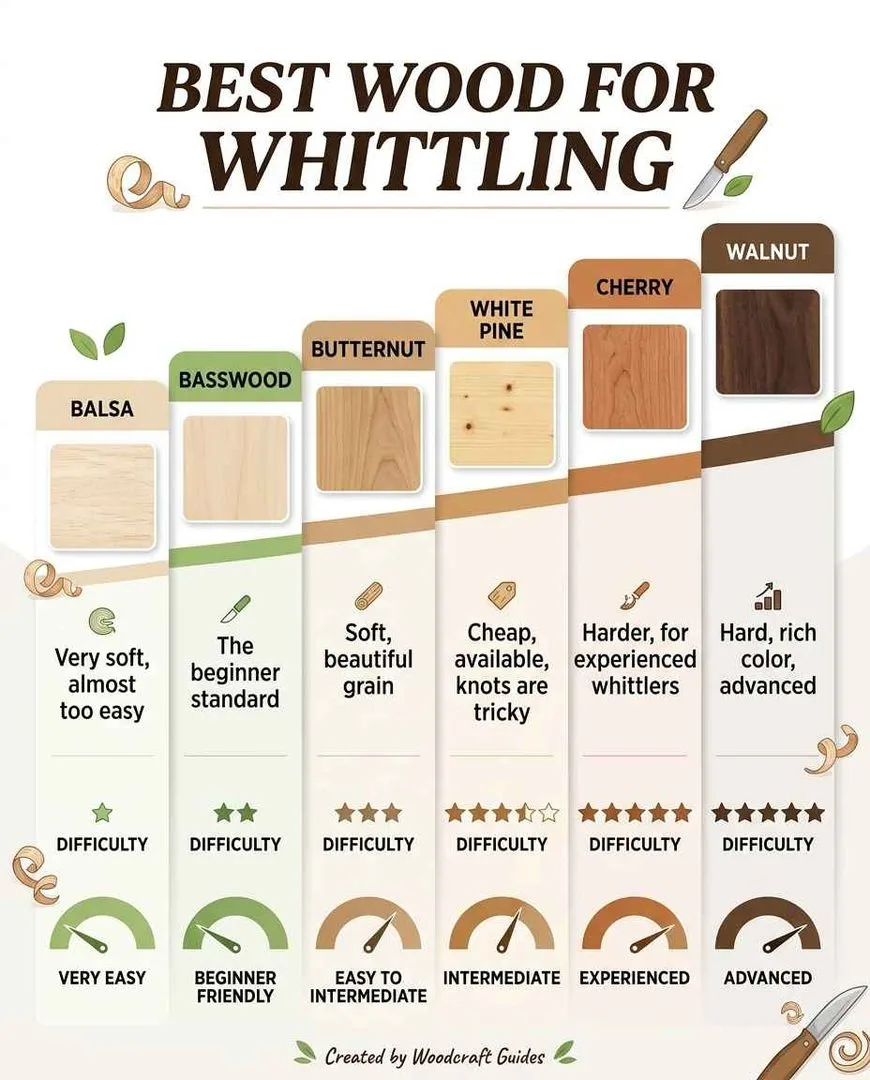
- Basswood (linden). The universal recommendation. Soft, even-grained, light-coloured, cheap, widely available. Takes paint and stain well. Buy this for your first 10 projects.
- Butternut. Slightly harder than basswood with a beautiful warm grain. Carves cleanly and finishes beautifully. Excellent for projects you want to display unfinished.
- White pine. Cheap and available everywhere. Softer than basswood but knotty — the knots are rock-hard and will deflect your blade. Choose knot-free sections or use pine only for practice.
- Balsa. So soft you can dent it with your fingernail. Good for children’s projects and rapid prototyping, but too fragile for anything you want to keep.
- Cherry, walnut and oak. Beautiful but hard. Save these for after you are confident with basswood. They require a sharper knife, more force, and more patience. The results are worth it — the grain and colour are stunning.
- Avoid: pressure-treated wood, plywood, MDF, painted wood. Pressure-treated wood contains chemicals. Plywood and MDF cannot be whittled. Painted wood hides the grain and may contain lead.
Whittling safety — the rules that prevent every injury
- Always cut away from your body. The single most important rule. If the knife slips, it goes into the air, not into you.
- Wear a thumb guard. Your holding hand’s thumb is the body part most frequently cut. A $5 leather guard eliminates 80% of whittling injuries.
- Keep the knife sharp. A sharp knife cuts cleanly with light pressure. A dull knife requires force, and force causes slips. Strop before every session.
- Cut with the grain. Against-the-grain cuts require more force and are more likely to slip or gouge. If the wood tears instead of curling, reverse direction.
- Take breaks. Tired hands and stiff fingers lose precision. Stop every 30–45 minutes, stretch your hands, check your blade edge.
Whittling ideas: FAQ
What is the easiest thing to whittle?
A pointed stick. It teaches you how the knife enters the wood, how grain direction affects the cut, and how much pressure to use. After that, a flat butter knife or a small spatula are the next steps. The first real “project” most beginners make is a simple gnome or mushroom, which can be finished in under an hour.
Is whittling a cheap hobby?
Yes. A beginner whittling knife costs $10–20, a basswood block costs $2–5, and a leather thumb guard costs $5–10. Total startup cost: $17–35. That is cheaper than almost any other craft hobby. Ongoing costs are essentially zero — a knife lasts years with stropping, and basswood blocks cost less than a coffee.
What should I whittle first?
A pointed stick (to learn the push cut), then a flat butter knife or spatula (to learn the pull cut and shaping), then a simple mushroom or gnome (to learn 3D form). This three-project progression covers every fundamental skill and takes one afternoon total.
What are good wood whittling projects for beginners?
Pointed sticks, butter knives, spatulas, mushrooms, gnomes, wooden pendants, chip-carved coasters, letter openers, simple spoons and whittled balls. All 10 beginner projects in this guide use only push cuts, pull cuts and stop cuts, require only a standard whittling knife, and can be completed with basswood.
What is the best wood for whittling?
Basswood (also called linden). It is soft, straight-grained, light-coloured, takes paint well, and is available at every craft store. Butternut is the next step up for finer work. White pine is cheap and available but has hard knots that deflect the blade. Avoid hardwoods like oak until you have experience.
Can you whittle with a pocket knife?
Yes, for beginner projects. A sharp pocket knife with a locking blade works for pointed sticks, spatulas, pendants and simple figures. For more detailed work, a dedicated whittling knife with a thinner, shorter blade gives better control. Most whittlers eventually buy a dedicated knife, but a pocket knife is a perfectly valid starting point.
How long does it take to whittle something?
A pointed stick takes 15 minutes. A butter knife takes 30–45 minutes. A mushroom or gnome takes 45–90 minutes. A detailed animal figure takes 3–6 hours. A functional spoon or bowl takes 3–5 hours. Most beginner projects finish in under an hour.
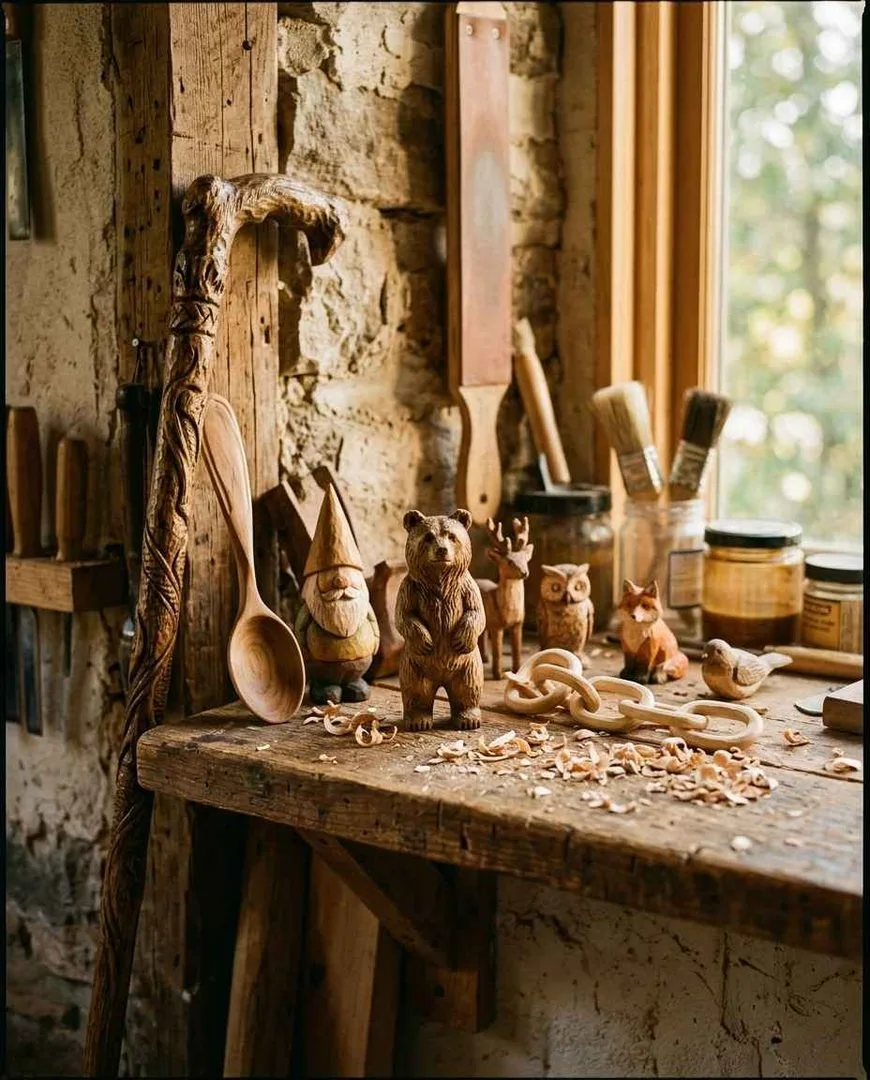
Pick up the knife and make the first cut
The pointed stick takes 15 minutes and teaches you everything you need to know about how a knife moves through wood. The mushroom takes 45 minutes and teaches you 3D form. The gnome takes an hour and teaches you character. By the time you have carved all three, you will be looking at every block of wood and every fallen branch as a project waiting to happen. That is when whittling stops being a hobby and starts being the way you see wood.
For more hands-on hobbies, air dry clay ideas has 50 no-kiln projects, things to bedazzle has 50 rhinestone projects, junk journal ideas has 50 mixed-media pages, and girls night craft ideas has 40 group projects. For the full collection, hobbies to do at home and things to do when bored are the master lists.