Air Dry Clay Ideas: 50 Projects from Easy Trinkets to Stunning Home Decor (2026)
Air dry clay is the most forgiving craft material that exists. It does not need a kiln, an oven, or any special equipment. You knead it, shape it, let it sit for 24 hours, and it hardens on its own. If it cracks, you patch it with wet clay. If you hate it, you start again. The entry cost is a $5 pack from any craft store and the tools you already own.
This guide has 50 air dry clay ideas sorted by difficulty and purpose — from five-minute trinket dishes to weekend home decor projects. Every idea tells you what to make, what you need, and the one tip that prevents the most common beginner mistake for that specific project. No product pitches, no kit upsells — just ideas you can start with whatever clay you already have.

Air dry clay is a modelling clay that hardens at room temperature without firing or baking. It is made from natural clay, chalk and cellulose fibre, and dries in 24–72 hours depending on thickness. The most popular brands are DAS, Crayola, Jovi and Sculpd. It can be painted with acrylic paint, sealed with varnish, and used for home decor, jewellery, ornaments and gifts. It is not food-safe or waterproof without sealing.
What you need to get started
You probably own most of this already. The clay itself is the only thing you might need to buy.
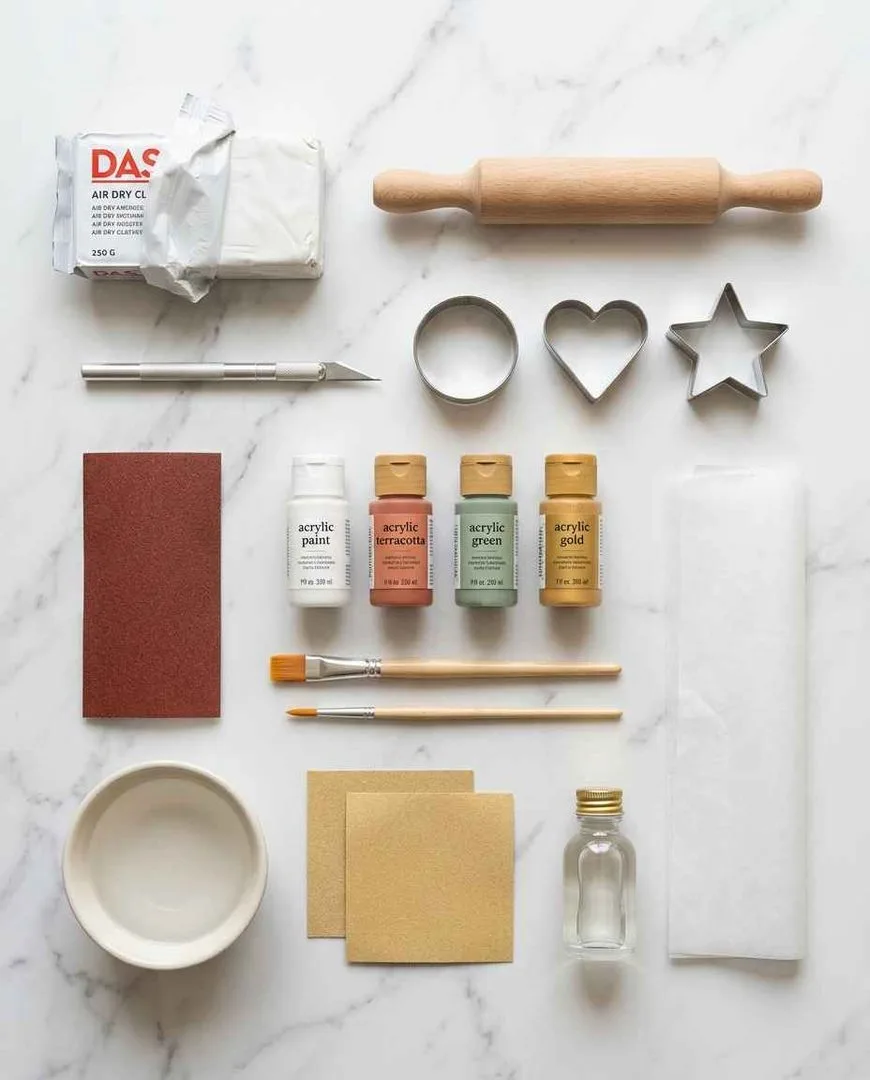
- Air dry clay. A 1kg block costs $5–10. White clay is the most versatile because it takes paint well. Terracotta-coloured clay looks beautiful unpainted.
- Rolling pin. A kitchen rolling pin works. Place two wooden sticks (chopsticks or rulers) on either side to roll an even thickness.
- Craft knife or clay tools. A butter knife works for most cuts. A needle tool or toothpick handles fine detail.
- Cookie cutters. For clean shapes. Circles, hearts, stars and letters cover 80% of projects.
- Sandpaper. Fine-grit (220+) for smoothing dried pieces. The single most skipped step that separates amateur from professional-looking results.
- Acrylic paint and brushes. Any acrylic paint works. Small brushes for detail, a flat brush for base coats.
- Varnish or sealant. Mod Podge, clear acrylic spray, or polyurethane. Sealing is what makes the piece durable and gives it a finished look.
- Water and a sponge. Keep your fingers and the clay surface damp while working. Dry clay cracks; damp clay forgives.
Easy air dry clay ideas for beginners
Start here. These projects use basic shapes — rolled slabs, pinched bowls, pressed textures — and finish in under an hour plus drying time. If you have never touched clay before, the trinket dish is your first project.
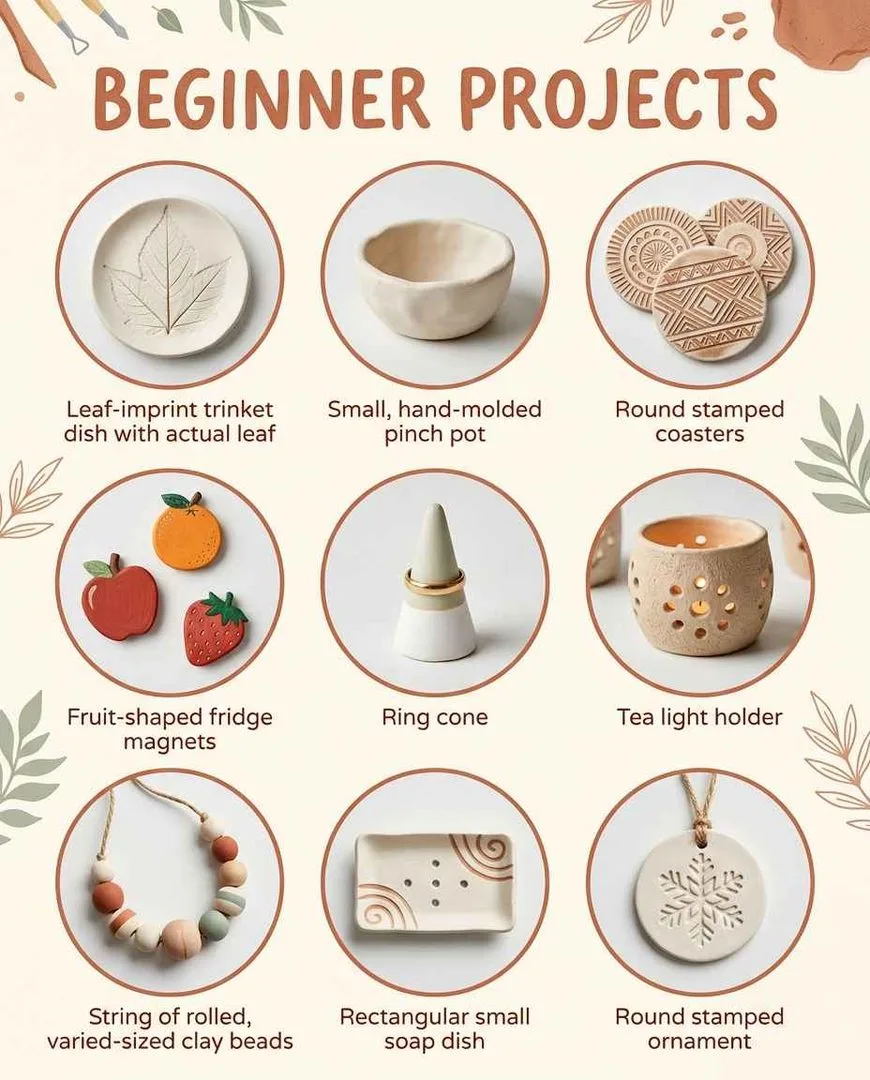
1. Trinket dish with leaf imprint
Roll a slab 5mm thick, press a real leaf into the surface vein-side down, cut around it with a knife, and drape it over an upturned bowl to dry in a curved shape. The leaf texture does all the artistic work — your job is just to press evenly and let gravity shape the curve. Sand the edges once dry and paint the leaf veins with gold acrylic for a museum-quality result from a 15-minute project. The tip: press the leaf firmly and evenly, then peel it off slowly. Rushed peeling tears the impression.
2. Pinch pot
Roll a ball the size of a lemon, push your thumb into the centre, and pinch the walls outward while rotating. Keep the walls even and the base thick enough to support the sides. This is the oldest ceramic technique on earth and the single best way to learn how clay responds to pressure. The tip: keep your fingers damp. Dry fingers create drag lines that crack when the pot dries.
3. Stamped coasters
Roll a slab 8mm thick (thicker than a trinket dish for durability), cut circles using a large cookie cutter or a drinking glass, and press textures into the surface before drying: lace, burlap, the bottom of a shoe, a fork, bubble wrap. Each coaster gets a different texture. Seal with two coats of varnish to make them water-resistant. The tip: flip them halfway through drying to prevent warping.
4. Fridge magnets
Roll small shapes — fruits, letters, animals, abstract blobs — no more than 5mm thick. Let them dry, paint them, seal them, and glue a small magnet to the back. These are the fastest start-to-finish project in this guide and the one most likely to become a gift. The tip: make them small and light. Heavy magnets slide down the fridge.
5. Ring cone
Roll a cone shape about 10cm tall with a wide, stable base. Smooth the surface with a damp finger, let it dry, and paint it. Rings slide down to whatever diameter fits. A five-minute project that solves the “rings scattered across the nightstand” problem permanently. The tip: make the base wider than you think. Narrow bases tip over.
6. Tea light holder
Form a ball, hollow it out with your thumb like a pinch pot, but leave the walls thick (1cm+). Press a tea light candle into the wet clay to create the perfect-sized indent, then remove the candle before drying. Paint or leave natural. The tip: the indent must be slightly larger than the candle because clay shrinks 5–10% as it dries.
7. Clay beads
Roll small balls between your palms, pierce each one through the centre with a toothpick (leave the toothpick in while drying to keep the hole open), let them dry, paint them, and string them on cord or wire. A necklace or bracelet from scratch in one afternoon. The tip: roll all the beads the same size by starting with equal amounts of clay. Uneven beads look intentional in a “wabi-sabi” style.
8. Soap dish with drainage ridges
Roll a slab, cut an oval or rectangle, and press parallel lines across the surface with a ruler or the back of a knife to create drainage channels. Drape over an upturned bowl to create a slight curve so water runs off. Seal thoroughly — soap dishes live in wet environments. The tip: the ridges must be deep enough that the soap does not sit flat in water.
9. Stamped ornaments
Roll a slab 5mm thick, cut shapes with cookie cutters (stars, circles, hearts, gingerbread figures), press a rubber stamp or textured fabric into the surface, and pierce a hole at the top with a straw for ribbon. Dry flat. Paint and seal. These become Christmas tree ornaments, gift tags, or wall decorations. The tip: pierce the hole before drying. Drilling into dried clay cracks it.
10. Pencil holder
Wrap a slab of clay around a tin can or glass jar, smooth the seam, and add texture or carved initials to the surface. Remove the can after the clay holds its shape (about 4 hours) or leave it inside as a structural core. The tip: score and slip the seam. “Score and slip” means scratching both surfaces and applying a thin layer of wet clay as glue. This is how every clay join should be made.
Cute and kawaii air dry clay ideas
The projects that earn the most saves on Pinterest and the most comments on TikTok. Small, charming, personality-driven pieces that make people ask “where did you get that?”
11. Mushroom trinket jar
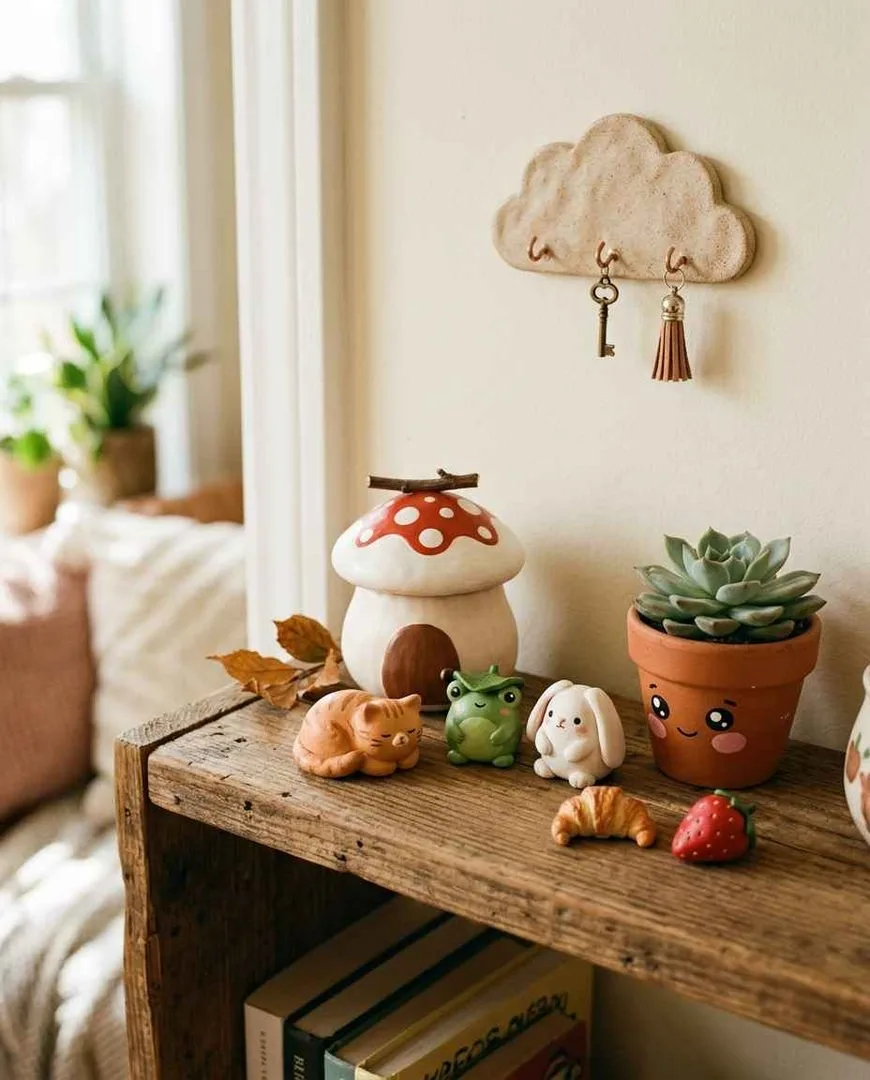
Form a small jar with a lid shaped like a mushroom cap — the spots are small flattened balls attached with slip. Paint the cap red with white spots, or go pastel for a cottagecore aesthetic. The jar holds jewellery, coins or small treasures. The tip: make the lid slightly larger than the jar opening. Lids that fit inside tend to get stuck.
12. Kawaii face plant pot
Wrap clay around a small terracotta or plastic pot (or form a pot from scratch), smooth the surface, and once dry, paint a simple kawaii face: two dots for eyes, a tiny curved mouth, pink circle cheeks. The plant becomes a character. The tip: seal the inside if the pot will hold soil directly. Unsealed clay absorbs moisture and softens.
13. Mini clay animals
Form tiny animals from pea-sized pieces: a cat loaf, a sitting frog, a round bird, a sleeping fox. Keep them under 3cm. The smaller the scale, the more forgiving the proportions — a lumpy blob with two dots for eyes reads as “cute” rather than “wrong.” The tip: let each body part firm up slightly before attaching the next. Wet-on-wet joins sag under gravity.
14. Cloud key holder
Roll a cloud shape (a flat, rounded, organic blob), press three small hooks or bent wire into the bottom edge before drying, mount on the wall near the door. Keys hang from the hooks. The tip: embed the hooks deep enough that they hold weight. Test with real keys before painting.
15. Mini food replicas
Tiny croissants, strawberries, avocados, fried eggs, sushi rolls — each no larger than a coin. Paint with realistic colours and seal with a gloss varnish for a shiny “food” finish. Display in a miniature tray, use as fridge magnets, or give as gifts. The tip: mix a tiny amount of paint into the clay before shaping for through-colour that does not chip.
16. Heart-shaped ring dish
Roll a slab, cut a heart shape, drape over a heart-shaped form (or a balled-up piece of aluminium foil shaped into a heart). Paint the interior gold or pastel, leave the exterior white. The combination of the heart shape and the gold interior makes this the most giftable project on the list. The tip: press the edges thin and let them curl up naturally. Forced curves crack.
17. Tiny house village
Form 5–7 small houses (rectangles with triangle roofs), each slightly different in size and shape. Paint them in pastels, arrange them on a wooden board or a shelf. A miniature neighbourhood that takes an afternoon and fills a mantelpiece. The tip: each house should have a flat bottom heavy enough to stand without glue.
18. Clay flower bouquet
Shape individual petals, layer them into roses, daisies or tulips, attach to wire stems wrapped in green tape. Arrange in a small clay vase you made yourself. An entire bouquet that never wilts. The tip: thin petals dry fastest and look most realistic. Thick petals look like clay; thin petals look like flowers.
19. Biscuit coasters
Shape coasters to look like chocolate digestive biscuits, Oreos, or shortbread rounds. Paint with realistic colours, add texture for crumb detail, and seal with matte varnish. These are conversation starters every time someone sets down a mug. The tip: use a toothbrush to stipple texture onto the surface. It creates a convincing biscuit-crumb finish.
20. Cat loaf collection
Shape one cat in five escalating loaf positions: slightly tucked paws, half loaf, three-quarter loaf, full loaf, and perfect bread loaf. Paint each one, line them up on a shelf. The internet’s favourite cat meme rendered in clay. The tip: the body should be a rounded rectangle with no visible legs in the final “perfect loaf” position.
Useful air dry clay home decor ideas
Projects that solve a problem or fill a space. These are the ones adults search for — functional pieces that look handmade in the good way, not the primary-school-art-project way.
21. Textured vase
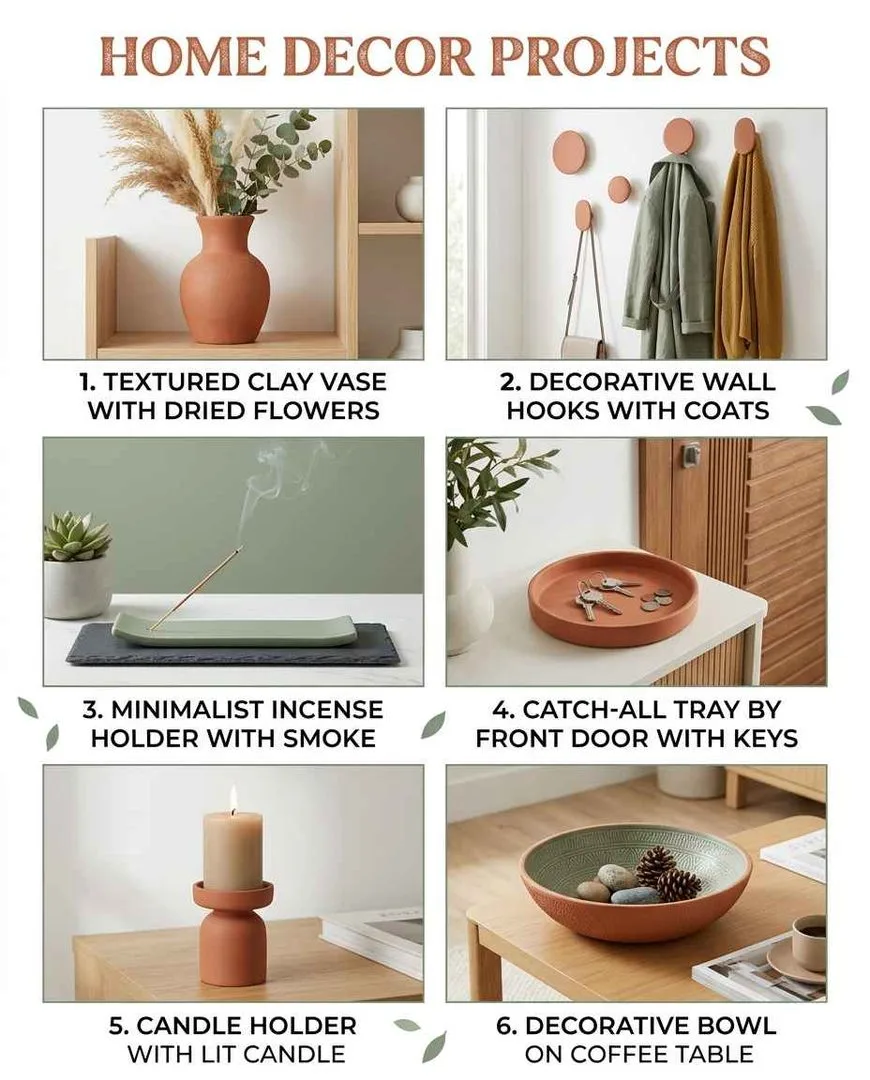
Wrap a slab of clay around a glass bottle or jar, smooth the seam, and add texture: press rope into the surface for a ribbed look, use a fork for fine lines, or carve geometric patterns freehand. Remove the glass insert after the clay sets or leave it inside for water resistance. Dried flowers do not need water, so the vase works without a glass liner. The tip: the seam is the weakest point. Score, slip, and smooth it until invisible.
22. Decorative wall hooks
Shape a flat backing plate (circle, cloud, abstract shape), embed a screw or wall hook into the back before drying, paint and seal. Mount on the wall for coats, bags, keys or jewellery. Functional art that takes 20 minutes to make and replaces a $30 store-bought hook. The tip: the backing plate must be thick enough (1.5cm+) to hold the embedded hardware without cracking.
23. Minimalist incense holder
Roll a small slab, shape it into a line, a circle, or an organic form, and press a thin hole at an angle using a wooden skewer. The incense stick slots into the hole. Paint in matte white, black, or sage green. The simplicity is the point. The tip: angle the hole so the incense leans rather than stands straight up. A slight lean looks more intentional.
24. Catch-all tray
Roll a large slab (20cm+), place it inside a shallow baking dish lined with cling film, press the edges upward to form low walls, and let it dry. The tray sits by the front door for keys, wallets, sunglasses. Paint the interior one colour and the exterior another. The tip: low walls (2–3cm) work better than high walls. Too tall and it looks like a bowl; too short and things roll out.
25. Decorative bowl
A larger version of the pinch pot, finished with sanding, painting and sealing until it looks like a ceramic piece you bought. Use it for fruit (not touching the clay directly — use a liner), decorative objects, or as a centrepiece. The tip: build thickness gradually. A large bowl with thin walls will slump while drying. Keep the walls at least 8mm thick.
26. Candle holder set
Make three candle holders of different heights. Each is a cylinder or tapered form with a tealight-sized indent at the top. Group them on a tray. The grouped arrangement looks deliberate even if the individual pieces are simple. The tip: test with a real tealight before painting. If the indent is too tight the candle will not sit flush.
27. Spoon rest
Roll a flat slab in an oval shape, curl the edges up slightly, and done. A five-minute project that sits next to the stove and prevents spoon stains on the counter for the rest of its life. Seal with food-safe varnish if the spoon will touch food. The tip: make it larger than you think. A spoon rest that is too small defeats the purpose.
28. Bookends
Form two solid rectangular blocks, smooth and paint them, and use them to hold books upright on a shelf. The weight of air dry clay makes surprisingly effective bookends. Carve initials, press textures, or leave them minimalist. The tip: solid blocks work better than hollow ones. The weight is the function.
29. Wall art tiles
Roll slabs, cut into squares or rectangles, press textures or carve designs, dry flat, paint, and mount on the wall in a grid or scattered arrangement. A set of 6–9 tiles creates an entire accent wall installation for the cost of one bag of clay. The tip: make all tiles the same thickness so they sit flush against the wall.
30. Light switch cover
Roll a slab, cut to fit around the light switch plate, press textures or paint designs, and attach over the existing plastic cover with adhesive putty or small screws. The single fastest way to make a room feel personalised. The tip: measure twice. The switch holes must align perfectly.
Air dry clay gift ideas
Handmade gifts that look intentional, not desperate. Every project here finishes in under two hours and arrives looking like something you would buy at a craft market.
31. Personalised keychain
Shape a small tag (circle, heart, star), stamp or carve initials or a name into the surface before drying, pierce a hole, thread a keyring through after painting and sealing. Costs 50p in materials and means more than a $20 shop-bought version. The tip: stamp letters into the clay while it is still soft but firm enough to hold the impression. Too soft and the letters blur; too dry and the clay cracks.
32. Photo holder
Form a small base (a rock shape, a cube, a heart) and press a piece of thick wire into the top, curved into a clip at the end. The wire holds a Polaroid or small printed photo. A desk ornament that becomes instantly personal when the photo is inserted. The tip: embed the wire at least 2cm deep. Shallow wire pulls out when you swap photos.
33. Hand print ornament
Press a child’s hand or a pet’s paw into a rolled slab, cut around the impression with a 2cm border, pierce a hole for ribbon, and let it dry. Paint the background and leave the print natural. A keepsake that appreciates in sentimental value every single year. The tip: practice the press on a scrap piece first. Children pull away; pets resist. One clean, confident press is all you get.
34. Custom name sign
Roll out letters or cut them from a slab using a knife, dry them, paint them, and mount them on a wooden board or directly on a wall. A nursery name sign, a kitchen label, a door plaque. The tip: thick letters (1cm+) are more durable and easier to mount. Thin letters snap.
35. Decorative clay flowers
Shape individual petals, assemble them into roses or daisies, attach to wire stems, and arrange in a hand-thrown clay vase. An entire gift — flowers and vase — made from the same material. The tip: thin petals dry translucent at the edges, which makes them look realistic. Roll them as thin as you dare.
36. Jewellery dish with monogram
A small dish with a single stamped initial in the centre. Fill the stamped letter with gold paint for contrast. Wrap in tissue paper. A 15-minute gift that looks like it took all day. The tip: press the stamp firmly and remove it cleanly. Rocking the stamp blurs the letter.
37. Essential oil diffuser pendant
Shape a small pendant (disc, heart, teardrop), leave it unglazed and unsealed. The porous clay absorbs essential oil and releases the scent slowly throughout the day. Thread on a cord as a necklace. The tip: do not seal this one. The porosity is the function.
38. Memory impression box
A small box with a lid, where the lid has a pressed impression of something meaningful: a fingerprint, a tiny footprint, a shell, a leaf from a specific place. The box holds a small note explaining the impression. The tip: make the box and lid separately, measure the fit while wet, and adjust before drying.
Seasonal air dry clay ideas
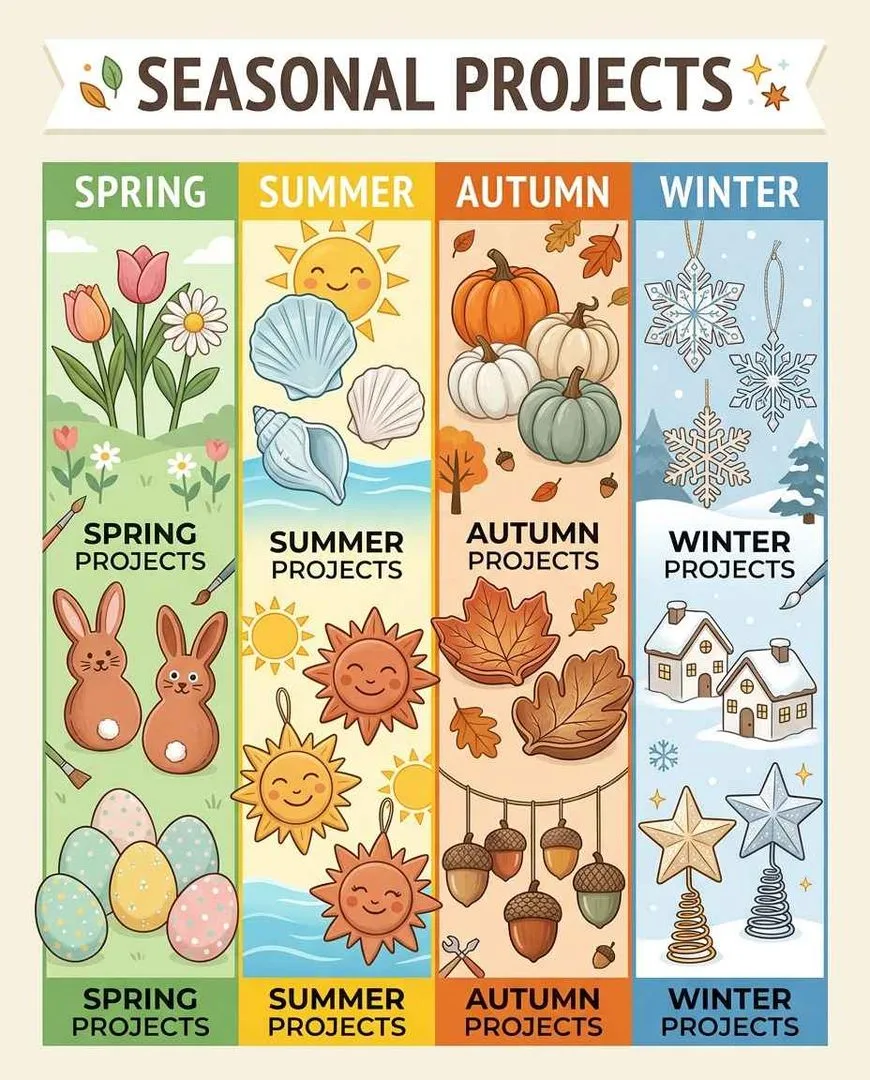
39. Christmas tree ornaments
Stars, snowflakes, gingerbread figures, angels, baubles — all cut from slabs, stamped with textures, dried, painted and hung with ribbon. A batch of 20 takes one afternoon and replaces a box of plastic decorations with something handmade. The tip: make a hole for ribbon before drying. Use a drinking straw for a clean round hole.
40. Halloween pumpkin set
Shape 5–7 small pumpkins in different sizes by forming balls and pressing vertical grooves with a knife. Attach a small stem to each. Paint in classic orange, white, or matte black. Group them on a shelf or mantelpiece for an instant seasonal display. The tip: the grooves should be deeper than you think. Shallow grooves disappear when the clay dries and shrinks.
41. Easter egg set
Shape smooth oval eggs, dry them, and paint with pastel colours, geometric patterns, or gold metallic accents. Display in a bowl or nest of straw. Reusable every year, unlike the chocolate kind. The tip: smooth the surface obsessively before drying. Eggs are the shape where every bump shows.
42. Autumn leaf garland
Press real leaves into slabs to capture the vein pattern, cut around each leaf, pierce a hole at the top, dry, paint in autumn colours (burnt orange, gold, deep red), and string them on twine. Hang above a fireplace or across a window. The tip: use real leaves from outside as both stamps and templates. Each one is unique.
43. Spring flower mobile
Shape small flowers and birds, dry, paint in pastels, and hang from a branch or wire frame with clear fishing line. A nursery decoration or a window ornament that catches the light. The tip: keep each piece light. Heavy pieces pull the mobile off balance.
44. Valentine heart garland
Cut hearts from a slab, dry, paint alternating red and white or pink and gold, and string on twine with beads between each heart. A 30-minute project that decorates a mantelpiece or a bedroom wall. The tip: punch holes before drying using a straw at each end of the heart.
45. Thanksgiving place settings
Shape small pumpkins, acorns or leaves and stamp or paint each guest’s name on them. Set one at each plate. Functional decoration that doubles as a take-home gift. The tip: flat-bottomed shapes sit stable on a plate. Round shapes roll into the gravy.
How to prevent air dry clay from cracking
Cracking is the #1 complaint with air dry clay, and it is almost always preventable. These seven rules cover every cause:
- Knead for 3 full minutes. Kneading removes air bubbles and creates a uniform moisture level. Skip this and differential drying causes cracks where wet meets dry.
- Keep thickness even. Thick sections dry slower than thin sections. The thin parts shrink first and pull away from the thick parts, creating stress cracks. Roll to an even thickness throughout.
- Dry slowly. Cover the piece loosely with plastic or a damp cloth for the first 12 hours, then uncover for the remaining drying time. Fast drying (sunlight, heaters, fans) is the enemy.
- Flip halfway. The bottom dries slower than the top because air does not circulate underneath. Flip the piece after 12 hours so both sides dry evenly.
- Score and slip every join. Any two pieces of clay joined together (a handle to a mug, a stem to a pumpkin) must be scratched on both surfaces and bonded with a thin layer of clay slip (clay dissolved in water). Unscored joins crack apart 100% of the time.
- Patch cracks immediately. If a crack appears while the clay is still damp, press wet clay into it with a damp finger. If the piece is already dry, fill the crack with a paste of clay dust and PVA glue, let it set, and sand smooth.
- Seal the finished piece. Two coats of varnish or sealant protect against moisture, chips and further cracking. Unsealed air dry clay is fragile; sealed air dry clay is surprisingly durable.
Air dry clay ideas: FAQ
What can you make with air dry clay?
Trinket dishes, pinch pots, vases, coasters, ornaments, jewellery, keychains, magnets, candle holders, plant pots, wall hooks, soap dishes, photo holders, wall art, bookends and decorative sculptures. Air dry clay can be shaped into anything that does not need to hold water or food directly (unless sealed with food-safe varnish).
Is air dry clay good for beginners?
Yes. Air dry clay is the most beginner-friendly modelling material because it requires no kiln, oven, or special tools. It is soft enough to shape with your hands, forgiving enough to rework if you make a mistake, and it hardens on its own in 24–72 hours. A trinket dish or pinch pot can be completed in 15 minutes plus drying time.
How long does air dry clay take to dry?
24 hours for thin pieces (under 5mm), 48–72 hours for thicker pieces (1cm+). Drying time depends on thickness, humidity and air circulation. Do not force-dry with heat — this causes cracking. The piece should feel cool to the touch when it is still damp and room-temperature when it is fully dry.
Can you paint air dry clay?
Yes. Acrylic paint is the best option because it adheres well, dries quickly and comes in every colour. Apply paint after the clay is fully dry. Two thin coats are better than one thick coat. Seal with a clear varnish after painting to protect the finish.
Is air dry clay waterproof?
No. Unsealed air dry clay will soften and dissolve if submerged in water. However, sealing with two or more coats of polyurethane varnish, Mod Podge, or clear acrylic spray makes it water-resistant enough for coasters, soap dishes and plant pot saucers. It will never be truly waterproof like fired ceramic, but sealed pieces handle normal household moisture.
What is the difference between air dry clay and polymer clay?
Air dry clay hardens at room temperature and does not need baking. Polymer clay must be baked in an oven at a specific temperature to cure. Air dry clay is better for larger projects and beginners because it is cheaper, easier to work with, and requires no equipment. Polymer clay is better for jewellery and small detailed pieces because it is stronger and available in colours.
How do you stop air dry clay from cracking?
Knead the clay for 3 minutes before starting, roll to an even thickness, dry slowly away from direct heat, flip the piece halfway through drying, score and slip every join, and seal the finished piece with varnish. The full anti-cracking guide is in the section above.
Pick a project and start with what you have
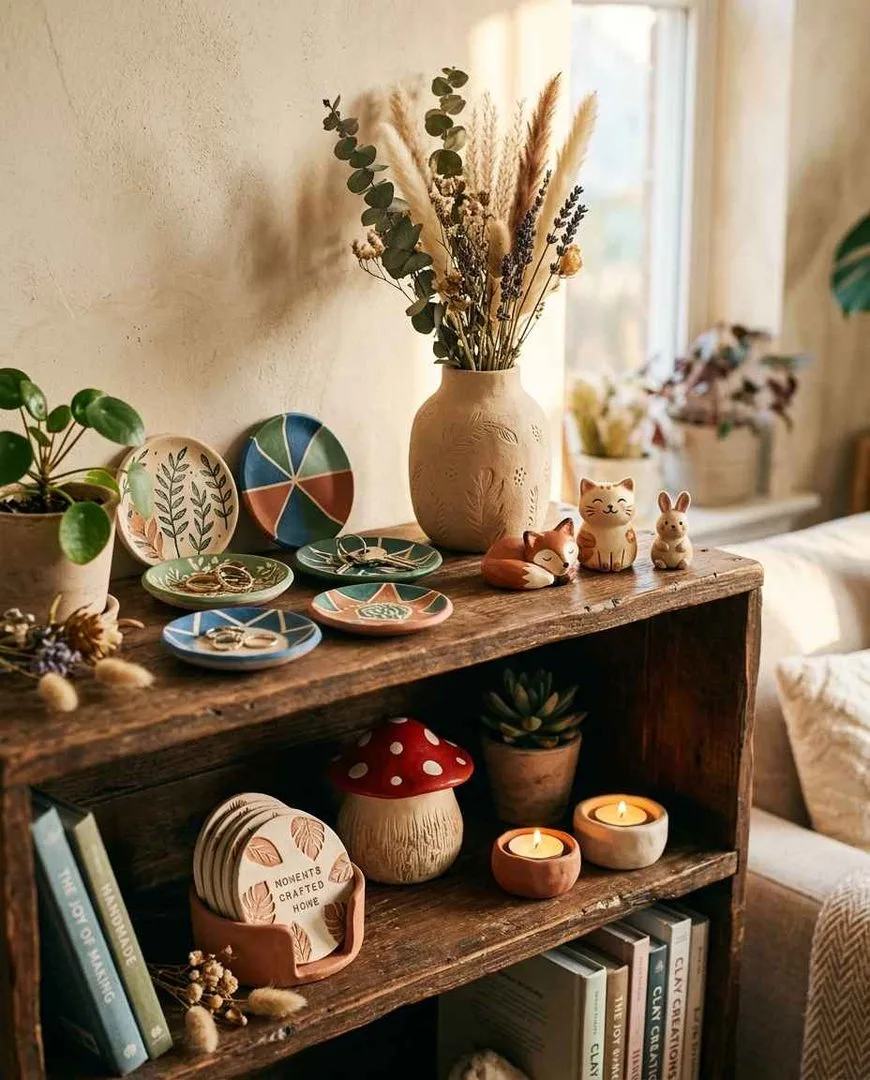
The trinket dish (idea 1) takes 15 minutes and teaches you everything you need to know about rolling, pressing, shaping and drying. By the time it is dry and painted, you will already be planning the next three projects. That is how air dry clay works — you start with one dish and end up with a shelf full of handmade pieces that make your home feel like yours.
For more creative boredom-killers, junk journal ideas has 50 mixed-media projects using found materials, things to draw when bored has 100 drawing prompts sorted by mood, and hobbies to do at home has more hands-on projects for every interest. If the creative energy keeps going, our things to do when bored master list has the full collection.