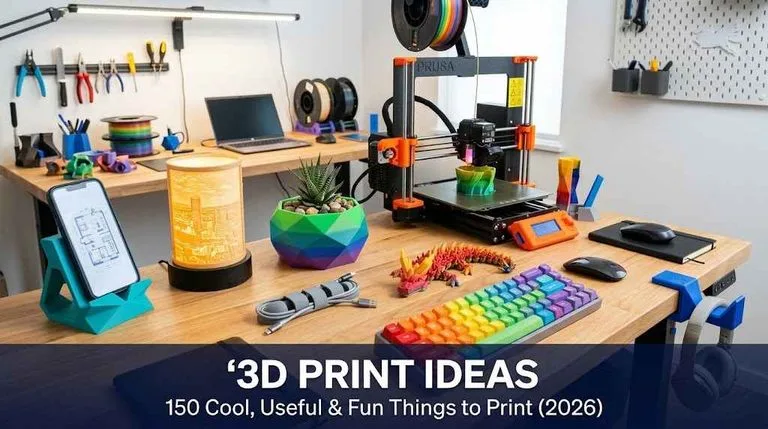
Perler Bead Ideas: 60 Cute, Easy and Cool Patterns for Beginners (2026)
Perler beads — also called fuse beads, Hama beads or melting beads — are small plastic tubes you arrange on a pegboard to form a pixel-art design, then iron to melt them together into a single solid piece. The result is a colourful, flat, durable creation that can be a coaster, a keychain, a magnet, a wall decoration or just something satisfying you made with your hands in 20 minutes.
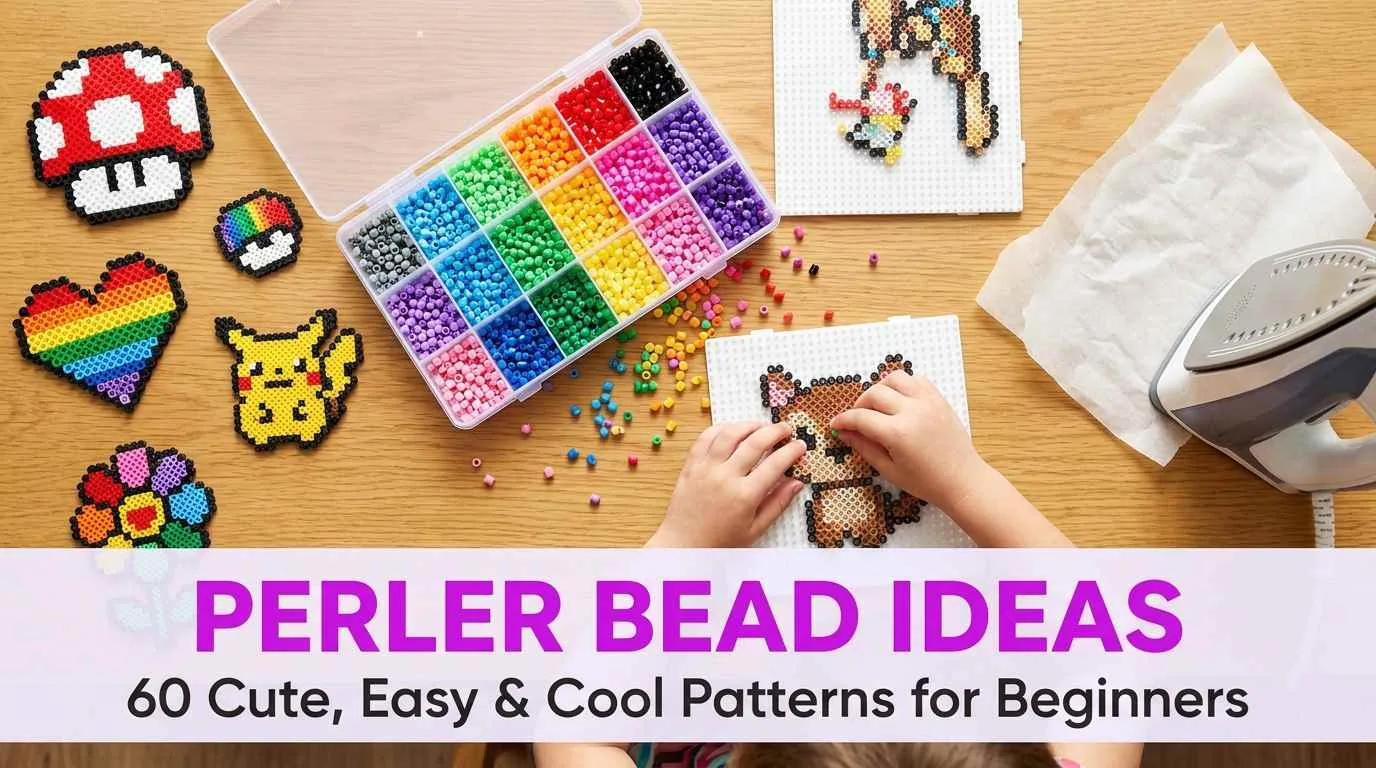
This guide has 60 perler bead ideas sorted from five-minute beginner designs to impressive multi-board showpieces, with a complete step-by-step tutorial showing exactly how to place, iron and finish your first design. Every idea includes the approximate bead count, the pegboard shape you need, and the difficulty level. Whether you are 8 or 38, this is the craft that turns boredom into something you can hold.
Perler beads (fuse beads) are small coloured plastic tubes arranged on a pegboard to form designs, then fused together with a household iron. The process takes 10–30 minutes per design, costs under $0.50 in beads per project, and requires no artistic skill — you are placing beads into preset pegs, not drawing freehand. The finished pieces are waterproof, durable, and surprisingly beautiful. A starter kit costs $10–15 and contains enough beads for dozens of projects.
How to make perler beads — the complete beginner tutorial
This section walks through every step with images. If you have never touched a perler bead, follow this once and you will understand the entire craft.
Step 1: Gather your supplies
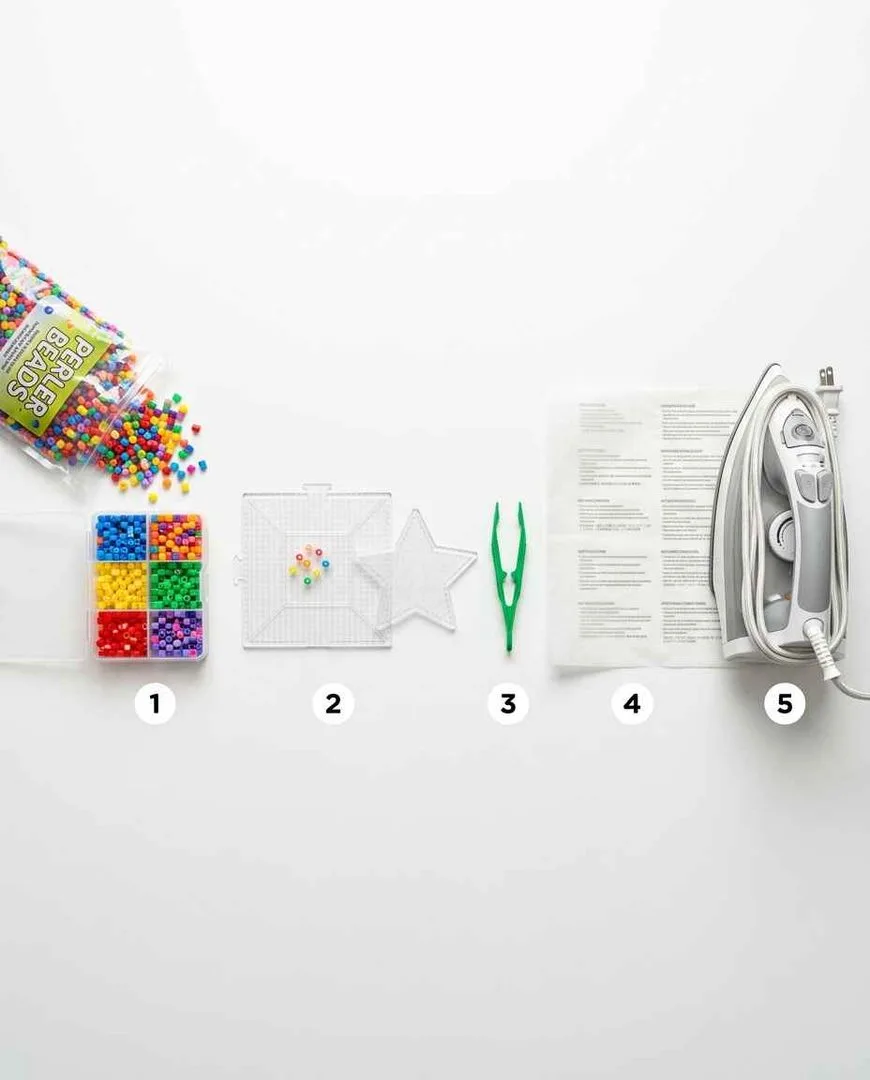
- Perler beads. A mixed-colour bucket (11,000 beads for $10–15) lasts for months. Brands: Perler (US), Hama (Europe), Artkal (widest colour range). All standard-size beads (5mm) are interchangeable across brands.
- Pegboards. Clear boards let you place a printed pattern underneath as a guide. Start with a square board and a circle board — they cover 80% of beginner designs. Interlocking boards connect to create larger designs.
- Household iron. A regular clothes iron, set to medium heat (no steam). This is the only tool that costs anything — and you already own one.
- Parchment paper or ironing paper. Placed between the iron and the beads. Parchment paper from the kitchen works perfectly. The paper prevents beads from sticking to the iron.
- Tweezers. Plastic tweezers for picking up and placing beads precisely. Included in most starter kits. Fingers work for large designs; tweezers are essential for small, detailed work.
Step 2: Choose a pattern and sort your beads
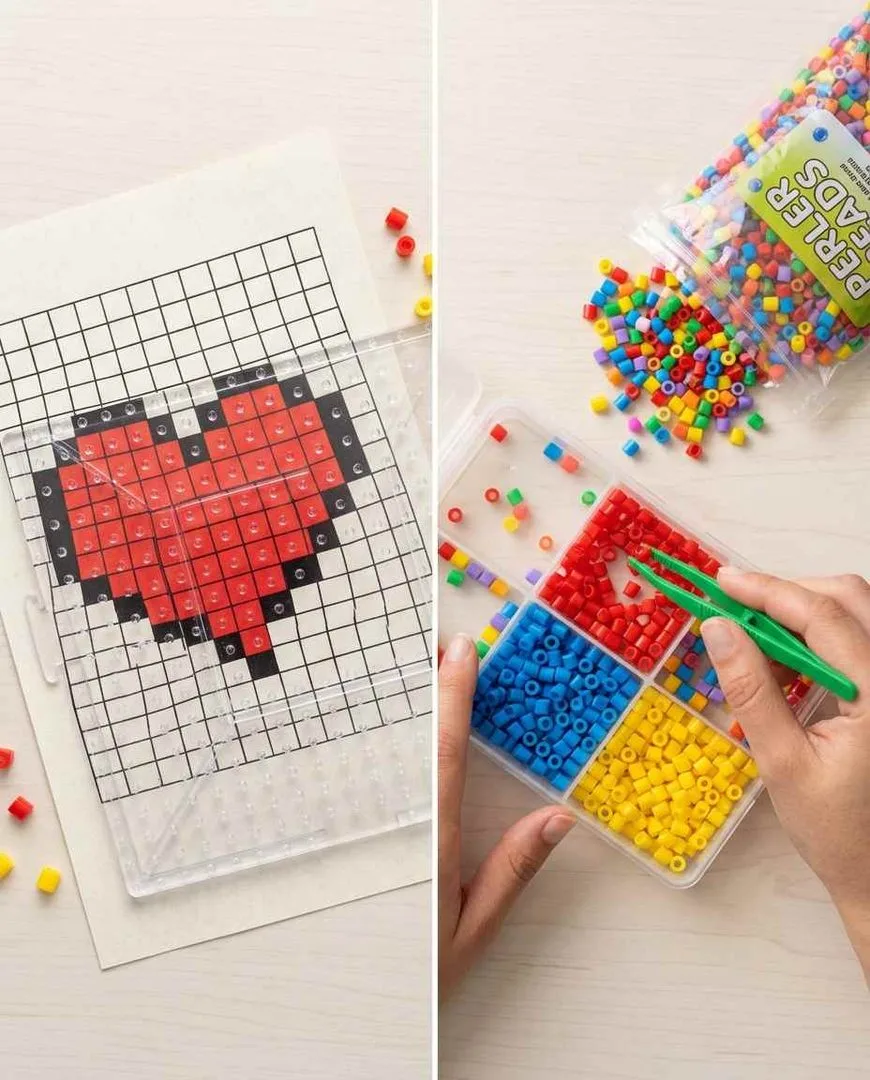
Pick any design from this article. For your first project, choose something with fewer than 100 beads and 3–4 colours — the simple heart (idea 1) or the basic star (idea 2) are ideal starters.
💡 BEGINNER TIP: Print the pattern and slide it underneath a clear pegboard. The pegs align with the pixel grid, so you can see exactly where each colour goes without counting squares. This eliminates the #1 beginner frustration: losing your place mid-pattern.
Step 3: Place beads on the pegboard
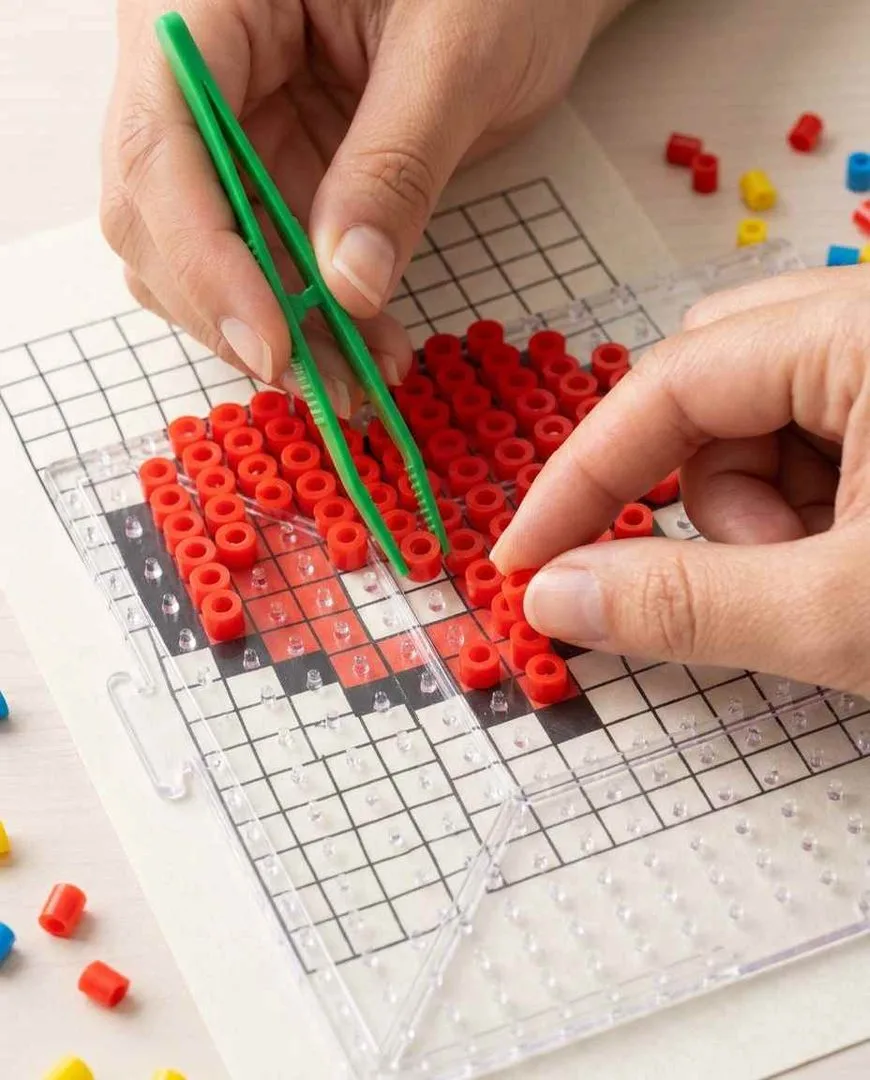
Place beads one at a time onto the pegs, following your pattern. Work from one corner to the opposite corner, row by row, to avoid accidentally bumping finished sections. Each bead drops over a peg and sits upright.
💡 TECHNIQUE: Work on a flat, stable surface. A bumped table sends 200 beads off their pegs and onto the floor. If you need to move the board, slide a piece of cardboard underneath and carry both together. Never lift the pegboard by its edge mid-project.
Step 4: Iron the design
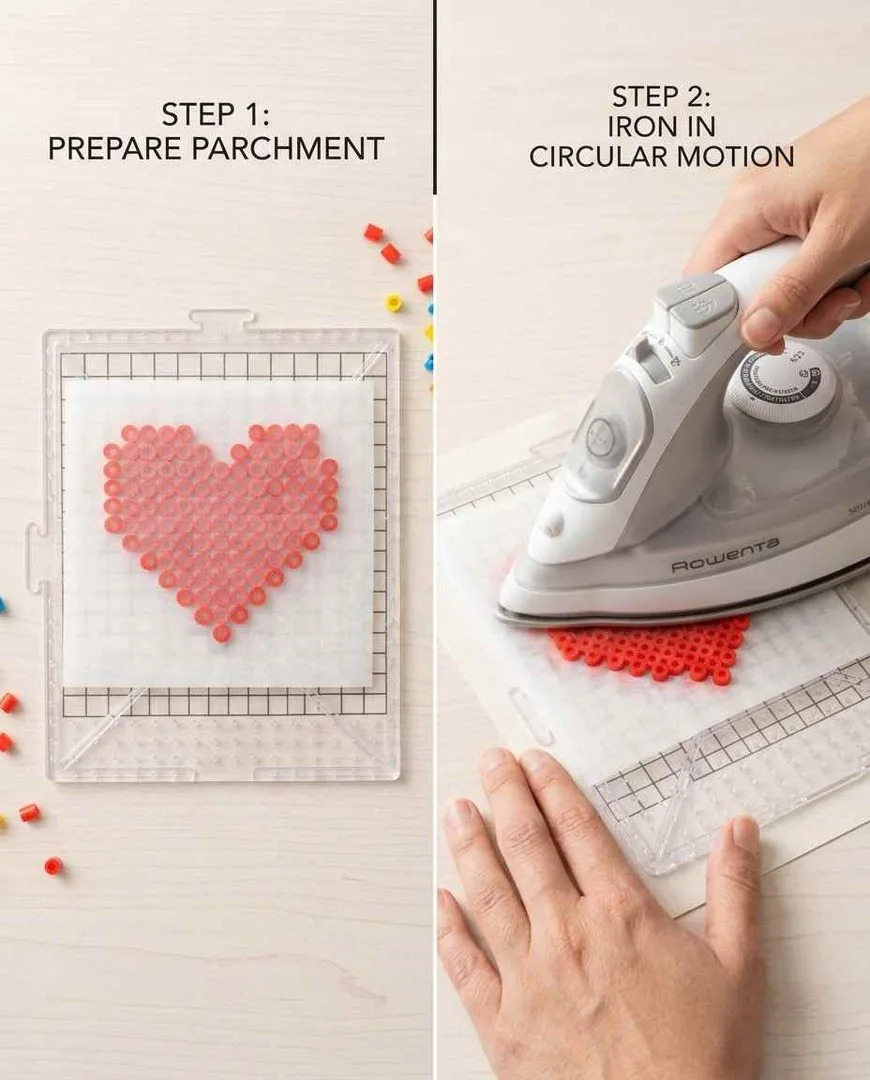
Place parchment paper over the completed design. Set your iron to medium heat, no steam. Press the iron gently onto the parchment paper and move in slow, circular motions for 15–30 seconds. The beads underneath will melt slightly and fuse together. You will see the beads flatten and connect through the parchment paper — when the surface looks evenly fused with no individual bead tops visible, stop.
⚠️ COMMON MISTAKES: Too much heat melts beads into a flat blob (unrecoverable). Too little heat leaves beads unfused and they fall apart. Too much pressure warps the design. The goal: gentle, even pressure with circular motion. Check every 10 seconds by lifting a corner of the parchment. When beads are fused but still have visible holes in the centre, you are done.
Step 5: Cool, flip, and finish
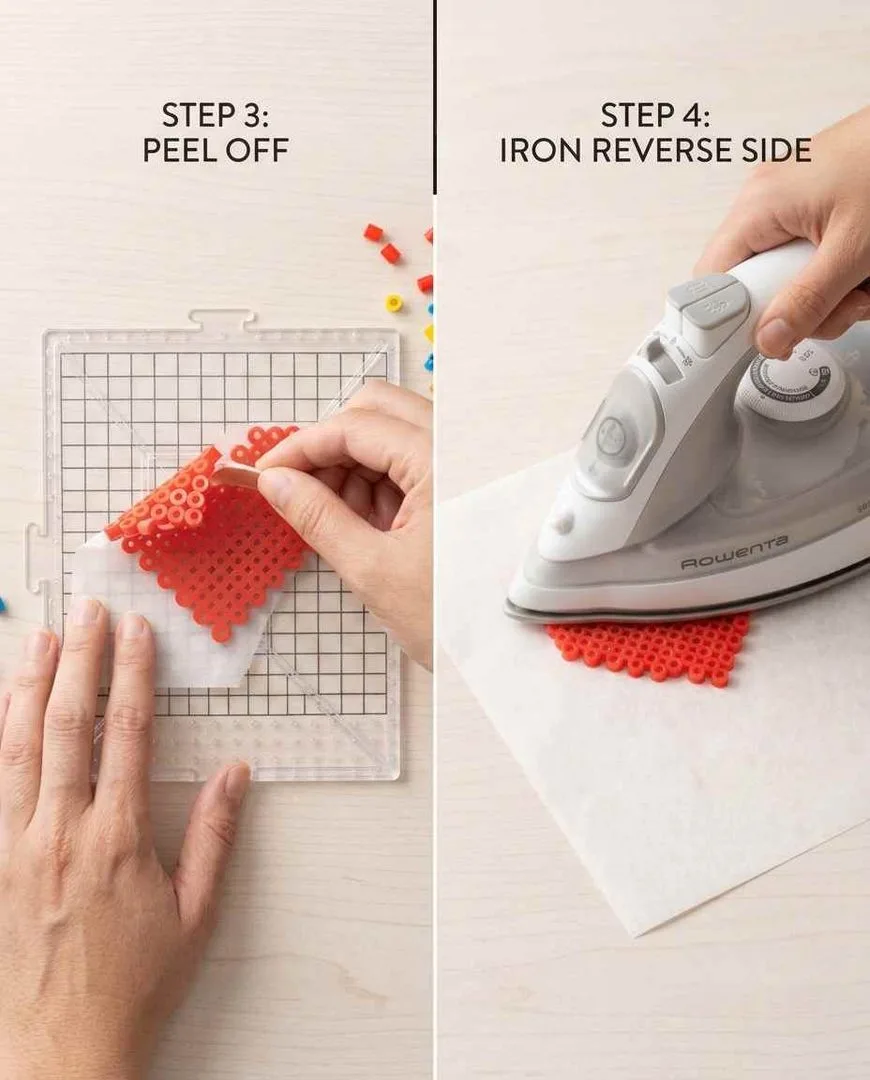
Let the design cool for 30 seconds on the pegboard. Carefully peel it off from one corner — the fused beads should lift as one solid piece. Flip it over, place parchment paper on the un-ironed side, and iron the back for 10–15 seconds for even fusion on both sides. Place a heavy book on top while it cools to prevent curling.
💡 THE BOOK TRICK: Perler bead designs curl when one side is more fused than the other. The fix: iron both sides equally and immediately place a heavy book on top while the piece cools. The weight keeps it perfectly flat. Leave the book for 5 minutes. This single step is the difference between a professional-looking result and a warped coaster.
Your first perler bead creation is done. The entire process — sorting beads, placing, ironing, cooling — takes 15–30 minutes for a small design. Now pick an idea from the sections below and make your second one.
Easy perler bead ideas for beginners
Start here. These use the basic square pegboard, require fewer than 100 beads, and use 2–4 colours each. Any of them can be your first project.
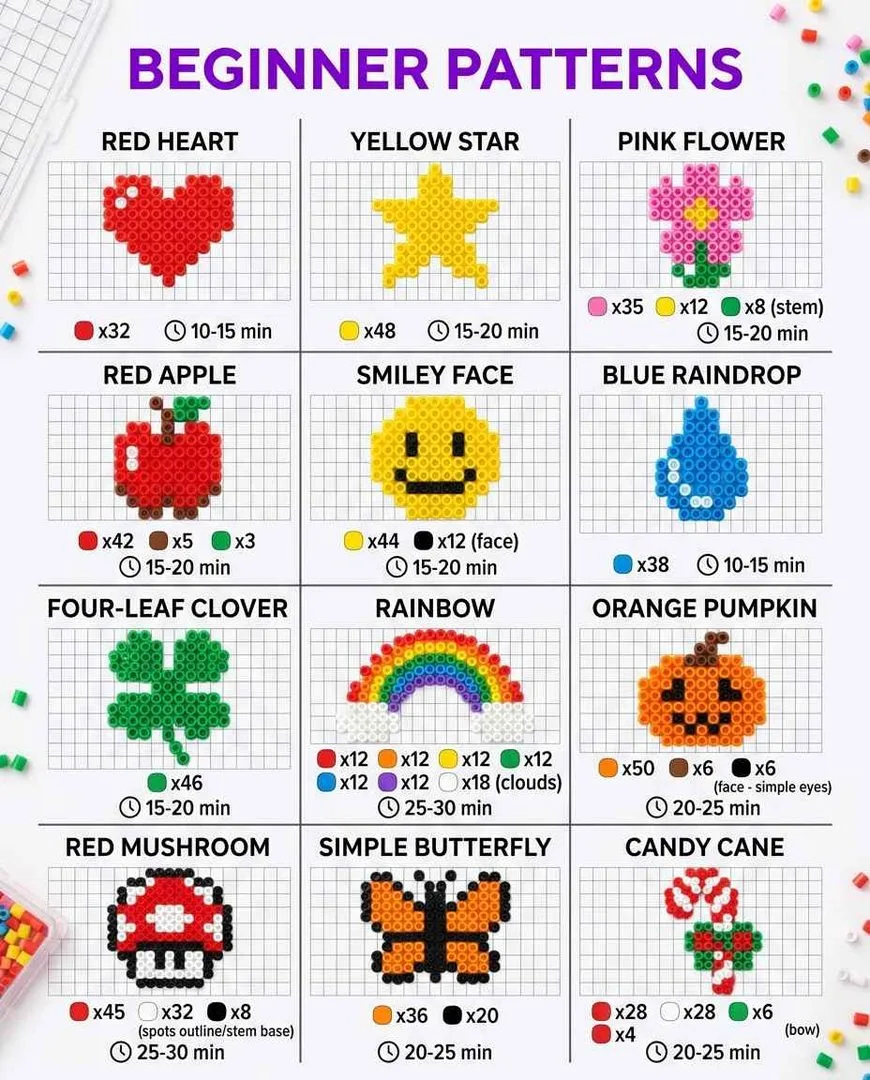
1. Simple heart -Two colours: red fill and a single black or dark outline row. The heart uses about 70 beads and fits a small square pegboard. This is the universal first perler bead project because the shape is forgiving — a slightly uneven heart still reads as a heart. Make it as a magnet (glue a magnet to the back), a keychain (thread a jump ring through a corner hole before the beads fuse completely), or a coaster.
2. Five-pointed star — About 60 beads in yellow or gold. The star shape teaches you to count pegs outward from a centre point, which is the core skill for any radial design.
3. Simple flower — A centre circle of one colour surrounded by petal circles in another. About 80 beads. The daisy pattern — yellow centre, white petals — is the most recognisable.
4. Pixel apple — A red circle with a green leaf and a small brown stem at the top. About 50 beads. The apple teaches you how to create curved edges in a square grid — a fundamental pixel-art skill.
5. Smiley face — A yellow circle with two black dot eyes and a curved black mouth. About 60 beads. The simplest face design and the foundation for every character pattern.
6. Raindrop — A teardrop shape in blue, about 40 beads. The pointed top and rounded bottom teach asymmetric shaping on a square grid.
7. Four-leaf clover — Four green heart shapes arranged in a cross, with a small brown stem. About 80 beads. A St. Patrick’s Day design that works year-round.
8. Rainbow arc — Seven rows of colour (red, orange, yellow, green, blue, indigo, violet) arranged in an arc. About 100 beads. The rainbow teaches you to create curves across multiple rows.
9. Mini mushroom — The Mario mushroom: a red cap with white spots, a white face with two eyes, and a tan stem. About 70 beads. The most iconic pixel-art design in existence.
10. Simple butterfly — Two mirrored wings in any colour with a thin body line down the centre. About 80 beads. The bilateral symmetry teaches you to mirror patterns, which is essential for complex designs.
11. Candy cane — A curved hook shape in alternating red and white diagonal stripes. About 50 beads. A fast seasonal design that teaches diagonal striping.
12. Crescent moon — A yellow crescent about 40 beads. The negative space (the inside of the crescent that has no beads) is the design element. Learning to use empty space is an important skill.
13. Lightning bolt — A yellow zigzag, about 35 beads. The smallest design on this list and the fastest to complete. A good warm-up project before tackling something larger.
14. Cherry pair — Two red circles connected by green stems with a green leaf. About 50 beads. Teaches you to create two separate elements connected by a thin line.
15. Ghost — A white rounded shape with two black dot eyes and a wavy bottom edge. About 60 beads. The simplest Halloween design and a good introduction to creating character expressions.
Cute and kawaii perler bead ideas
The designs that get the most saves on Pinterest and the most likes on TikTok. Kawaii style means big eyes, small mouths, round shapes and pastel colours.
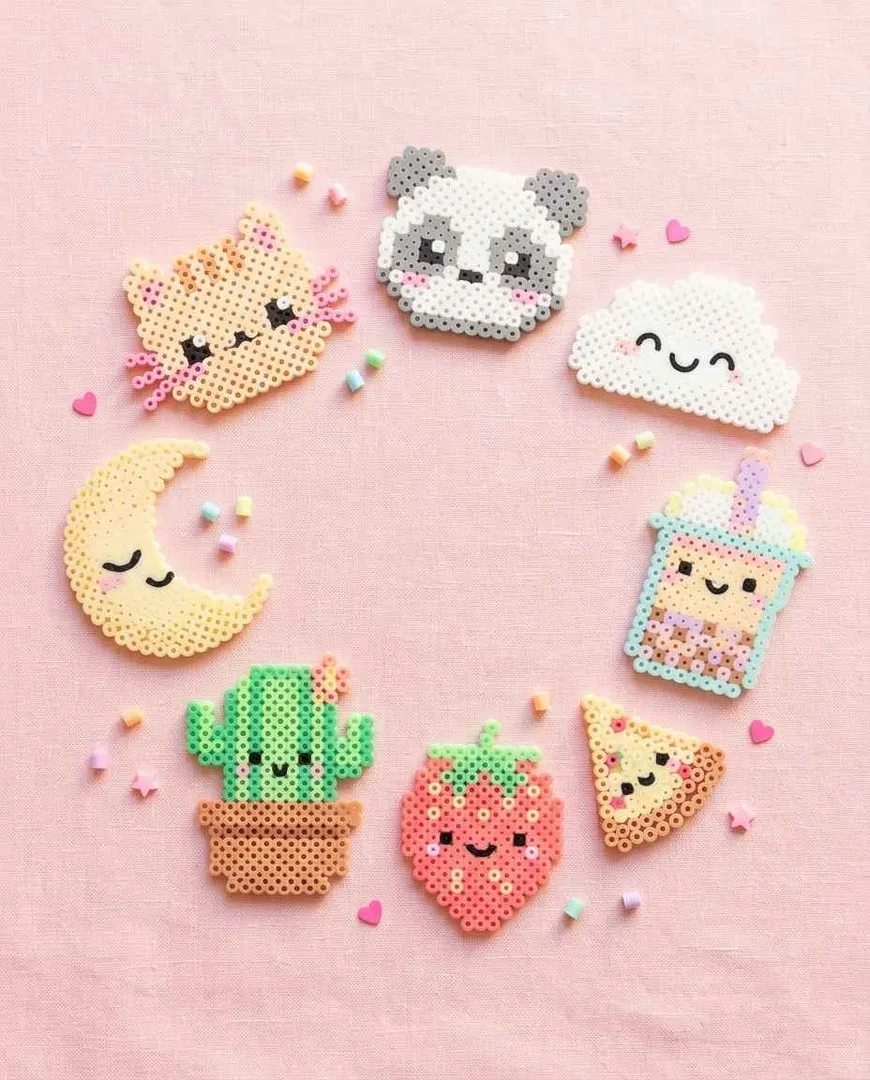
16. Kawaii cat face – A circular face with two pointed ears, two large oval eyes with a white highlight dot in each, a tiny triangle nose, and a small curved mouth. About 120 beads. Use pink, white and black. The highlight dot in the eyes is the single detail that makes any face look kawaii — it creates the illusion of light reflecting in the eye. Learn this and every character you make will look professional.
17. Panda face — A white circle with black ear circles, black eye patches and a small nose. About 100 beads. The most forgiving animal face because pandas ARE black-and-white pixel art.
18. Smiling cloud — A fluffy white cloud shape with two dot eyes and a small curved smile. About 80 beads. Add pink cheeks (two pink beads on either side of the smile) for instant kawaii.
19. Boba tea cup — A cup shape with a dome lid, a straw, and dark brown circles (tapioca pearls) inside the cup. About 130 beads. The cup is tan/cream, the lid is clear/white, the straw is pink, the pearls are brown. A trending design that photographs beautifully.
20. Pixel pizza slice — A triangle with golden-brown crust, red sauce, yellow cheese and small red pepperoni circles. About 90 beads. Pixel-art food is one of the most popular perler bead categories.
21. Strawberry with face — A red strawberry shape with yellow seed dots and a kawaii face added to the centre. About 70 beads. The combination of realistic fruit shape + cartoon face is the kawaii formula.
22. Potted cactus — A green cactus with arms in a small brown or terracotta pot, with a kawaii face on the cactus body. About 100 beads. Add a tiny pink flower on top.
23. Ice cream cone — A tan waffle cone with one or two round scoops on top. Add a kawaii face to the scoop. About 90 beads. Use pink for strawberry, brown for chocolate, white for vanilla.
24. Tiny avocado — A green oval with a dark green outer ring and a brown circle pit in the centre. Add a face to the pit. About 80 beads. The most popular fruit design after the strawberry.
25. Pixel bunny — A white body with long ears, pink inner ears, two dot eyes and a small pink nose. About 110 beads. The bunny works for Easter or any time of year.
26. Baby chick — A round yellow body with a tiny orange beak, two dot eyes and small wing bumps on the sides. About 60 beads. The fastest cute design on this list.
27. Sleeping moon — A yellow crescent with closed eyes (two curved lines) and a peaceful expression. About 50 beads. A nursery wall decoration.
28. Donut — A circle with a hole, brown base, pink frosting on top and multicoloured sprinkle dots. About 100 beads. Endlessly customisable frosting colours.
29. Watermelon slice — A half-circle with green rind, white inner rind, pink flesh and black seed dots. About 80 beads. Simple, colourful, summery.
30. Pixel penguin — A rounded body, black sides and back, white belly, orange beak and feet. About 90 beads. The tuxedo pattern reads clearly even at small pixel scale.
Cool perler bead ideas that impress people
These take longer (30–60 minutes), use more beads (150–400+), and produce pieces that make non-crafters say “you MADE that?”
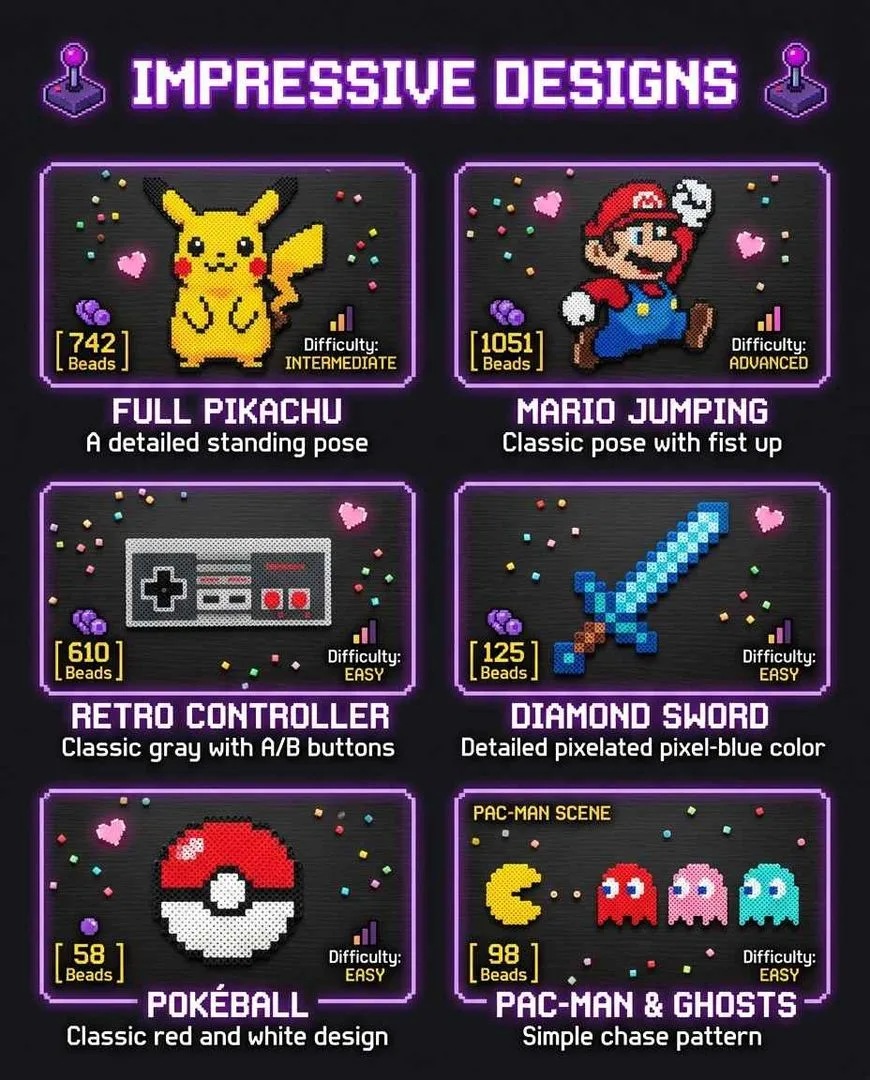
31. Pikachu – The full-body pixel Pikachu: yellow body, red cheeks, black-tipped ears, brown back stripes, lightning-bolt tail. About 250 beads on a square board. This is the design that converts casual crafters into perler bead enthusiasts because the finished piece is genuinely impressive. The key: get the red cheek circles and the eye shapes right, and the rest of the body is just filling yellow.
32. Mario jumping — The classic NES Mario sprite: red cap, blue overalls, brown shoes, one arm up in a jump pose. About 200 beads. The most iconic pixel-art character ever designed and a natural fit for perler beads because the original sprite was already pixel art.
33. Retro game controller — An NES, SNES or Game Boy controller rendered in grey, black and button colours. About 300 beads. A wall decoration for any gaming setup.
34. Pokéball — A circle split horizontally: red top, white bottom, a black line through the centre with a white circle button. About 120 beads. Simple shape, iconic design, instantly recognisable.
35. Minecraft diamond sword — A long diagonal shape in shades of blue and grey, replicating the Minecraft sword sprite. About 180 beads. Requires a long pegboard or connected boards.
36. Pac-Man scene — Pac-Man (yellow circle with mouth open) chasing a line of dots with a coloured ghost ahead. About 200 beads across a rectangular board. A complete scene rather than a single character.
37. Pixel Among Us character — The Among Us crewmate silhouette in any colour with a visor. About 80 beads. Small enough to make the entire 10-colour crew as a set.
38. Space Invader — The classic Space Invaders alien in green or white. About 70 beads. A retro gaming icon that doubles as pixel art wall decoration.
39. Pixel art landscape — A multi-board scene: a pixelated mountain, trees, a sun and clouds. About 400+ beads across 2–4 connected boards. The most ambitious design on this list and a genuine wall art piece when finished.
40. Rubik’s Cube — A 3D-perspective Rubik’s Cube showing three faces with scrambled colour squares. About 150 beads. The 3D perspective illusion on a flat bead surface is what makes it impressive.
Mini and small perler bead ideas
These use fewer than 50 beads each and finish in under 10 minutes. Make them as keychains, magnets, earrings or quick gifts. The small scale means you can make 10 in one sitting.
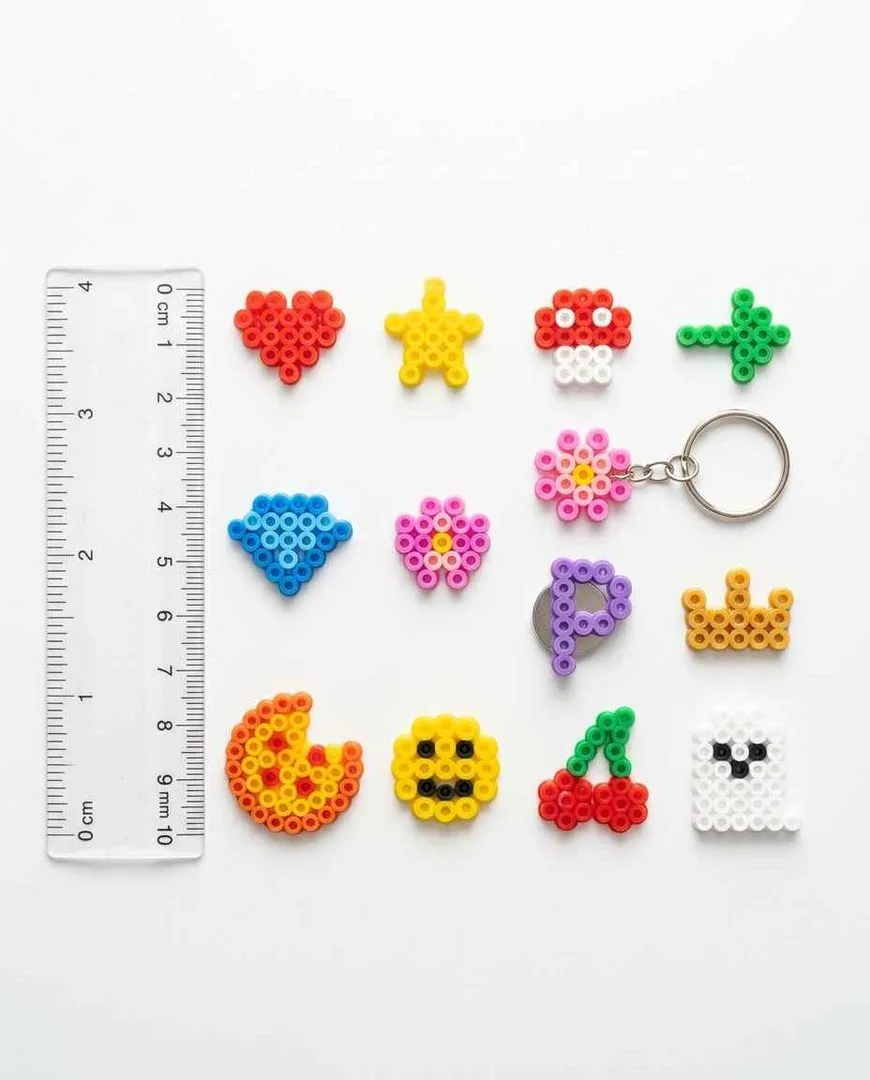
41. Mini heart — A 5×5 heart in a single colour. About 12 beads. The smallest possible recognisable shape. Make 20 in different colours in one session as gift tags.
42. Tiny star — A 5-pointed star at minimum scale. About 15 beads. Perfect for stringing into a garland.
43. Single letter initial — Your initial in a block font, 5–7 beads tall. About 20–30 beads. Glue a magnet to the back for a fridge initial, or add a keychain ring.
44. Mini crown — A tiny crown shape in gold/yellow beads. About 25 beads. A charm for a necklace or a cake topper.
45. Pixel arrow — A single-bead-wide arrow pointing in any direction. About 15 beads. Use as bookmarks or directional signs in a bedroom decoration scheme.
46. Tiny diamond gem — A diamond shape in light blue with a white highlight. About 20 beads. Minecraft-inspired and great as an earring (attach earring hooks to the top).
47. Mini music note — A single eighth note or quarter note. About 15 beads. A charm for a music lover’s keychain.
48. Bite-sized pizza — A single pizza slice at the smallest possible scale. About 20 beads. Part of a mini food collection.
3D perler bead projects
These use multiple flat pieces assembled into three-dimensional objects. Each panel is made on a pegboard as normal, then the panels are joined at right angles. The results are dramatically more impressive than flat designs.
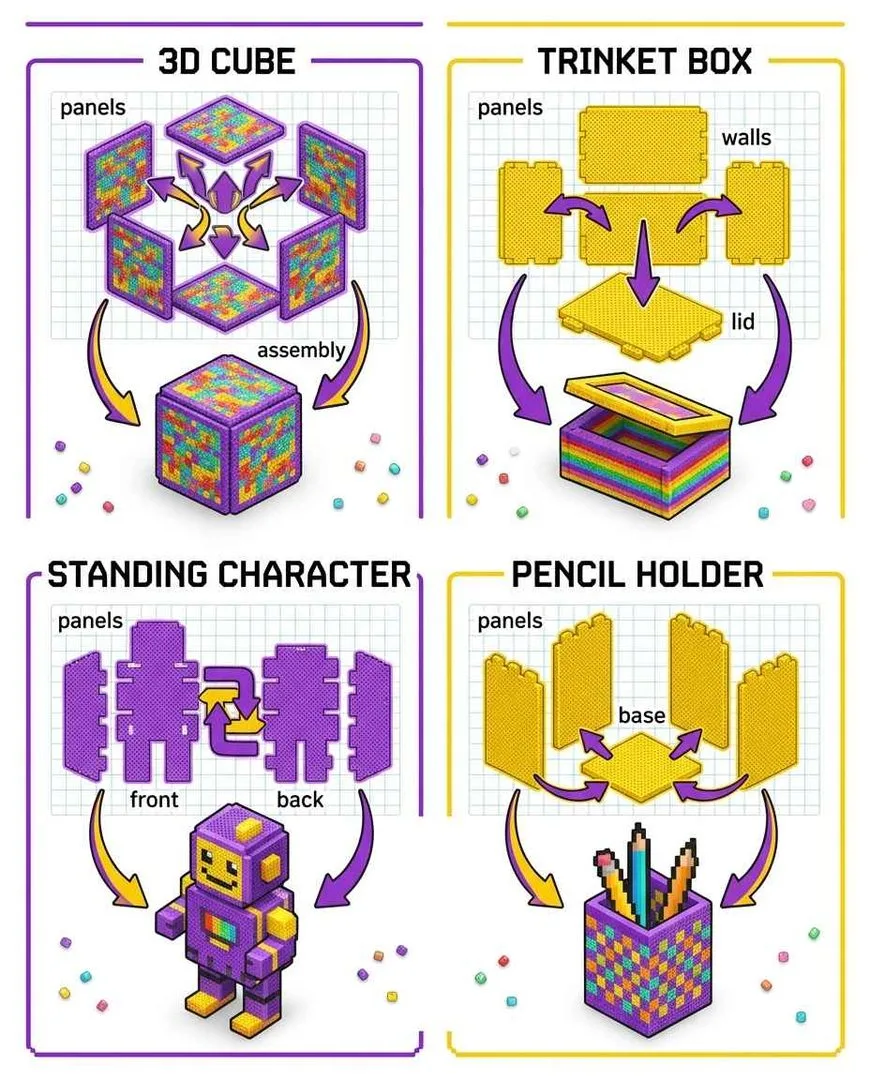
49. 3D cube – Six identical square panels assembled into a cube. Each panel is a flat square made on the pegboard, then the six panels are joined edge-to-edge. The trick: cut small notches into the edges of each panel before ironing so they interlock when assembled. A Minecraft grass block (green top, brown sides, grey bottom) is the most popular 3D cube design. About 300 beads total.
50. Trinket box with lid — Four wall panels, a base panel and a lid panel assembled into a small open-top box. The lid sits on top. Use contrasting colours for the lid and body. Functional and genuinely impressive. About 250 beads.
51. Standing character — A front panel and a side panel with matching slots cut into each so they slide together at right angles and the character stands upright on a surface. About 200 beads per panel.
52. 3D star ornament — Two identical flat star shapes slotted together at perpendicular angles through a centre slit, creating a 3D star that can hang from a thread. About 100 beads total.
53. Pencil holder — Four tall rectangular panels and a square base assembled into a box. Decorate each panel with a different pixel-art design. Functional desk organiser. About 350 beads.
Functional perler bead projects you will actually use
Perler beads are heat-resistant, waterproof and surprisingly durable once fused. These projects turn decorative craft into useful objects.
54. Coaster set — Square or circular designs sized to hold a mug (8–10cm across). Make a set of 4–6 in matching colours or a themed series. Perler beads are naturally heat-resistant and waterproof, making them functionally excellent coasters. About 200 beads per coaster.
55. Keychain charm — Any small design (under 50 beads) with a jump ring threaded through a corner hole before the final ironing. The hole in each bead provides natural attachment points. The most giftable perler bead format.
56. Fridge magnets — Any small design with a flat magnet glued to the back using E6000 or hot glue. A sheet of magnets costs $3 and converts 20+ designs into fridge magnets.
57. Picture frame border — Four long strips of patterned beads assembled around a photo opening. The photo sits behind the frame. A personalised picture frame that costs under $1 in materials.
58. Earrings — Mini designs (under 20 beads) with earring hooks threaded through the top bead hole. Lightweight, colourful and completely unique. Use mini perler beads (2.6mm) for more delicate results.
59. Phone charm / strap — A small perler bead design attached to a phone strap cord through a bead hole. The TikTok phone charm trend meets pixel art. Coordinate with your
60. Bookmark — A long rectangular strip of patterned beads, 2–3 beads wide and 15–20 beads tall. Thin enough to sit flat between pages. Make a set with different patterns for different books.
Perler bead ideas: FAQ
What are perler beads?
Perler beads (also called fuse beads, Hama beads or melting beads) are small coloured plastic tubes that you arrange on a pegboard to form designs, then melt together with a household iron. The result is a solid, flat, colourful piece of pixel art. They are one of the most popular craft activities for kids, teens and adults, with over 11,000 monthly searches for project ideas.
What temperature do you iron perler beads?
Medium heat, no steam. The exact temperature varies by iron, but medium is the universal recommendation. Too hot melts the beads into a flat, unrecognisable blob. Too cool leaves them unfused and they fall apart. Check every 10 seconds by lifting the parchment paper corner. When the beads are fused but still have visible centre holes, stop.
How do you keep perler beads from curling?
Iron both sides equally and place a heavy book on top immediately while the piece cools. Curling happens when one side is more fused than the other, causing uneven shrinkage. The book applies even pressure during cooling and keeps the piece perfectly flat. Leave the book for 5 minutes.
What can I do with finished perler bead designs?
Use them as coasters, keychains (thread a jump ring through a bead hole), fridge magnets (glue a magnet to the back), earrings (attach earring hooks), wall decorations (mount with adhesive strips), bookmarks, phone charms, gift tags, or standalone display pieces. Perler bead designs are waterproof and durable, so they work for functional items as well as decorative ones.
Are perler beads and Hama beads the same?
They are different brands of the same product. Perler is the US brand, Hama is the European brand, and Artkal is an Asian brand with the widest colour range. All three make standard-size (5mm) fuse beads that are interchangeable — you can mix brands on the same pegboard. The process is identical for all brands.
What age are perler beads for?
Perler beads are suitable for ages 6 and up. Children under 6 can place beads on pegboards with supervision, but the ironing step must be done by an adult. The craft is popular with kids (simple patterns), teens (gaming and kawaii designs) and adults (complex pixel art, coasters, 3D projects). There is no upper age limit — the adult perler bead community is large and active.
How many beads do I need for a project?
A mini design uses 15–50 beads. A small beginner design uses 50–100. A medium design uses 100–250. A large character or scene uses 250–500+. A multi-board wall piece uses 500–1,000+. A mixed-colour bucket of 11,000 beads ($10–15) is enough for dozens of small projects or several large ones.
Sort your beads, pick a pattern, and make something in 20 minutes
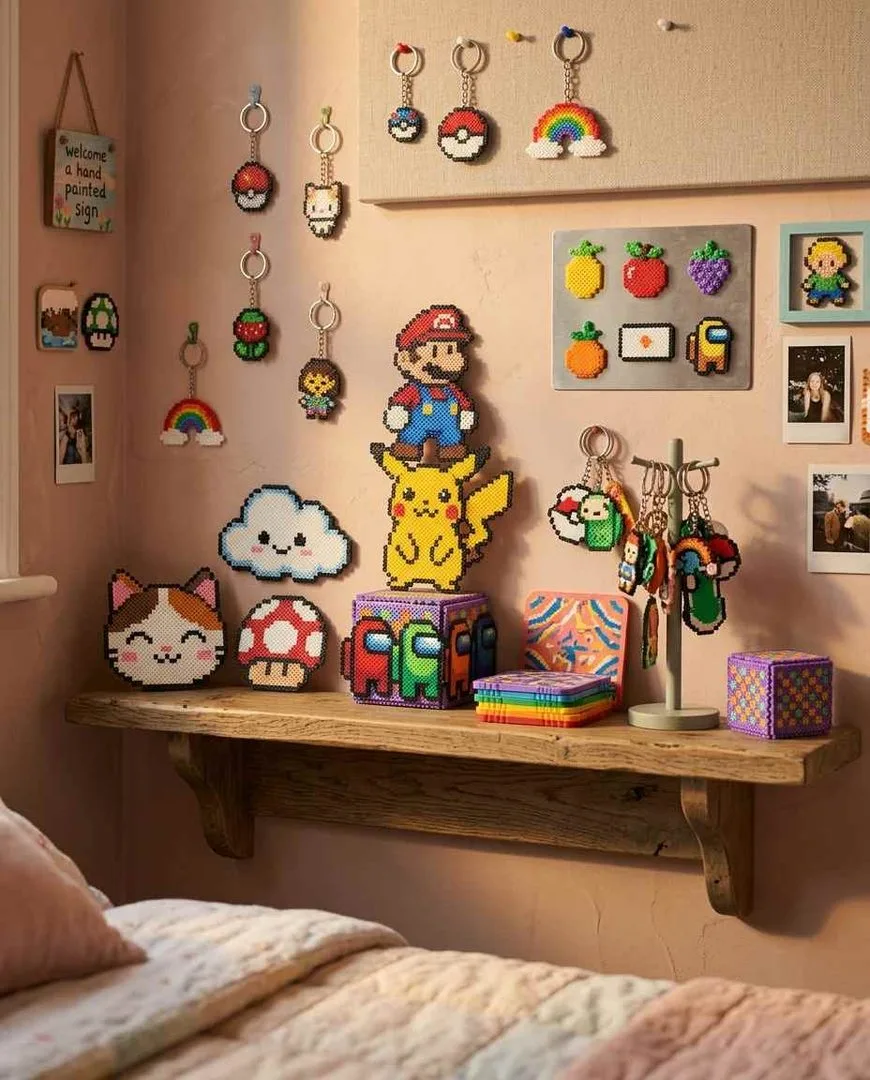
The heart takes 10 minutes. The mushroom takes 15. Pikachu takes 30. Any of them is your starting point, and by the time you iron your first design and feel the beads fuse into a single solid piece, you will understand why this craft has held its popularity for 50 years. It is fast, it is satisfying, and every finished piece is something you can hold, use, or give to someone who will keep it on their fridge for years.
For more hands-on crafts, bead bracelet ideas has 50 bracelet designs, air dry clay ideas has 50 no-kiln projects, paper squishy ideas has 50 cute designs, things to bedazzle has 50 rhinestone projects, and things to do when bored is the master list for when the beads are sorted and you need the next thing.